How to ganache a cake with sharp edges - The TORTA method
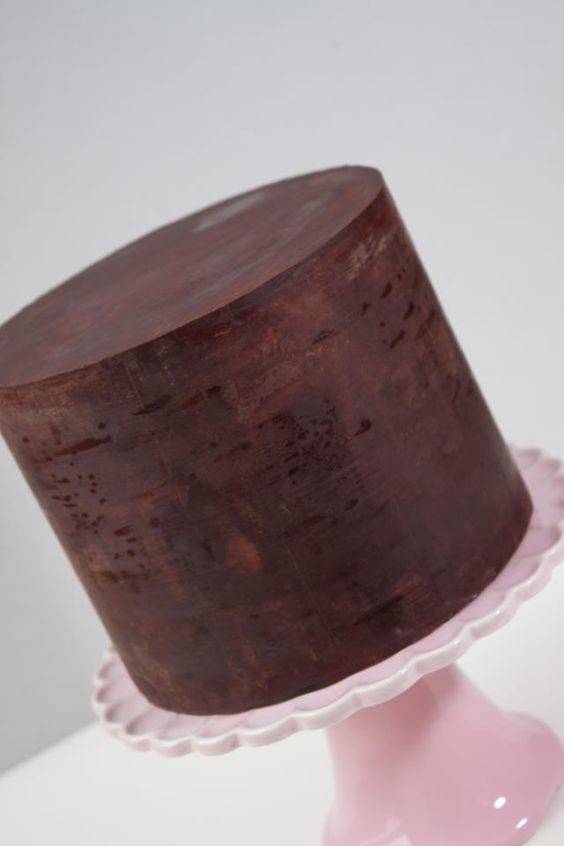
This tutorial is the technique that I came up with that made it easier for me to make sure that I got straight even sides and a completely flat top every time I ganached a cake. The technique I came up with is kind of a mix of the upside down method that everyone knows about and the technique used by Faye Cahill where she uses two boards (one on top and one on bottom) to help ganache her cakes. My technique as I say is a mix of both and hopefully you find it helpful. There are many ways to ganache a cake, this is just my method.
Now as a preface I want to mention that depending on where you live your cake boards will differ. Here in the UK the silver boards are not the size they say they are. A 6” double thick cake card is smaller than 6” which makes it a nightmare for ganaching because it means you need to trim your cakes, which I hate doing. Because of this I have started cutting my own acrylic Perspex circles that are exactly a half inch larger than whatever cake size I am working with i.e. a 6” has a 6.5” circle underneath it. This allows for a good quarter inch of ganache all the way round the cake. You do not need to do this, if you are happy trimming your cakes then keep doing so, or if you are lucky enough to have a supplier who makes accurately sized cake boards then just use them. The rule of thumb is that you want a quarter inch gap between your cake and the edge of your board, so do whatever you need to, to get that gap.
What you will need:
- 2 x identically sized cake boards
- A crank handled palette knife
- Chocolate ganache
- Cake layers
- Buttercream (I use SMBC)
- A large round cake drum (bigger than your cake boards – preferably a good 6” bigger)
- A large turntable or a lazy susan
- A bench scraper
- A spirit Level
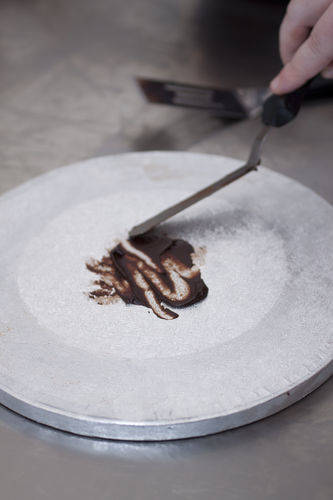
Take your cake drum and smear a little bit of ganache in the centre and place one of your cake boards on top of it making sure to keep the cake board in the centre of the drum. Push down on the cake board to make a good adhesion and allow the ganache to set so that the cake board won’t slide around on you.
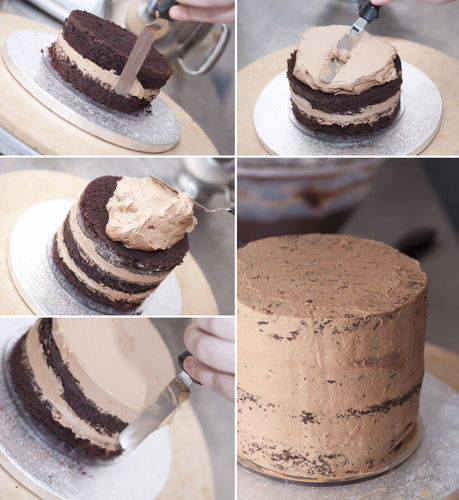
Once your board is sufficiently stuck to the cake drum, smear some ganache on top of the cake board (just a little) and place your first layer of cake on top and make sure it is centred on the cake board.
Next apply some buttercream and smooth it out using your palette knife and your turntable to get it completely smooth. The more level you can make each and every layer (cake and buttercream) the easier it is going to be to get a flat top. Once you have completely filled your cake and you have your top layer of cake on, apply a crumb coat of buttercream all over the cake. Put the cake in the fridge for the buttercream to firm up before you move on to the next stage.
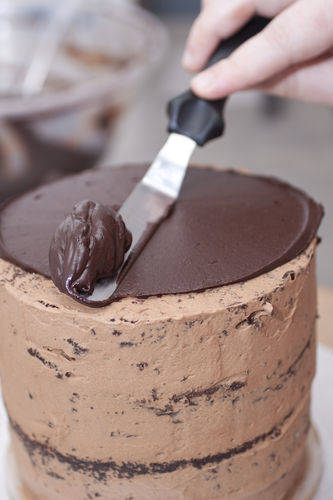
Take your cake out of the fridge and apply a layer of ganache on top – not too thick and not too thin, but make sure that you leave an overhang of ganache over each edge.
Take your other cake board and sprinkle one side liberally with water. Place the cake board on top of your cake (water side touching the ganache) and push down gently to adhere to the ganache.
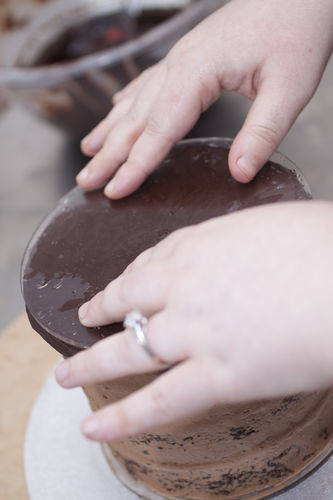
Using a bench scraper butt the scraper up against the cake boards (using the bottom board as your guide) and make sure the top and the bottom board are perfectly aligned all around the cake. You will have to do this at several points round the cake to make sure it is completely aligned.
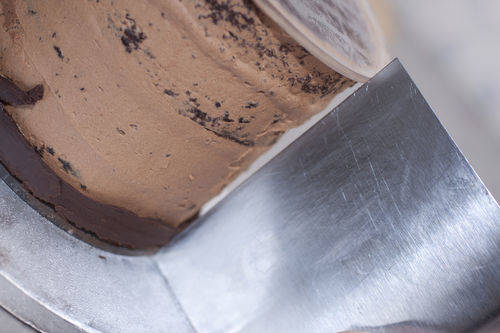
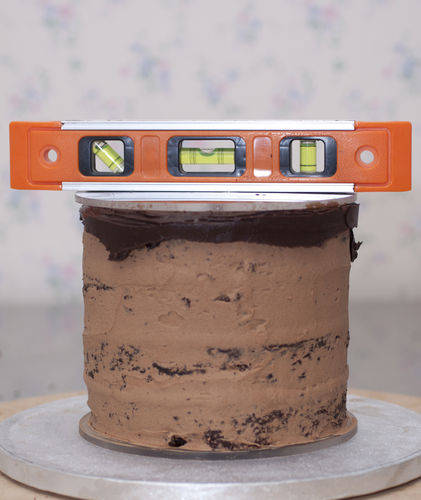
Once the boards are aligned take your spirit level and check to see if your cake is level – if it is not apply pressure to the top of the cake to make it level – don’t push too hard, but apply enough pressure to get a level cake.
Once your cake is level, remove the cake (including both boards) from the cake drum that it was adhered to with ganache and flip the cake over so that the top of the cake is now at the bottom. Apply some fresh ganache to the centre of the cake drum and place the cake (upside down) onto the centre of the cake drum. Scrape the ganache off the top of the cake board that used to be glued to the cake drum and then take the time to make sure the two cake boards are still aligned and level (in case there was any movement when you flipped it upside down.
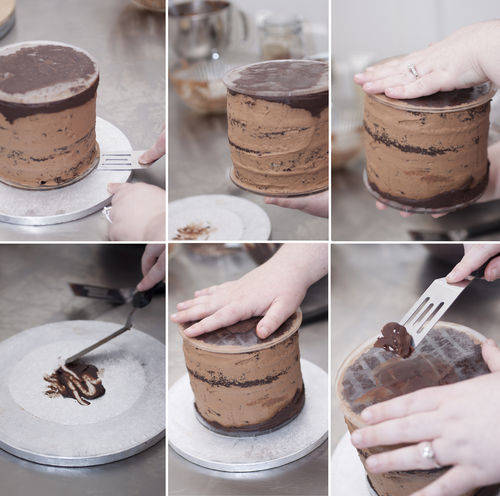
Use your palette knife to apply ganache to the sides of the cake in whatever way you feel most comfortable. I tend to apply a layer round the top of the cake to secure it to the cake board and then around the base of the cake and then the middle.
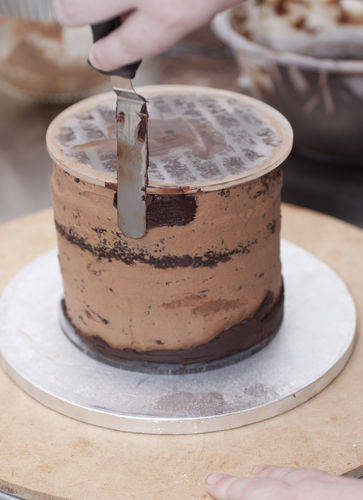
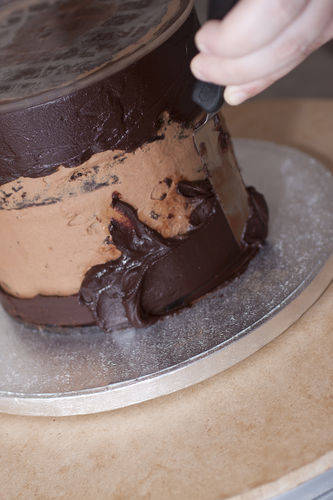
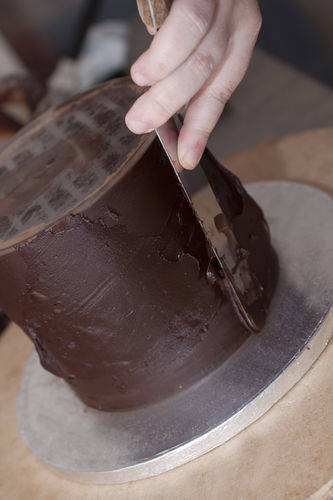
What you need to do constantly, is use your bench scraper to regularly scrape around the cake so that any ganache that is too thick can be removed whilst it’s still soft – if you wait too long you run the risk of the ganache being too firm to easily scrape away and you will then have to cut the ganache away – it’s best just to regularly do a routine scrape down to get rid of any excess while it’s soft. The bonus is that because your cake boards are completely aligned at the top and bottom you can just butt your bench scraper up against both of them and you don’t need to worry that your bench scraper is straight as the two boards do the work for you.
Once you have applied your ganache and you are happy with how smooth it is leave the cake long enough for the ganache to set. Once its set remove the cake from the cake drum and flip it back up the right way and put it in the fridge.
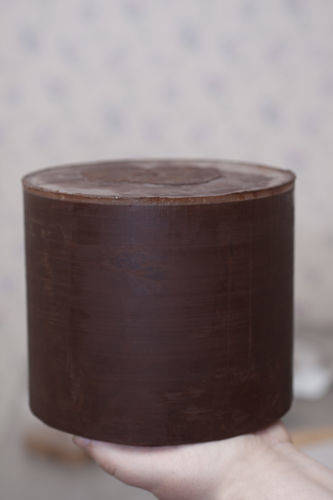
How long you leave your cake in the fridge will come down to the size of your cake and how cold your fridge is. You need to leave it in for as long as it takes for the ganache at the centre of your top cake board to be completely and utterly firm. If you take it out too early and try to remove the top board you run the risk of the top board ripping off the ganache on top. I sometimes have to leave mines in the fridge for a good 2 hours, other times not so long.
As soon as you are sure that your ganache is completely firm all over the cake, take your cake out of the fridge and slide either a palette knife or something fairly slim underneath the top board (be careful, you don’t want to damage your ganache) and pop the top board off.
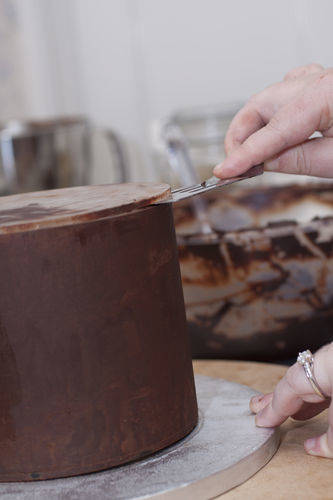
Because you applied water to the board before applying it to the top of the cake, the ganache will have seized on the top making the top board just pop right off. If you find it’s not coming off easily, put it back in the fridge until it does.
I usually find that when I take the top board off there are little gaps where there were air pockets, so take very small amounts of ganache, just enough to fill in any gaps. The less ganache you use the less likely it is you will mess up your perfectly level top. You might end up with some overhang where you’ve taken some ganache round the top edge and if so, just use your bench scraper to remove this.
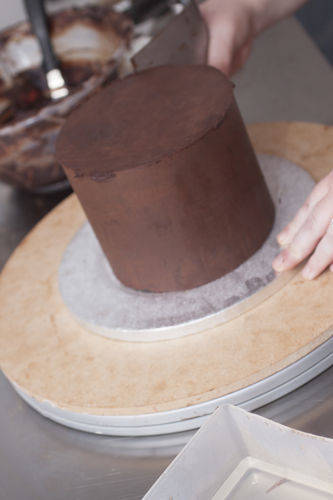
Now dip your bench scraper in boiling water and use it to lightly skim the sides and top of the cake – you are not looking to really remove anything but to simply smooth down any fine lines and it also helps to seal the ganache.
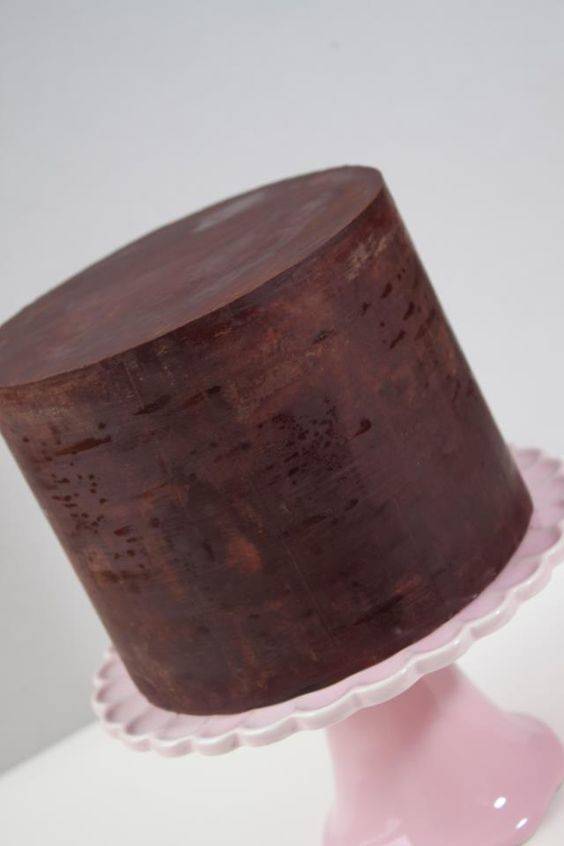
You should now have a perfectly ganached cake with straight sides, a level flat top and a sharp edge to die for!! You should now leave the ganached cake at room temperature over night before covering with fondant.
Et voila!!
https://www.facebook.com/tortacouture | Perth, Scotland
29 Comments
fantastic, thank you so much for sharing. :0)
Love this tutorial! Thank you for sharing!
Kim, Sydney, Australia. - SSCreations -
I recently started using ganache, and although not yet perfected, I quite like working with it. I use a technique I learned from a youtube video by InspiredByMichelle. I will definitely give this a try. Thanks for sharing!
Jacqueline: http://www.isugarcoatit.com | http://www.facebook.com/ISugarCoatIt
You did a fabulous job on this tutorial Jo, love it!
Thanks guys :)
https://www.facebook.com/tortacouture | Perth, Scotland
@isugarcoatit Michelle’s method is great too!! I love her videos :)
https://www.facebook.com/tortacouture | Perth, Scotland
I have watched your gorgeous cakes and tried to follow your written fb instructions, but haven’t managed anything that looked good. Your tutorial above is so clear and the pictures are really helpful. I am in the middle of a wedding cake for weekend. as soon as I have finished I will have a go using your new instructions. I can’t wait :)
Cheers Jo and thank you so much for sharing your info.
best wishes
Vicki
Hey Chiefwhisk – I’m so glad it’s of use. Ganache is definitely a learning curve but it’s so worth it – it gives you such a nice base to work on – granted it’s not without it’s issues, but the more you use and the more you troubleshoot it the easier it becomes. Honestly, once you master it, you’ll be hooked!
https://www.facebook.com/tortacouture | Perth, Scotland
Thank you so much for sharing your tutorial! Your ganaching is superb!
Thanks Tatiana :)
https://www.facebook.com/tortacouture | Perth, Scotland
