
Witch fingers and eyeball tutorial, free Halloween treat
HAPPY HALLOWEEN EVERYONE!
![]()
I have been asked for a tutorial about how to create the fingers and eyeballs from my Hansel and Gretel Halloween cake. It’s a very easy and quick tutorial and I hope some of you find it useful.
If you decided to follow the tutorial I would love to see your creations.
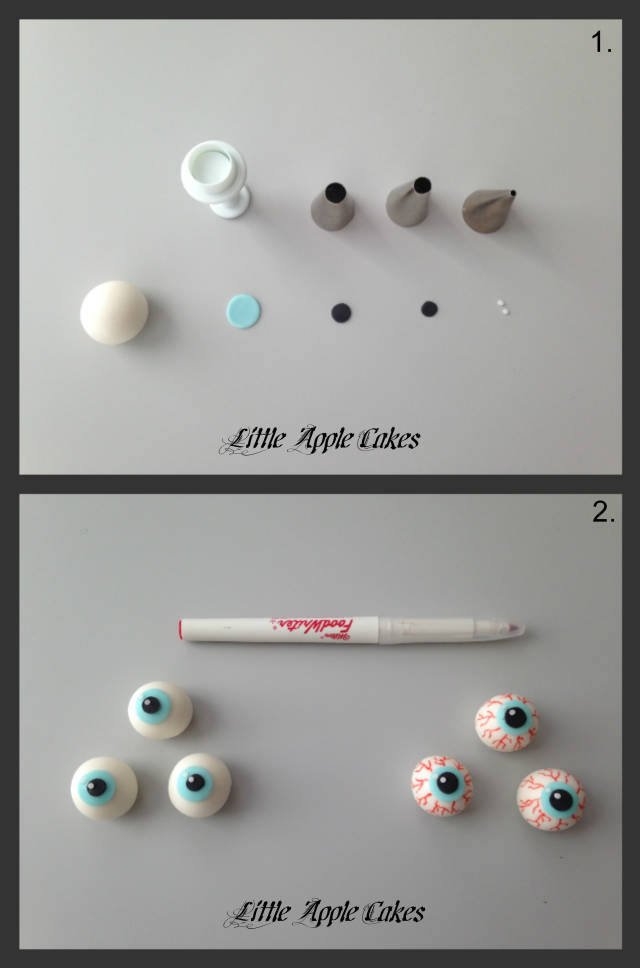
MAKING EYEBALLS
Picture 1: Start by rolling a small piece of white fondant (add some Tylose to it or just a pinch of gumpaste) into a ball and leave to dry for 15 minutes.
Punch out a circle (1cm in diameter) in any color you would like (I used Sky Blue) to make an iris.
Using a pastry tip make a black circle, I used Wilton’s size 12 and size 10 to make two different sizes of pupil.
Using a pastry tip size 3 make two little white circles to be used as a glare.
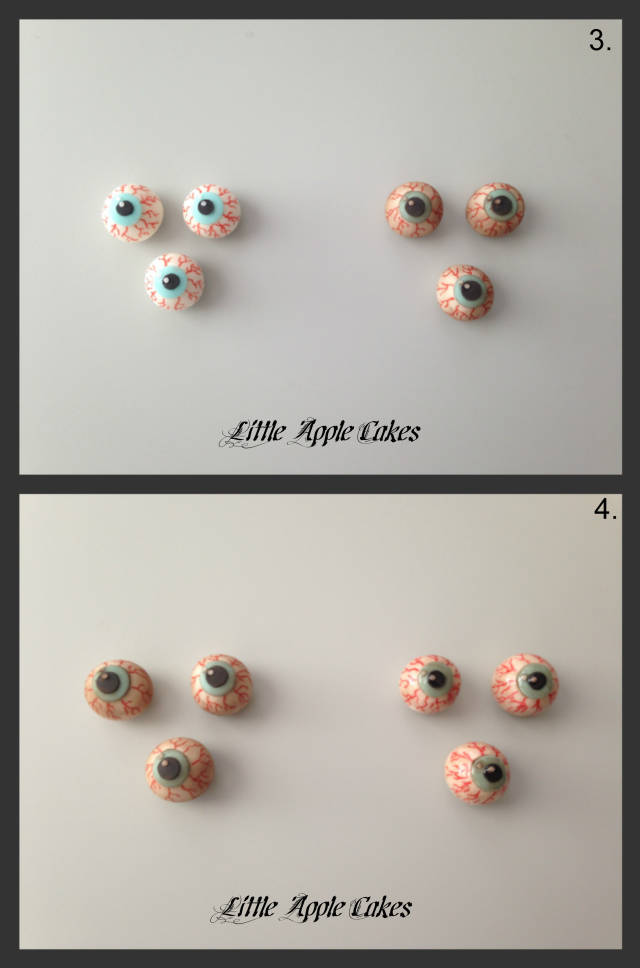
Picture 2:
Put the eyeball together with edible glue and use a red food marker to draw capillaries around the iris.
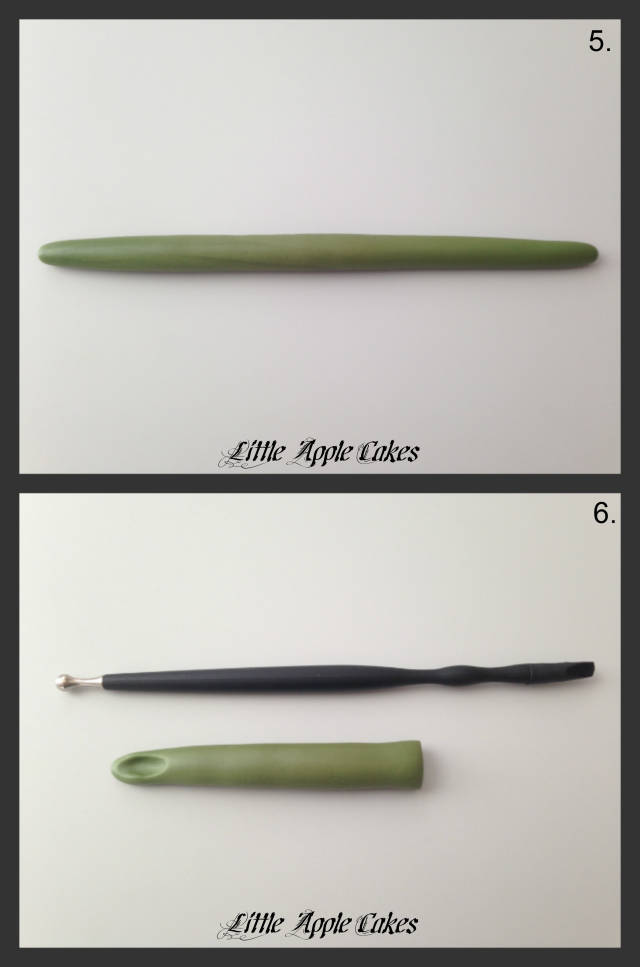
Picture 3:
With dark cocoa powder and a paint brush, brush the eyeballs to make them look dirty. If you would like you can always use edible dusts, cocoa is just a cheaper alternative.
Picture 4:
With a mix of lemon extract and corn syrup brush the eyeballs and leave them to dry.
MAKING WITCH FINGERS
Photo 5:
Start by rolling a long sausage and thin it out on both ends. One sausage makes two fingers.
Cut it in half and save the second part underneath a piece of plastic foil to prevent drying.
Photo 6:
Using a small ball tool make an indention on the top of the finger where the nail will go.
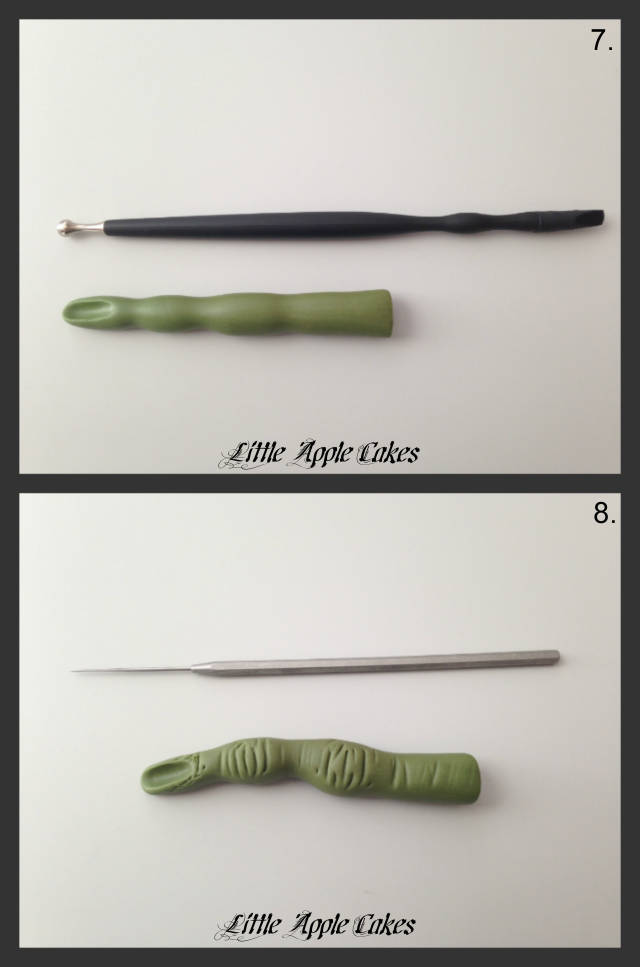
Photo 7:
Using the sides of your fingers or the handle of the ball too roll the fondant to make two knuckles.
Photo 8:
Use the scriber tool or a veining tool to create lines around the cuticles and on the knuckles.
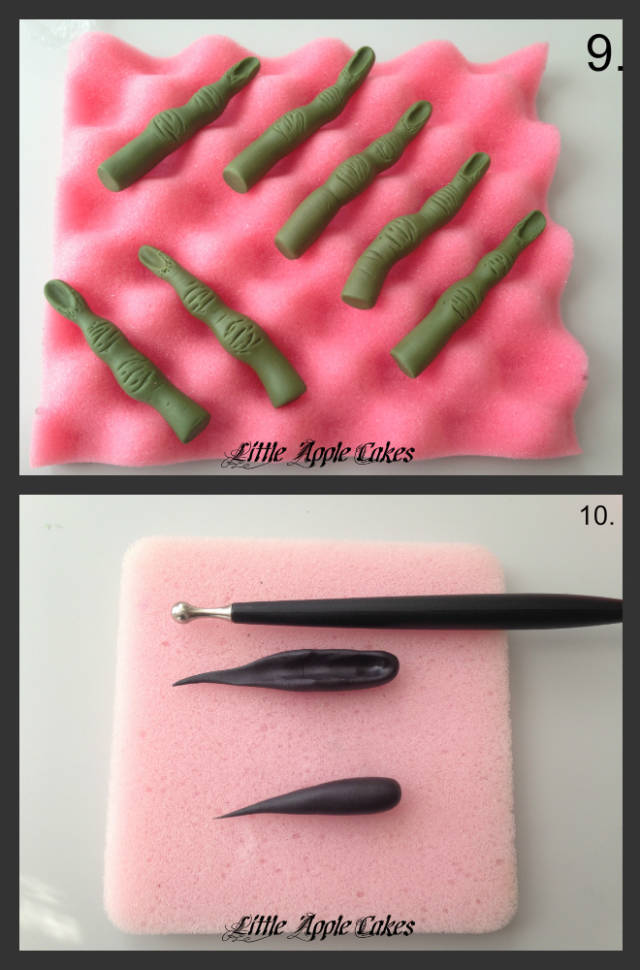
Photo 9:
Bend the fingers in different directions, leave on a piece of bumpy foam and start on making the nails right away.
Photo 10:
Roll a blueberry size piece of black fondant into a cone (with a very sharp top) and using a ball tool make a crevice from the top to the bottom of the nail.
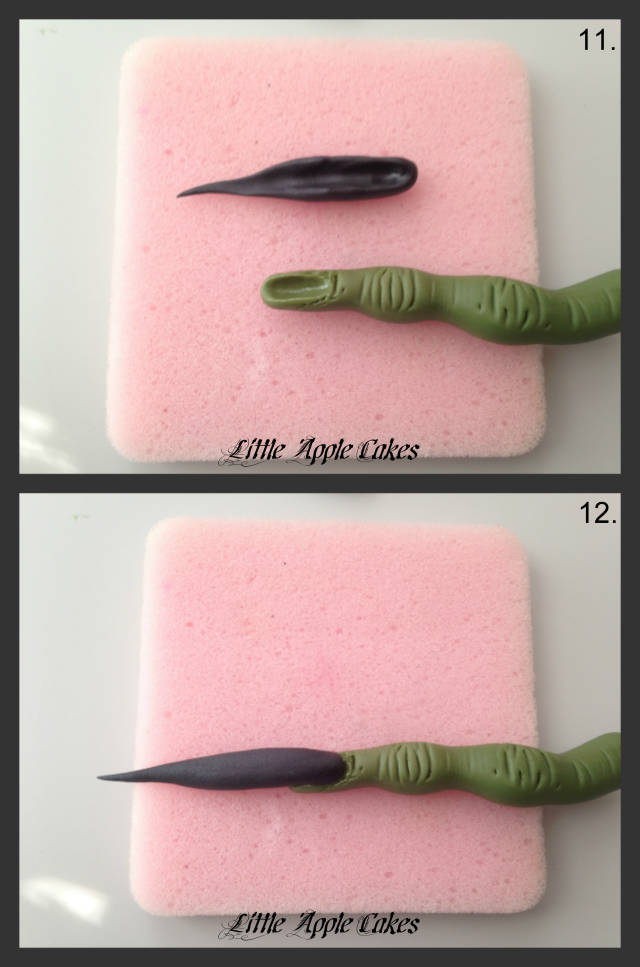
Photo 11:
Using edible glue attach the nail to the finger.
Photo 12:
Turn the finger around and elongate the nail by pinching and pulling to make it fit better.
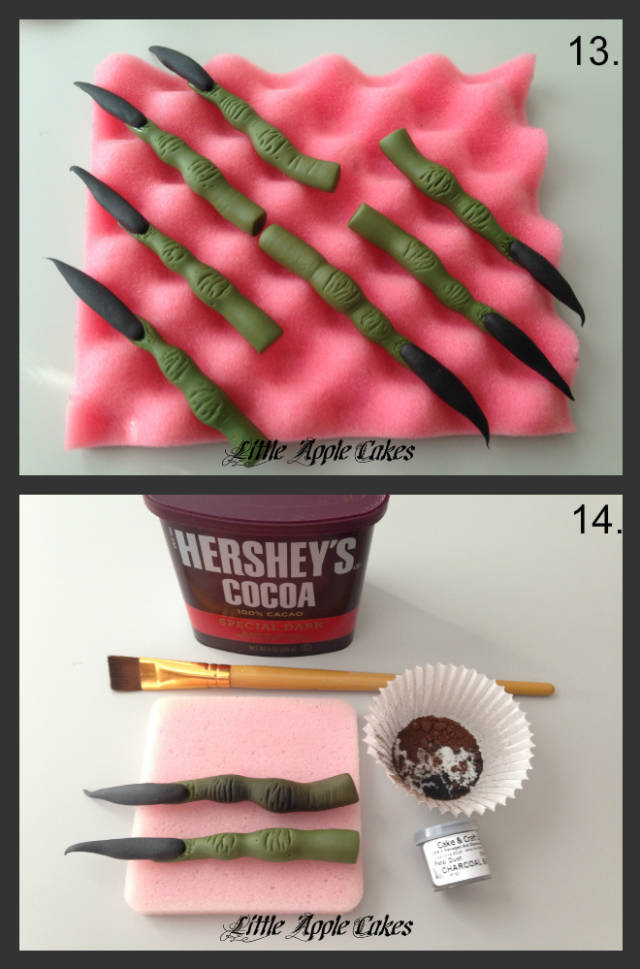
Photo 13:
Leave to dry overnight.
Photo 14:
Dust the fingers (without dusting the nails) with a mix of cacao and black petal dust, use black on the knuckles for a better effect.
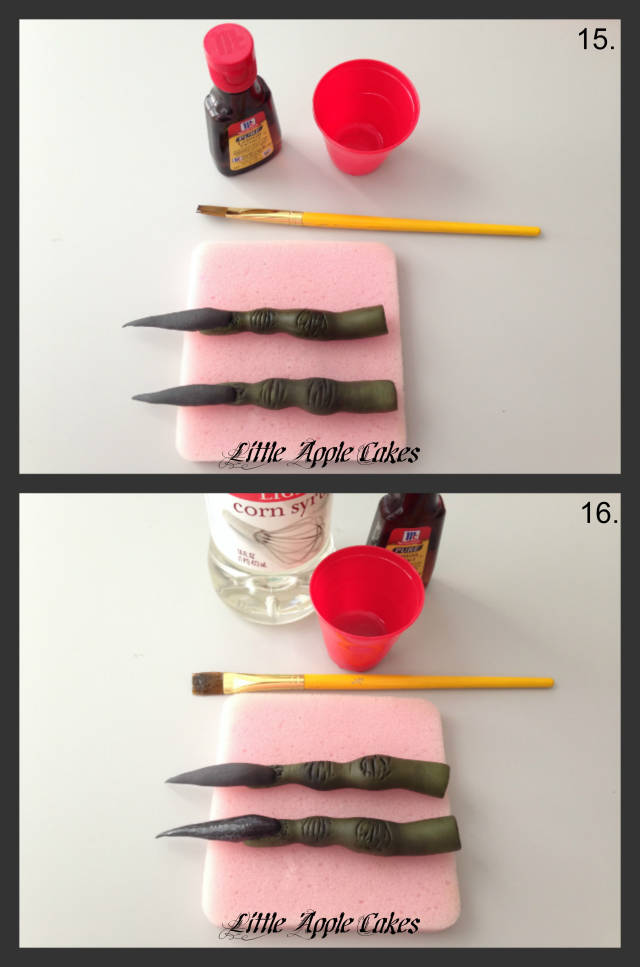
Photo 15:
After dusting, paint the fingers (without painting the nails) with lemon extract to seal the color and let the dust go deeper into the crevices.
Photo 16:
Mix lemon extract and corn syrup and paint the nails with the mixture. If you don’t get a flawless and shiny finish usually it means your mixture separated, mix again and paint the nail again. If it still looks dry in some spots you can add more corn syrup and less lemon extract.
Leave to dry on a piece of bumpy foam with nails sticking out. That will give you a perfect finish when dry.
If you need to attach fingers to a cake you can insert a toothpick into them, also you can make just a half of a finger, to make it look like the other half is hidden in the cake.

HOW TO MAKE SOIL AND BLOOD:
Crush couple of Oreo cookies to make dark soil, if you need light soil use chocolate cookies.
Make blood with a mix of red and brown gel paste colors and corn syrup. If you put your cake in the fridge, when you take it out the syrup will look like it has a crust but after just couple of minutes that will disappear
Thank you for watching, you can find my tutorial on my Facebook page too at: http://www.facebook.com/LittleAppleCakes
Also a big thank you to my friend Donna who sent me all the photo props used in the first photo, please visit her at: http://www.facebook.com/pages/Yummy-O-Cake-Company/305643862781563 for more of her wonderful creations and beautiful photos.
Selma S. ~ Little Apple Cakes
41 Comments

Thank u Selma xx

Great tutorial x thanks :-)
Lisa Salerno Bespoke Cakes
this is fantastic, thank you Selma!! xx
'It Always Seems Impossible Until It is Done' Nelson Mandela http://www.facebook.com/CakesByFifi

Thanks Selma fab tutorial xx
Sweet-E
This is amazing, and so realistic!! Thank you dear Selma <3
Learn from the past! Get yourself a blank canvas and paint your own life. Be your own artist! Mila, http://www.facebook.com/PureCakesbyMila http://www.tsu.co/PureCakesbyMila

Brilliant tutorial, thank you Selma x
Lyn (Nanna Lyn Cakes) xx
Super cool tutorial!
SweetKOKEKO

great tutorial
Anka
grazie! è bellissmo!!!!
This so much lovely lady… Happy Halloween!!!!
You must never limit your challenges, instead you must challenge your limits