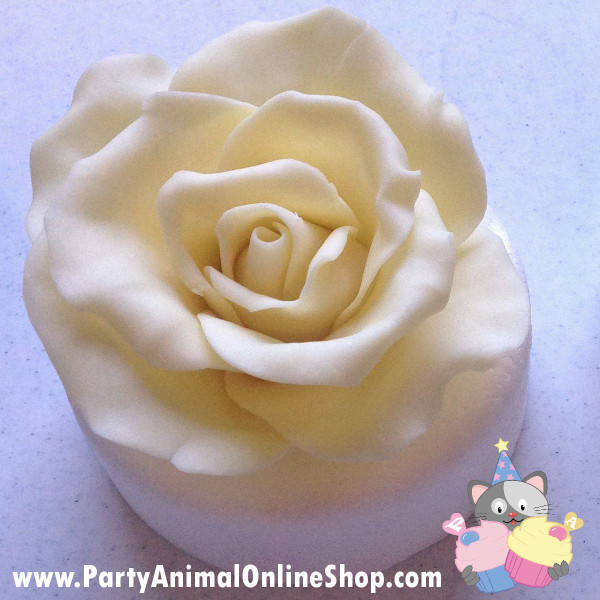
Making a Rose with White Chocolate Modelling Paste
Making a Rose with Modelling Chocolate Tutorial
I loved how fun and different these were to make. I found chocolate to be much more slap-dash than what sugarcraft is. When you use flower paste to model your flowers you use very precise methods, spend a lot of time perfecting and it requires a lot of love, attention and time. Where as chocolate modelling is all about working fast, getting involved with your hands a lot more and learning to love the imperfections, the imperfections are what make your roses look real, down to the stamp your fingerprint makes on the rose petal like a natural veining tool.
So you think you want to try it? If you have hot hands like me you are going to have to work faster than most and cool your hands down if needed by running them in cold water for 5 minutes and drying them thoroughly when you feel like they are overheating, this will stop you overworking the chocolate and turning it in to a sticky mess.
I used Squires high quality white chocolate modelling paste, it’s also available in milk chocolate and dark chocolate but as I wanted to test colouring it too I used white chocolate. You can make your own modelling chocolate with a combination of chocolate and corn syrup but this way is so much easier although it can work out pricey if you need to do a lot of modelling but it taste so daaaamn goood!
Making a Rose with Modelling Chocolate Tutorial
So let’s get to it, this is what you are going to need:
- Squires Modelling Chocolate
- FMM Petal Cutters
Extra’s – Recommended
- Non Stick Board
- Flower Formers
As you can see you need very little which makes modelling chocolate a very desirable medium to play around with, especially if you are only just stepping in to the realms of flowers and you don’t want to spend a fortune on cutters.
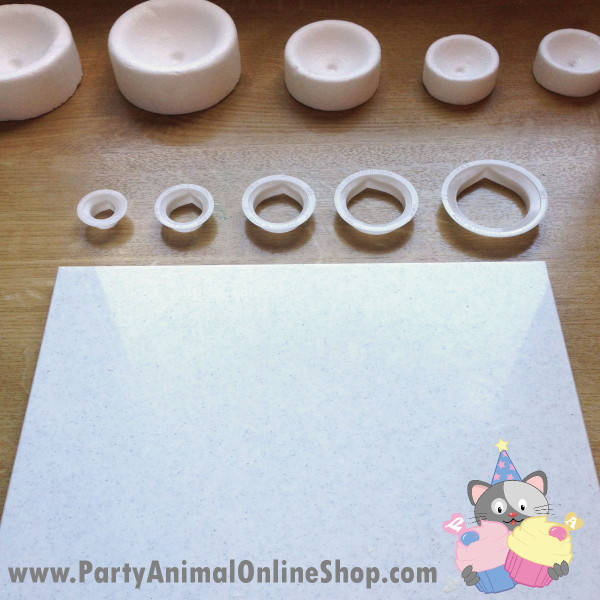
Step 1
Prepare: Always prepare the equipment you will need, lay your cutters out and knead your chocolate paste to loosen it up ready. Get your flower formers at the ready and then your not panicking when you have this beautiful flower with no where to put it.
Step 2
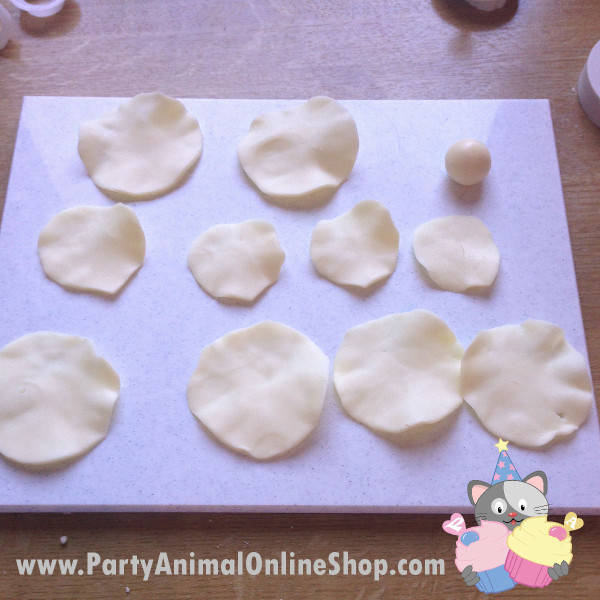
Cut the Petals: Once you have quickly kneading the paste just to loosen it up you can roll it out, I would aim for about 1mm in thickness. Although there’s 10 petals on this photo I actually ended up using 11 and adding another one at the end, I just felt it needed it, you can always add to your flower to make it fuller. I made 5 of the largest size 45mm then 2 of the next 35mm, 1 of the following 30mm and 3 of the smallest 15mm.
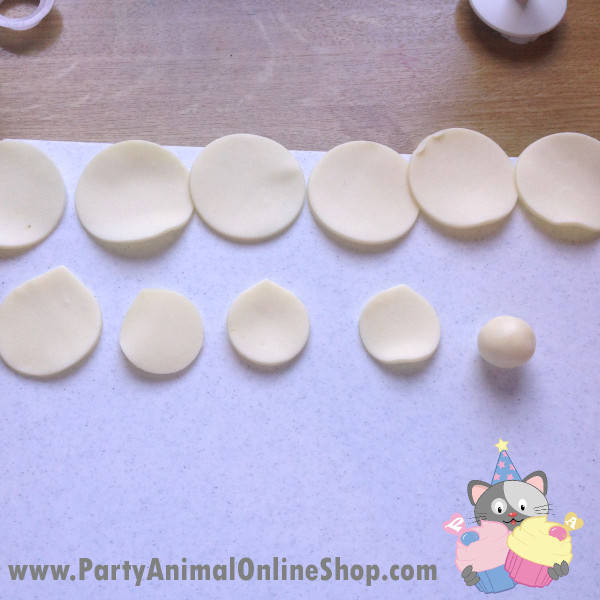
Step 3
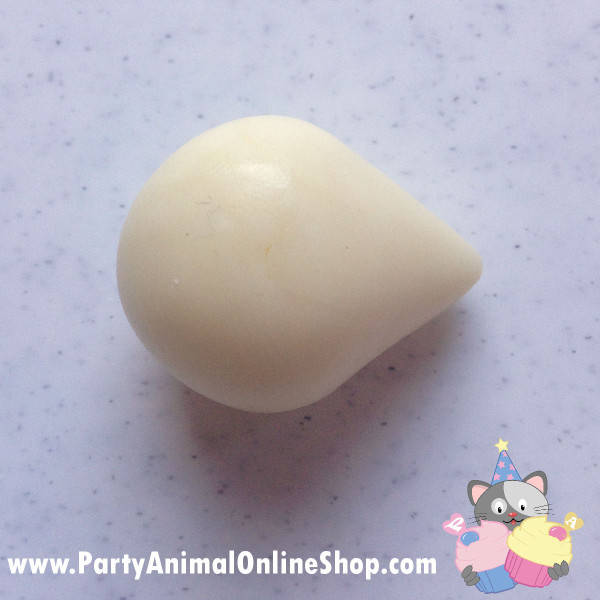
Making the Centre: Once you’ve cut all the petals roll the left over in to a ball and then cone the end to give you the centre of your flower, it should look like the picture above…
Step 4
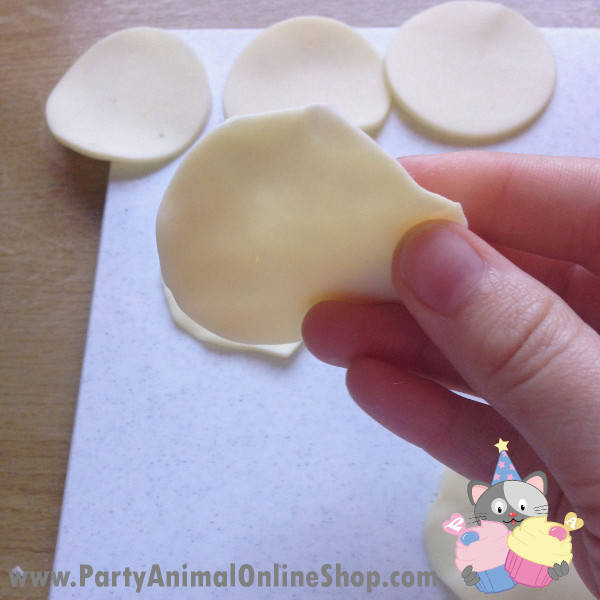
Shaping your Petals: In this step we are going to prepare all the petals and making them look more realistic by shaping them. The key here is to work with the rounded edge of the petal shape, leave the half with the point untouched, this will stretch out the outside creating a thin realistic petal. To do this you need to nip the petal in between your thumb and your forefinger repeatedly. Remember here is the point where you want to work fast and you may also need to cool your hands down. We are not looking for a perfect finish, the main aim of the game is to stretch and then the edges of the petal ready for putting it together.
I love that you can leave the petals to one side for 5 minutes without them drying out to much or worry of them cracking, chocolate modelling paste is considerably more pliable than many pastes and you don’t need edible glue to bond them all together!
Step 5
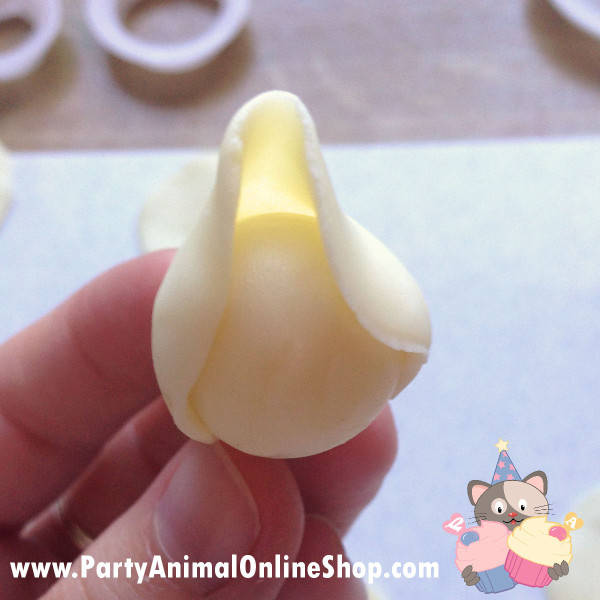
Starting to build your rose: Everythings ready and you are now feeling organised and hopefully reasonably happy with your petals. We are going to start the initial building of the rose. I would say the beginnings the most important, your eye is drawn to the centre so you want this part to look the best. Hold the centre cone so the tip is facing upwards and the round edge is facing down. Start by wrapping your first petal around the centre, remember it’s tip face down and the thin part of the petal should be the part sticking up. Curl the petal around your cone centre.. it should look a little like this.
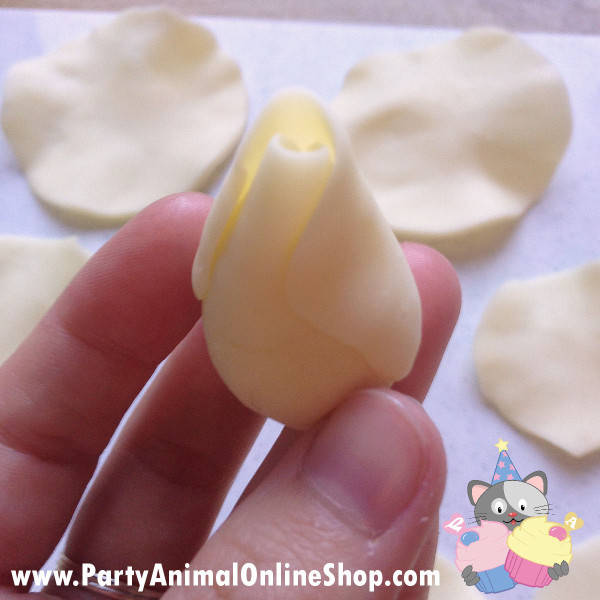
Continue to do the same with the other 2 small petals and we are off to a good start. If you just wanted a bud in your chocolate bouquet you could finish here but this time we are going to carry on!
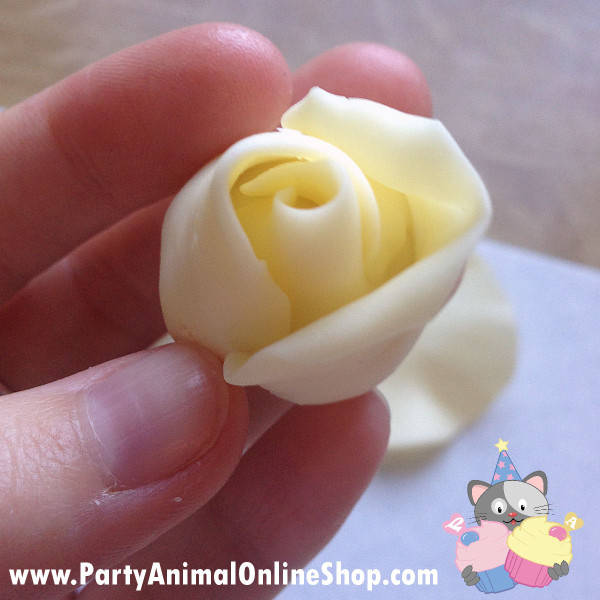
Here’s the side on view of where you are up to, don’t worry that you haven’t covered the bottom of your rose fully, this will be covered by the end. It’s starting to come together.
Step 6
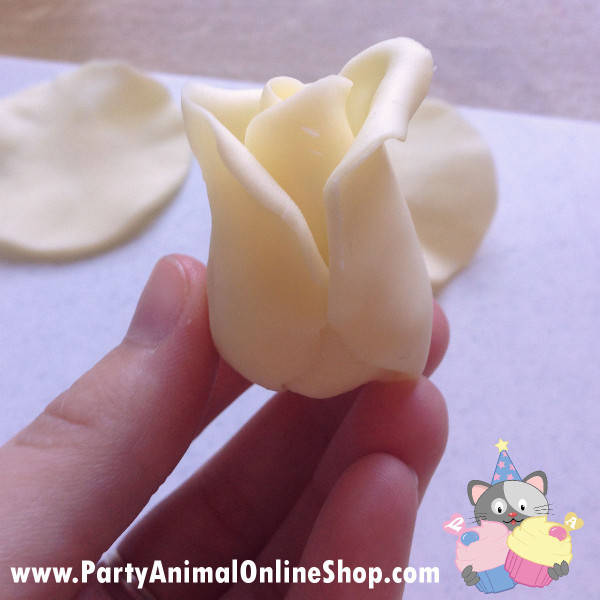
Building it up: From here on out we are just building it up and thickening it out, modelling paste doesn’t require glue as the heat of your hand will encourage the paste to stick easily. For the layers from here on out you want to be making them come out further from the rose, the first layers require you to work closely to the centre where as now only the very bottom of your petal should be touching the rest of the rose. To create a lovely realistic effect I found curling the very tip of the petal over slightly added a lovely touch.
It can always be handy to have a picture of what you are attempting to model near by, this way you can refer to it for it’s certain characteristics like a subtle curl of a petal that will make your flower look that much more life like.
Work from small to large in your petals: Small = inside centre petals and Large = outside pulled away petals.
Top Tips:
- Try not to overwork your modelling chocolate, learn to love the imperfections.
- Use your thumb and finger to thin the petals this will give them a very natural finish.
- Cool your hands down with cold water for 5 minutes if you feel your hands are getting a bit hot.
- If you over work the chocolate due to heat, stop, put it in the fridge for 2 mins while you cool down your hands under the tap and then try again!

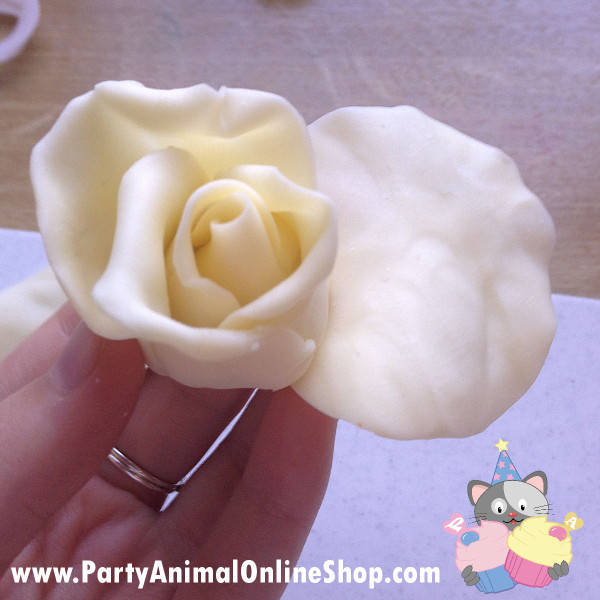
Step 7
Finishing it off: You can continue with as many petals you like until your rose has reached the perfect size you want. Once done pop it in your formers and if you want it to firm up fast you can stick it in the fridge for 10 minutes.

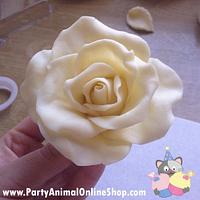
Modelling chocolate firms up but isn’t rigid like sugar flowers making it much more appetising for your cake topper that you can actually eat! I really enjoyed sing the Squires Modelling Chocolate but the question is what do we move on to next?..

I’ll be writing up a blog over the next few week on colouring your chocolate modelling pastes and dusting techniques so be sure to check them out.
Here’s some other Blogs you might like:
Sugar Rose Tutorial
Fondant Lip Topper Tutorial
Kneading Sugarpaste Techniques
Steph from PartyAnimalOnline www.partyanimalonlineshop.com
7 Comments

fab tutorial, i have been wanting to try chocolate roses!
https://www.facebook.com/home.php#!/pages/Time-for-Tiffin/245051878902972

Thanks for sharing Steph! I love using modelling chocolate, but I prefer to make my own. Never tried a flower though, might give it a go! ;-)
sugar and art - perfect combination! sugarmagic22@gmail.com

Thank you so much for this lovely tutorial!!
Toni, Pennsylvania, https://www.facebook.com/WhiteCraftyCakes

Thanks, Steph… ♥
Julez, https://www.facebook.com/pages/Allways-Cakes/450634018350115?ref=hl

That flower is beautiful! I work with modeling chocolate all the time – I need to try this!
Jenniffer White, Cup a Dee Cakes - http://cupadeecakes.blogspot.com

Great tutorial thank you
https://www.facebook.com/pages/For-the-Love-of-Cake/539125856108107
Thanks everyone, I’ll post more tutorials up really soon :) Really glad you like this one x
Steph from PartyAnimalOnline www.partyanimalonlineshop.com