Step #1 Cover cake with fondant with your choice of color
Step #2 Trim edges and smooth fondant onto cake
Step #3 Draw/Transfer image on cake using scriber needle and pencil (this will be...
We are not sure if anyone will need this tutorial, but we know we would have loved to have had one. After several disasterous cannoli filling attempts, we finally figured out the perfect blend....
In March I made my youngest daughter Jasmine, a very special little guy to sit on both her ‘at home’ family cake and then her special ‘party’ cake later in the week.
Elmo rules her world, or...
This is our first attempt at an iconic character. We were pretty happy with the results!We couldn’t find any help on line, so this is how we made our goofy. We hope it can help!
First...
Just a quick note (hopefully) with a few hints on how to create a seamless join when you want to have more than one colour of fondant covering your cake, with no overlaps.
1. Start by...
Ok, so this two-toned technique has many applications, but I used it to create a landscape on the side of my cub scout cake. It worked so well, I can’t wait to find a good reason to use it again!...
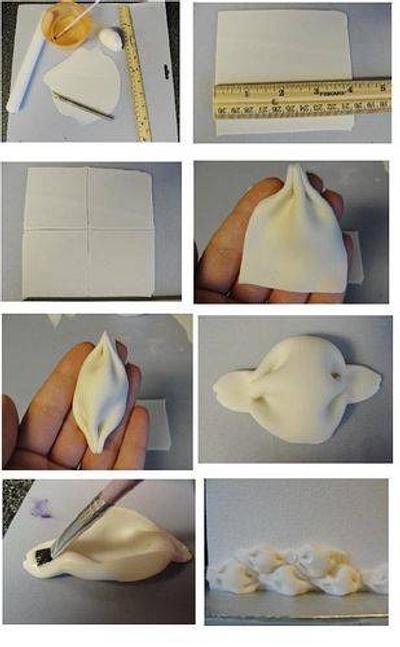
The first time I saw a cake with fondant billowing I wanted to try it on a cake one day!
What you will need.
Fondant, a ruler, exacto knife, rolling pin, water and a brush
Roll...