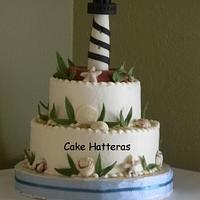
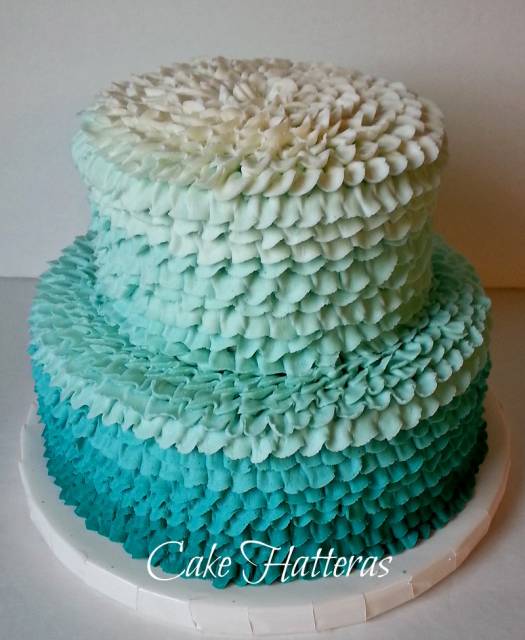
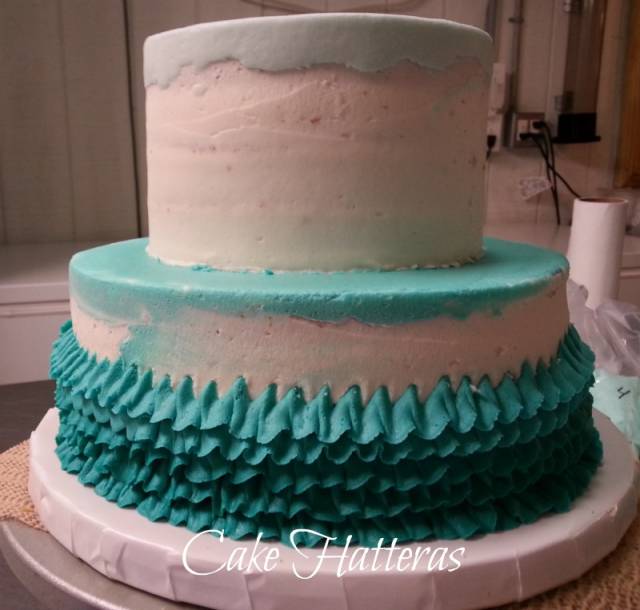
Buttercream Ombre Ruffles Tutorial
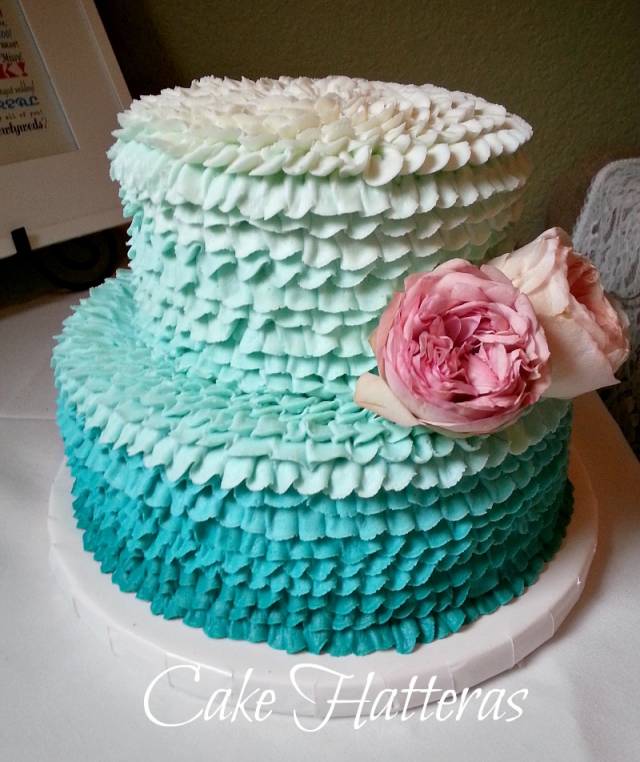
I like taking things that are done in fondant, and creating the look and feel in buttercream. This weekend, I worked on this cake and I thought I’d share the process of how I did the buttercream ombre ruffles. The cake shown is has a 9" base and 6" top.
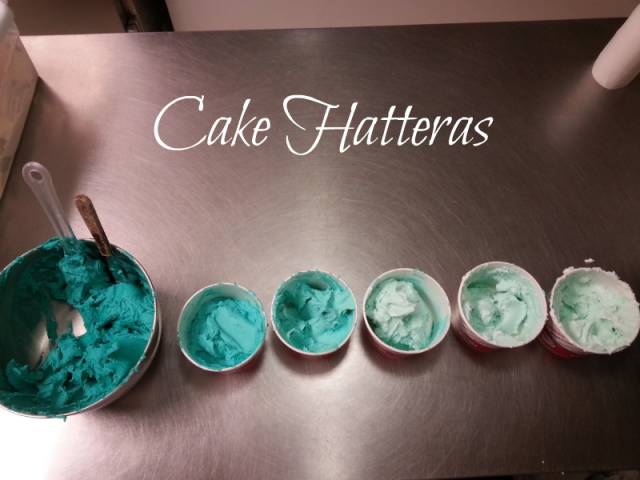
First I set up 6 containers to mix the icing. You can’t see it, but I numbered the containers to keep the colors straight.
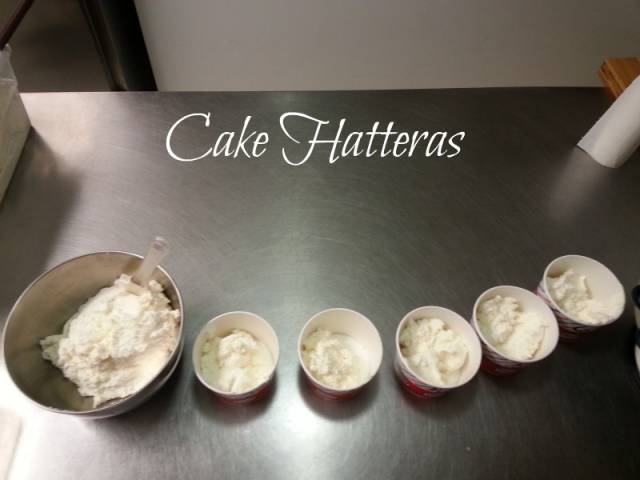
Starting with the largest container, I mixed about 4 cups of the darkest tint. (You’re going to use this to tint the other colors) put about 2 cups of icing into each small cup and mixed small amounts of the darkest color into the buttercream icing until desired hue is met. Remember: You cal always add color, you can’t take it out! I struggled with the lightest color and had to add some white food gel to get the lightest color. The light teal wanted to take on a lime green hue. In the end, I topped of the cake with white buttercream. ***If I had to do it again, I’d mix more icing, just to be sure I had enough.
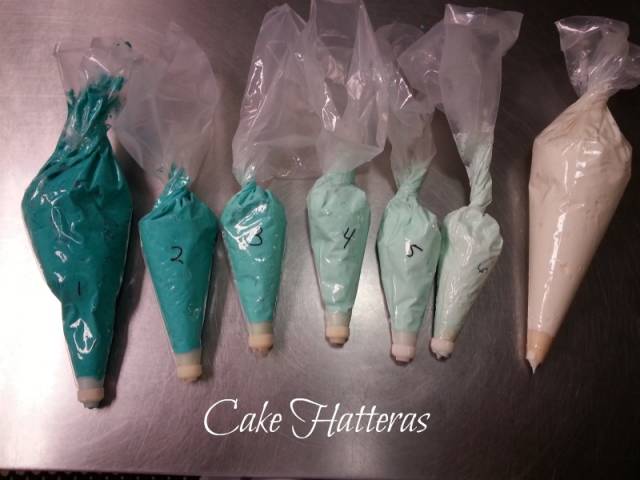
With a permanent marker, label pastry bags and fit with a coupler.
Have your cakes dirty iced. I originally thought I would have flat tops on my layers so I dirty iced only the tops in a base coat. If I had to do it over again, I would dirty ice the whole layer in a base coat of the lightest color.
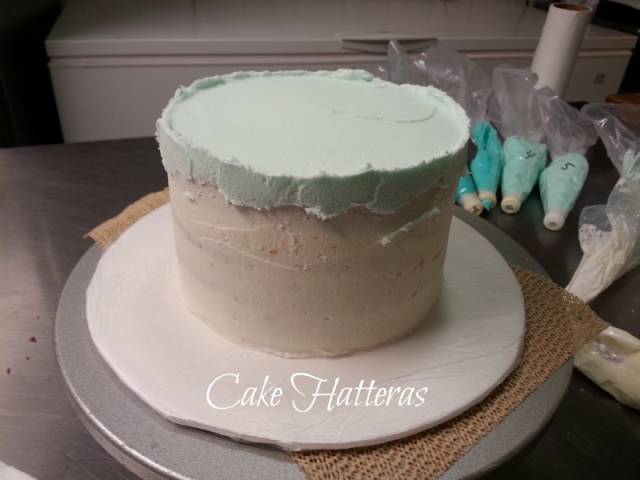
If you are making a tiered cake, stack it before you begin the buttercream ruffle process.
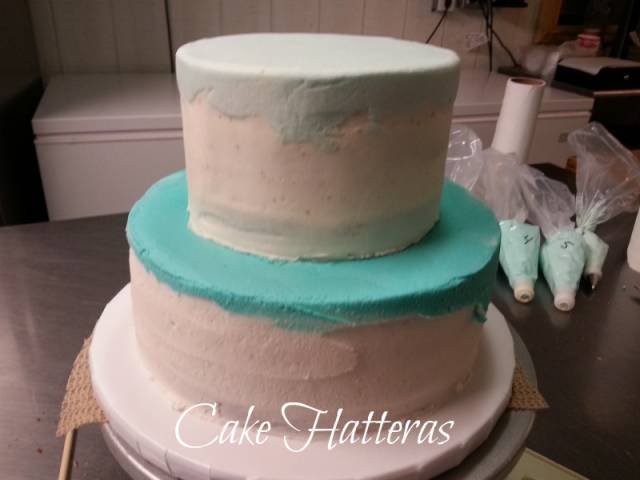
Measure the height of your cake and divide by 6. This will be the height of your individual colors. starting at the bottom, using a rose tip, start making ruffles holding the tip towards the cake and creating ‘u’ shaped strokes, keeping them even and rhythmic.
Place the same tip into a new bag and start your next layer of ruffles. (by not cleaning the tip, your icing will blend better)

Continue all the way up the cake, changing the tip and bag and the correct intervals, all the way up to the top center of the cake.

I was very pleased with how nice this turned out. It’s real simple to do the buttercream ombre ruffles, don’t be afraid to try. If you have any questions, please feel free to pm me.
Psalm 127:1 Unless the LORD builds the house, the builders labor in vain.
11 Comments
Beautiful! I love it!
What tip number did you use please?
My video tutorials http://www.youtube.com/channel/UC54goz2tkv2xFdB3uQT5vZw
Beautiful!
wow, thanks… looks amazing!!
You must never limit your challenges, instead you must challenge your limits
This is soooo beautifully done.
https://www.facebook.com/pages/Erivana-Cakes/363534378522?ref=hl
Lovely!!!! Thank you for sharing Donna!!! xxx
CUPCAKES & DREAMS My facebook: https://www.facebook.com/pages/CUPCAKES-DREAMS/115882865103239?ref=hl
stunning x
Storyteller Cakes
Thank you for sharing. What were the sizes of the cakes and how many cups of buttercream do you reckon were used?
Thanks for sharing xx
sugar and art - perfect combination! sugarmagic22@gmail.com
I have a Frozen theme party with Elsa cake to make this month for my daughter and this is very helpful. Thank you. I want ruffles and then place an Elsa figure on top with a fondant 6 for her age. Thanks so much! I was clueless on how to do the ruffles!!! And now I have the information I need. I’m new at cakes. I’ve only made 2 so far and want them to look professionally made. Your technique is perfect for what I am looking for!!!! Thanks again! You are one great artist!