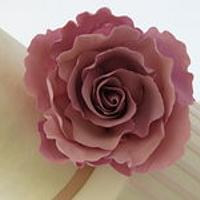
Poinsettia Cake, A Peek into our Holiday Traditions

Poinsettia Gumpaste Plant:
Equipment:
26 gauge white wire
26 gauge green wire
Fine needle nose pliers
Embroidery scissors
Wire cutters
Fine groved needle nose pilers
Green floral tape
Art brushes
Fresh mat
A-ceto knife
PME plain wheel
Jem poinsettia cutters or global sugar
Foam board
Ball tool
Poinsettia bract and leaf veiner, SKGI
Celsitck
Groove board
Gumpaste/fondant rolling pin
Materials:
Serger thread
Petal dust: Vine, moss, forest, poinsettia red, crystal red, mimosa, aubergine, mimosa, edlerwise, and daffodil
Sugartex, or DIY cornstarch & mimosa petal dust
Gumpaste
Food paste, red, green, yellow, and white
Egg white/ glue
1-recipe for Madeira cake
Mise en place
You will need to create the flower/plant centre and the stamens, if you do not have sugartex then DIY. Place equal amounts of cornstarch and mimosa petal dust on a piece of parchment paper, set aside.
Now for the stamens cut 3 pieces of 6.35cm/2 1/2-inch serger thread, using your fine needle nose pliers and bend the green 26 gauge wire into an open hook, fold the threads in half, tie a knot around the loop of the hook. Smush/clamp the wire closed on the thread. Tape the 1/4 up of the thread and down the wire, cut the thread, color the thread red, lightly dip the tip of the thread into an egg white, and dip into sugartex or the mixture you previously made, with the cornstarch and mimosa petal dust. Allow the stamens to dry. With floral green tape place 5 stamens and six petals tape then tightly to create The yellow flowers, or cyathia, that is in the center of the colorful bracts.


For buds, kneed a small piece of pale green gumpaste, roll a ball, divide the ball in half, and hollow each half. Attach to the taped wire, add a tiny piece of daffodil yellow paste to the centre of the halved pieces, and use a celstick to place an indent in the yellow piece top.
For the cyathia (petals) cut 12 short white wire (cut the wire in thirds), knead some white gum, using a small piece of the white gum paste roll into a ball, and place on a grove of a groove board. Gently hollow the centre as you pull the petal to a point, dip the wire slightly in the glue (the egg white) and attach the petal. Allow the buds and petal to dry. Dust the buds with moss green petal dust. Dust the petal with daffodil yellow and a little red in the inside of the tip. We brought the poinsettia close enough to see and replicate.


The bracts and leaves are created similar. The poinsettia is actually a plant, and the bracts are the beautiful colored parts of Poinsettias
Most people think of these bracts as the flowers, however they are actually colored bracts (modified leaves). To prepare the bracts and green leaves color some gumpaste light red, knead the paste, roll out the gum paste thin, but not as thin as you would for a delicate flower (poinsettias have deep veins and you don’t want the bract to rip). I find it helps to place the bracts/leaves on the groove broad, lightly roll your gum paste with a rolling pin to create a thick centre for the wire. Dip a piece of wire in your egg glue, holding the bottom of the bract/leaf gingerly thread your wire half way up through the middle, pinch the bottom of the bract/leaf to secure to the wire. Soften the edge, but do not frill, lift the wired bract/leaf, and vein the bract/leaf. Add some movement (bend) to the bract/leaf and allow to dry. The number of bracts and leaves will depend on how big you want the poinsettia to be.


Coloring the Bract and Leafs, Assemble


“For more information » ":http://bobbiesbakingblog.com/blog/2012/12/26/poinsettia-surgarpaste-tutorial/
Bobbie Bakes
5 Comments
oh WOW – thank you so so so much !
Dina @ miettes, http://www.facebook.com/pages/miettes/257790597632317
wonderful tutorial, thanks for sharing!
Xclusive, HTTP://facebook.com/xclusivecakes
Thank you again Bobbie for yet another amazing tutorial! The poinsettia flowers are gorgeous! Your detailed instructions are so wonderful!
Toni, Pennsylvania, https://www.facebook.com/WhiteCraftyCakes
thank you all!!!
Bobbie Bakes
So good! Thank you for sharing it with us!
Eleanor, Brisbane, http://www.facebook.com/#!/Cakeage.Cake.Craft


