Pillow cake tutorial
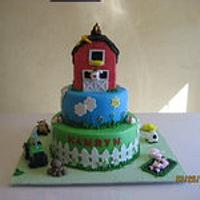
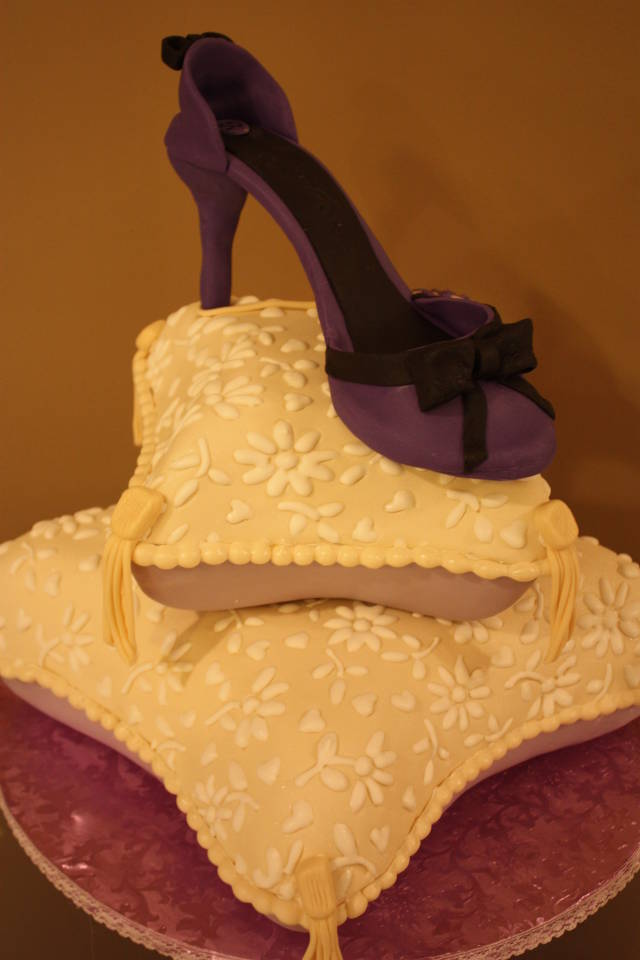
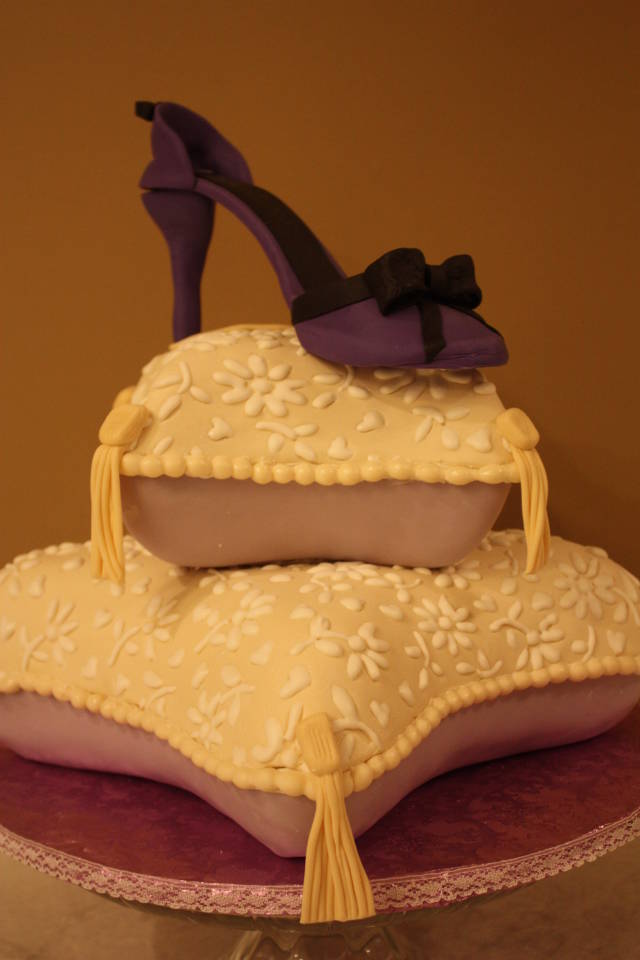
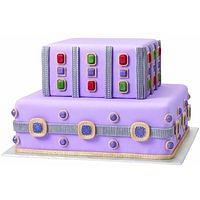
This is a pillow cake for a 50th birthday. The shoe is made of fondant/gumpaste and completely edible. We two-toned the fondant with purple on the bottom and biege on top with white royal accents. 10 inch and 6 inch tiers are of yellow cake and filled with chocolate mousse and oreo cookie crumbs. The pans were the newest in the Wilton line and simply great to use. We were so impressed that we can’t wait till we need to make another. Here is a brief showcasing of what we did and we hope this helps with a lot of the questions you might have through our trial and error.
These are the 3 sizes for the Wilton Pillow pan. 14inch, 10inch and 6 inch. We used the 10 and the 6 to make our cake. The Wilton directions for baking are not correct on the pans however. We used 5 cake mixes or around 14 cups for two 10 inch pans and 6 cups for the two 6 inch pans. If you decide to purchase these pans (which we highly recommend) don’t forget to get the 40 or 50% off coupon for Michaels Crafts. The pans are a pricey 44.99 in NY but with the coupon, we only paid 22.00 and it was well worth it!
Next, we covered 3 round 12 inch boards (that were glue gunned together) with lavender foil. We taped the back with clear shipping tape and then glue gunned lace around the edge for a clean finish. This will be the base for our cake.
Next, line with wax paper in order to keep neat and clean.
Now here is the tricky, but not so tricky part. After you bake the cake, take a long knife or cake leveler and cut the cake in the pan using the pan as a guide. Turn the cake out to cool on a rack. At this point you shoud have a perfect, flat surface for your cake. We did this two times for the 10 inch and the 6 inch in order to get the full pillow effect. After the cake was cool and had sat for an hour or so, we piped a dam of buttercream around the inside of the cake and then put in our mousse and oreo filling. We topped it with the other half of the pillow. Start by dirty icing from the middle up. When this is done, put in the fridge for 20 minutes (while you start your other tier). When the buttercream has hardened enough that its not sticky, take a cake board put on top and flip it over. Now we iced that with buttercream until the whole cake was now covered with buttercream. At this point the patience comes in. Put in the fridge to sit for a few hours to over night so that its good and set.
Take cake out of fridge and using a hot knife, we went over cake to make sure it was as smooth as possible. We did this on only the top half of the pillow. You don’t want the get the bottom half wet or sticky. You only want the fondant to stick to the top half. Roll your fondant and drape on top of the cake. You will find that it drapes perfectly because of the shape of the cake and doesn’t require a lot of smoothing.
Aftering laying the fondant on the top, we took a ruler and measured how far we wanted the fondant to go down to and then we scored around the whole cake to make sure it was even.
We found it much easier to cut with a scissors than a knife. Just lift slightly so not to pull and stretch out of shape and cut where you had scored it.
When the fondant is attached and we were happy with it, we then put a foil wrapped mini board on top of the fondant. This is actuallly the bottom of the cake. We flipped it over, again used the hot knife to smooth any bumps and we were ready for the top half of the pillow to get its cover.
This is the Wilton impression mat that we used. It works great, but make sure that your fondant is not sticky or you will never get it off the mat. We make sugar holders with brand new nylons or panty hose filled and then tied on top. Its great for getting sugar on the fondant but not over whelming it with sugar. If you think your fondant may stick, just tap the mat and the fondant with the sugar holder and it should come right out.
We rolled the fondant first to about the size we needed, we then put the rolled fondant on the impression mat and slowly rolled the fondant on the mat. By only going one way (we went towards ourselves) you get the impression without it doubling or smearing.
Place the impressed fondant on top of the cake and let drape. Do not press hard on the fondant or you will lose your impression. The fondant drapes perfectly to the shape of the pillow, so don’t worry that you need to smooth it much. Repeat the same as the bottom fondant, but this time you are lining it up with the fondant that you put on the bottom. Don’t worry if your line is not perfect. You will be putting some type of roping or border there and it will cover it.
Now for the pretty stuff! The impression mat does that, makes an impression. So, what we did was take some slightly thinned (not too thin or it will drip down the sides) royal icing and with a #2 tip, filled in all the flowers and hearts to give it more dimension.
Roll a few balls of fondant to get ready for the border. We chose the pearl border. So not to have to cut around all those pearls we found that if you take one of the balls, roll a thin log, and then push into each hole (pulling slightly as you go) making sure that it doesn’t go over the top that it pulls right out perfectly. We used a lot of sugar (which you can see our work area is full of sugar :) in the mold to make sure that it wouldn’t stick. Don’t pull up with the fondant, but turn it over and pull down slowly when you take the pearls out.
We then glued our pearls with royal icing around the perimeter of the pillow, covering the seam where the two fondants meet.
Next we used a garlic press to make the tassles for the ends of the pillow. You would be amazed by the fact that you can just keep putting more fondant in the press and it keeps making longer strings. Make it as long as you like and cut to the lengths that you need, To make the top just make equal size little rectangles and score the surface slightly. Take strings and push together on top and attach to rectangle. Apply to pillow with royal icing.
c
We cut out a “price tag” , punched hole and use one of the garlic press fondant strings to wrap around the heel of the shoe. It was a good way to put the happy birthday 50 on the cake without drawing too much attention to the age factor :)
24 Comments
Great tutorial, thanks for posting ;)
-- Michal, http://cakesdecor.com | My Facebook: http://www.facebook.com/michal.bulla

thanks for posting this great instuction and made it seem simpler than others I have seen
Wow…thanks for such a detailed tutorial! The pictures definitely made it easier to understand.

That was excellent! Thank you so much!
Joy211
Thanks very much everyone! Hope it helps.
WOW!! That is one of the most helpful and innovative tutorials Ive seen! Thank you soo much for sharing this tutorial with everyone!!! I’ve been meaning to make a Pillow cake but was always worried about how to cover the bottom.. this just takes the cake! :)
Thanks cakesbysana. Let us know if you give it a try.
Very nice tutorial, Thank you for sharing.
This is great thanks for sharing. Can’t wait to try it!
Thank you for sharing! Ive wondered how cakes actually tun out using the Wilton pans.