
Tutorial-Unwired Anemone
Introduction:
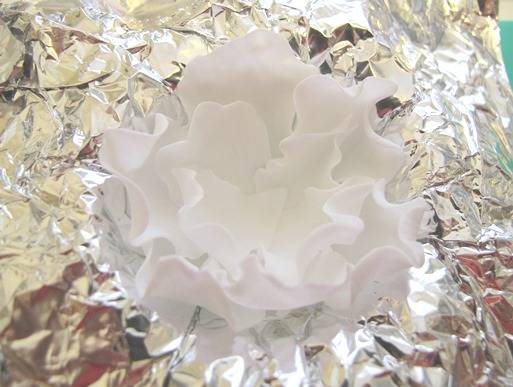
This tutorial gives you instructions on how to create the flowers in the centre of my stained glass cake
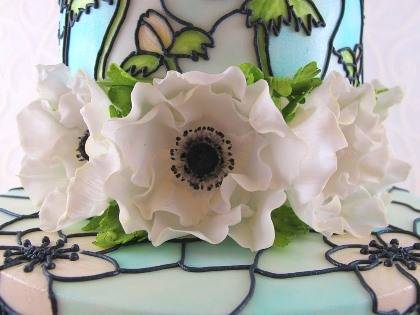
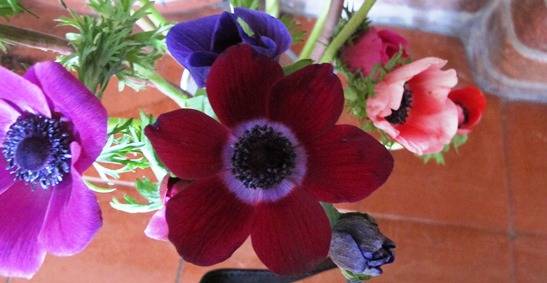
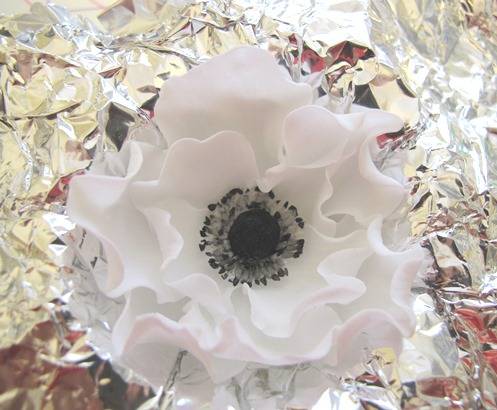
To start with, let’s talk a little bit about this flower. The number of petals ranges from about 5-15, and they are generally an unsymmetrical flower with respect to the petal arrangement. The 6 petal flowers can be symmetrical and the petals are in layers of three, with the layer above over the joins of the layer below. As for the shape of the petals, usually they are rounded with a slight point at the tip, but can be rounded like a rose leaf or a poppy leaf. The petals of the open flower are generally not frilly, but those on the half open or older flower can be. These flowers are often represented as stylised on wedding cakes but here I am going for something a little closer to nature. These flowers come in a multitude of colours both pastel and vibrant, but white is the favourite for a wedding cake. The centre of the flower is black, with the colour underneath being pale green for the pistil/domed centre and the stamens are tipped black with the stem colour being a paler version of the flower colour.
Make the flower centre:
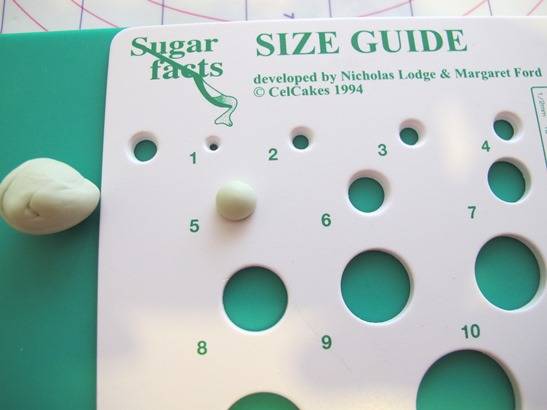
1. Take some pale green flowerpaste/gumpaste and roll it into a pea sized ball, size 5 if you use the ‘Size Guide’ (a very useful thing to have for flower making)
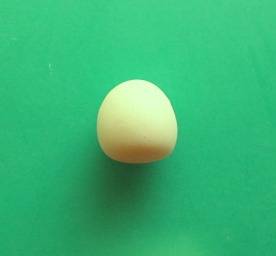
2. Next, flatten the ball at the bottom to form a dome or jelly tot shape
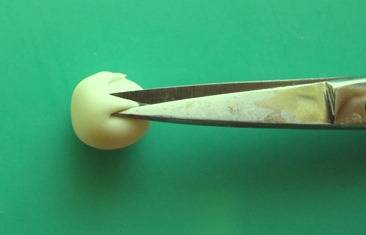
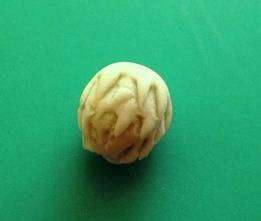
3. To give the pistil/central dome some texture, take a small pair of scissors (nail scissors are ideal, for sugar craft use only) and use the very tip of the scissors to snip out ‘v’shapes, start at the bottom and work around, then upwards to the top.
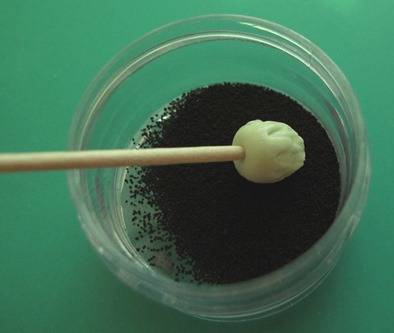
4. To give the pistil the appearance of being covered in pollen, insert a cocktail stick into the base, brush all over with edible glue and dip/roll it into black Sugartex or semolina which has been coloured black using edible food dust. If you have a little plastic pot (I recycle my edible glue pots) you can keep some ready coloured edible pollen ready to go.
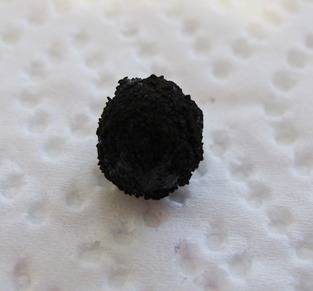
5. Gently remove the stick from the base and leave to dry in kitchen towel or alternatively push the other end of the cocktail stick into a foam/polystyrene block and remove the pistil once dry. Don’t worry if there is little bits of green showing, this will just make it look more realistic. To stop the edible pollen from falling off the centre onto your cake you can set it by spraying with a little edible glaze spray.
6. To make the stamens, thinly roll out some white flowerpaste/gumpaste. By thin I mean thin enough so you can read text through it (e.g. 0.5mm thick or less). To stop the paste sticking, rub a small amount of white vegetable fat/shortening on the board. You can also use cornflour but it will dry the paste out quicker.
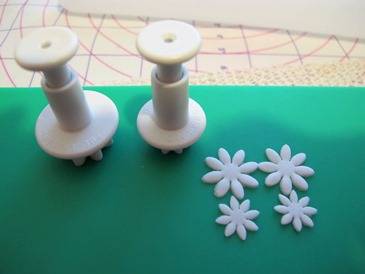
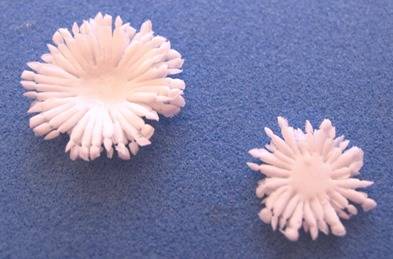
7. Cut out 2 of each of the smallest daisy plunger cutters from PME (or similar, they need to be two sizes that are big enough for the pistil to fit in). Store any cut-outs you are not working on under a stay-fresh mat or equivalent to keep them from drying out fast (steps 8 and 9 do not work well on paste that is to dry).
8. Take one of the two larger cut-out daisy’s and using a scalpel/X-Atco knife, cut each petal into 4. I have a small Corian board for cutting so the plastic rolling board doesn’t get ruined.
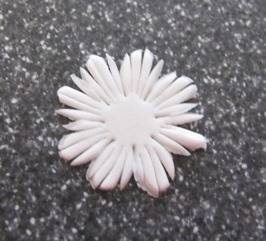
9. Take a small pair of tweezers with a fine pointed end (like the ones you can buy for plucking eyebrow hairs) and pinch in about 1mm down each stem to form a bulbous head
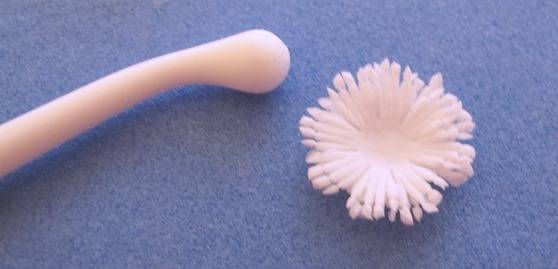
10. Prepare the other of the larger daisy cut-out in the same way and glue it on top of the first (with a small amount of edible glue), ideally so the stalks of the top layer cover the gaps in the bottom layer (interleaved). Place on a firm food grade mat (e.g. PME Mexican Foam Pad or equivalent), and cup/push into the centre using a medium sized bone/ball tool.
11. Repeat steps 8 and 9 with the smaller cut-out daisy’s and stick the two layers together as described in step 10.
12. Apply a little edible glue to the centre of the larger pair and stick the smaller on top (again, interleaved if possible). Cup the centre again.
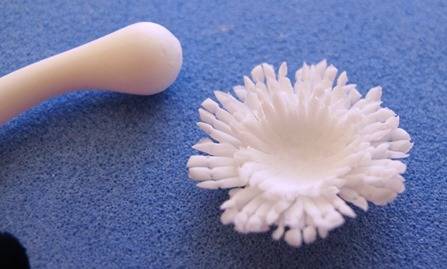
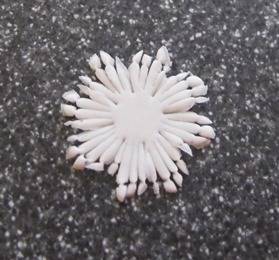
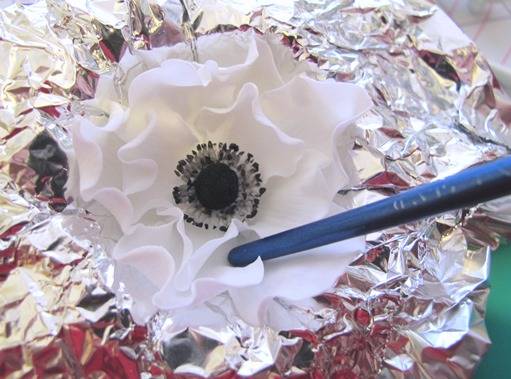
13. Apply a little edible glue to the centre again and stick the flower pistil in. Use the tweezers or scalpel to adjust the stamens and make the shape look more natural
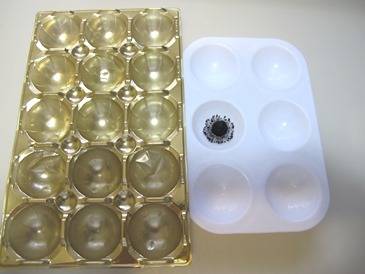
14. Place in a food use only paint palette or empty sanitised toffife candy (or similar) tray to keep the curved shape whilst drying
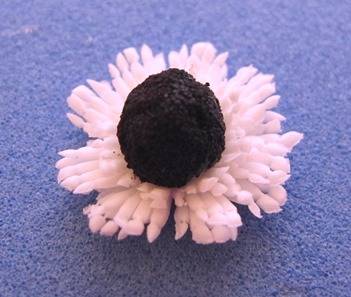
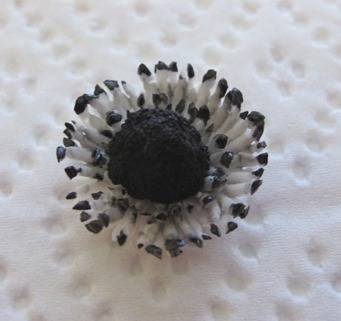
15. once dry, paint the stamen tips black using black food dust or paste dissolved in alcohol, re-juvinator spirit (iso-propyl alcohol food grade) or confectioners glaze (my preferred choice). Colour the stalks a diluted version of the petal colour. As these petals are white, I gave the stalks a grey tint to add depth.
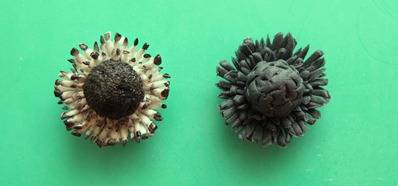
16. To make the centre more quickly, make the whole thing using black flower paste/gumpaste (no painting or spraying required) and do not cover the flower pistil in inedible pollen. The picture below shows what the two look like. Do whatever best suits, they both look effective.
Make and stick together the petals
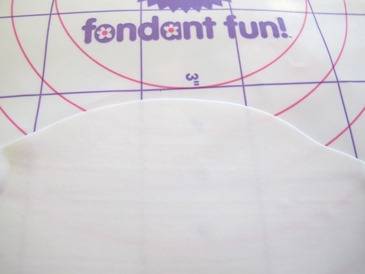
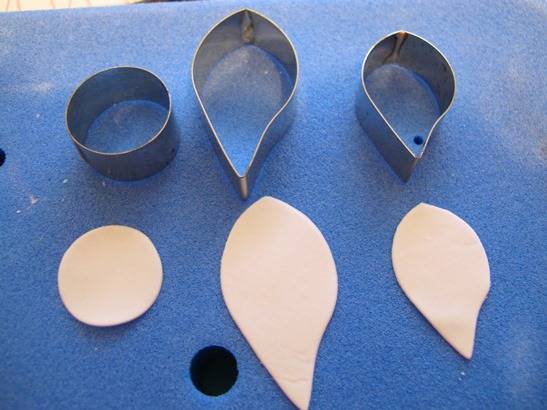
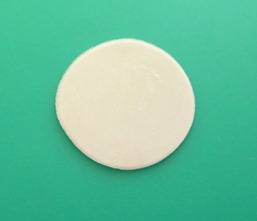
1. Roll out some white flowerpaste/gumpaste thinly (as shown earlier) and cut out one small circle, 4 small petals and 6 larger petals. Either use the template shown or the following/equivalent cutters; PME Briar rose cutter (BR 210) 2nd smallest circle, Tinkertech Two leaf 225-228 cutter (TT225-228), two largest cutters. You can also use a rose petal cutter and trim the rounded end of the petal into a point using small nail scissors (for food use). Store the petals you are not working on under a stay fresh mat.

template – actual sizes circle diameter approx.. 2cm, petal lengths approx.. 4.5 and 5cm
use cutters
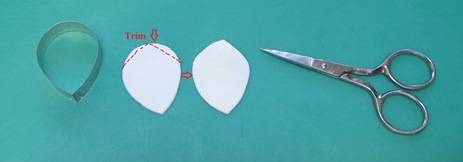
adapt existing cutter
Cutting tips (this what I do, if you do something that works, carry on to the next part)-
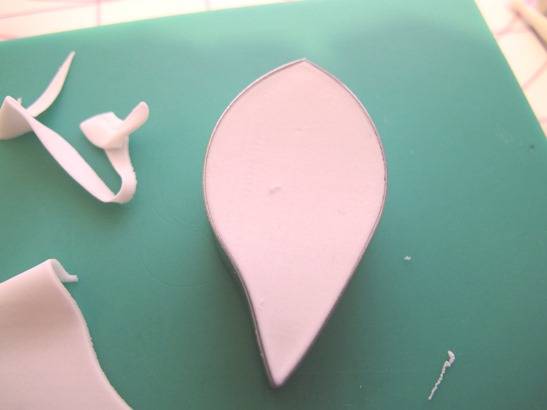
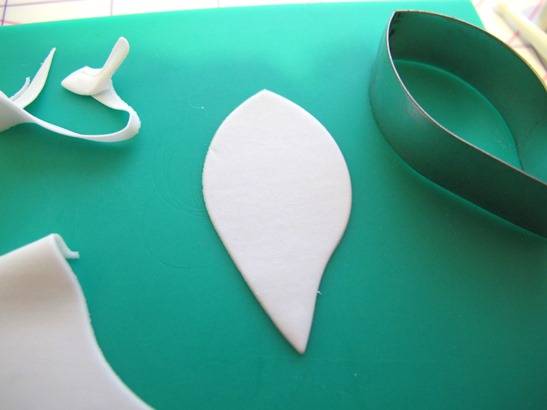
The ideal situation when using a cutter is that when you push down the cut-out gets stuck in the cutter as shown below. In this situation you can rub off the furry edges and push out a cleanly cut shape. If pushing the cutter onto the paste, it is better to pull the flower paste from around the cutter once you have cut through, than to wiggle the cutter about as this can distort the shape and make the cut-out come away from the sides of the cutter. The other thing that helps is to roll the paste out thinly and then turn it over so the slightly dryer side is now on the bottom, this helps get a clean cut. It also helps if the paste is fresh and not old and dried out. You can add a little water to the paste to bring it back to life. The other method which Lindy Smith likes, is to roll out the paste and then place it over the cutter and roll over the top of it, this way you should get a clean cut straight away. If you do get furry edges after cutting, you can rub them off once the petal has dried out or trim them off with a pair of nail scissors which is what I usually do. If you have greased part of your board for rolling, use a different part for cutting. A slight textured surface is also good for cutting as it can help remove the furry edges for you if you like to wiggle the cutter.
2. Take one of the large petals and vein it using a poppy petal or similar double sided veiner (the one here is made by Sugarcity). With these veiners, there is letters printed in the middle join of the mould indicating what it is e.g. PP=Poppy Petal, if you have this facing towards you then the back of the petal will be veined by the ‘back’ part of the mould. Sometimes it is hard to tell which side is which with a heavily veined flower!. Anyway, position the bottom of the cut-out petal as shown , fold the other half of the mould over the top, line up then press down on it firmly all over with your hand or roll over it with a rolling pin
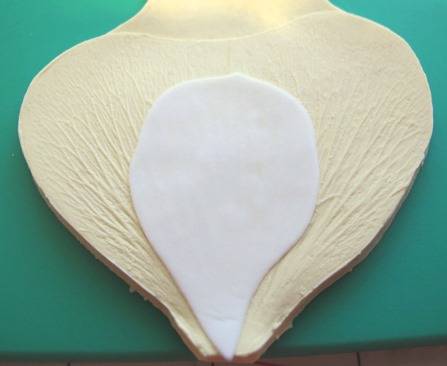
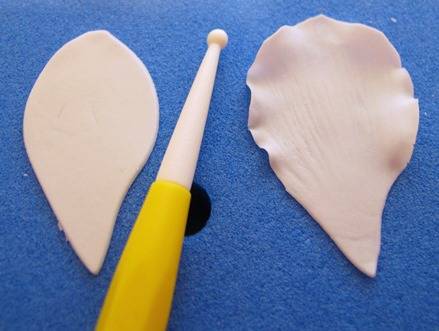
This is what it should look like after. These moulds are non-stick so it should be easy to peel the cut-out petal away. If your paste is very sticky you can apply a little white vegetable fat to the mould or cornflour to the petal (don’t put cornflour directly into moulds, the grains will get trapped in the grooves and you could lose detail on the impression
3. Next, put the petal on a foam pad and thin/frill the edges with a small ball tool. To do this run the ball tool around ½ on the petal edge and ½ on the foam pad from side to side on the top 2/3rds of the petal. The harder you press or the longer you go back and forth the thinner and frillier the petal edge will become (don’t press too hard or the paste will tear and the tool may snap!). I also stretch the petal by pulling out the sides and top while holding the other side static, which will thin the whole petal down a bit more and give it a more natural shape. You can see below a petal that had just been cut vs. one that has been veined, thinned and frilled. If the edges of your petals get a cracked appearance when thinning them then usually this means the paste has dried out on the edges and does not want to do what you want it to anymore! If this happens to me I usually trim it off and re-thin the freshly cut bit, petals are not always perfect and most of the time you cannot tell. This is another reason why it is important if you cut out several petals at once that you protect the ones you are not working on from drying out to quickly.
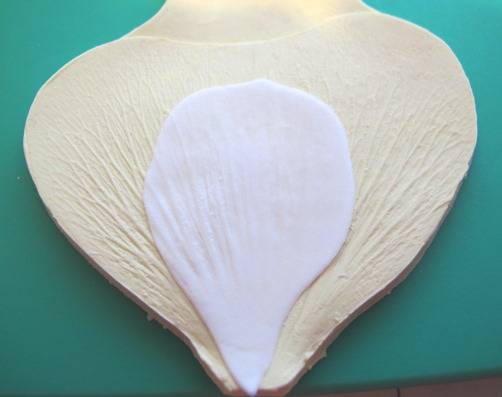
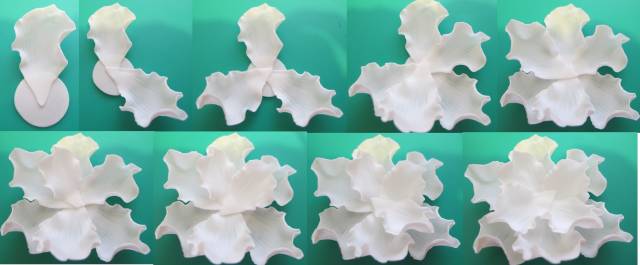
4. Take the circle of flower paste and lightly brush 1/3rd of it with edible glue. Stick the first petal on as shown in the combined picture below. Repeat steps 2 and 3 with the remaining petals (do the larger ones first, then the smaller ones) and stick them onto the circle as they are ready in the sequence below.
5. Make a curved former (a semi-circle shape, you can use a polystyrene or foam ball to help make the shape neat) out of tin foil for the flower to sit in while it dries (if you poke a few holes in it as well it will help the air get underneath)
6. Stick the centre of the flower in with a little edible glue or royal icing. This can be done while the petals are drying
7. To give the flower more strength and stability the larger petals can be glued to one another where they overlap. Apply a little edible glue to one of the overlapping edges (flick it up with the end of the paintbrush first f you need to). Use the end of the paintbrush to seal together. Repeat all the way round.

If the flowers are going between two tiers of a cake then the former shape should sit neatly into the gap without risk of the petals breaking. On the stained glass cake the separator tier is only 1 inch smaller than the tier above and the height of the separator was 2 inches; so the outer diameter of the foil was about 2 inches. The flower shape was also very slightly oblong/fatter across the middle to help it sit better. Depending on where you are using the flower you can customise the former to suit. It will take a few hours to dry or just leave overnight in the former.
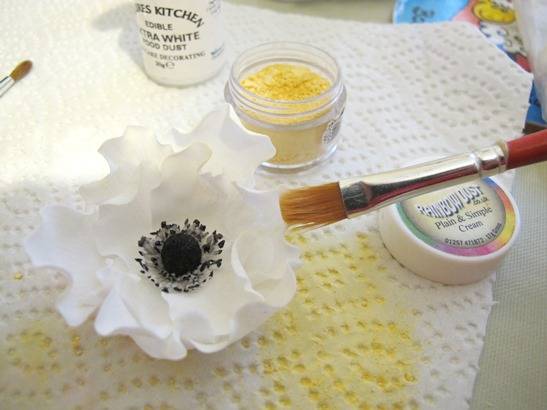
8. Once dry, the flower can be dusted with complimentary colours to give them more depth. For these flowers I used a little white at the petal base and cream on the edges. Attach to the cake with royal icing. On the Stained glass cake I filled the gaps between flowers with flowerpaste anemone leaves but this is not necessary.
13 Comments

Thanks! It is great!
Dina @ miettes, http://www.facebook.com/pages/miettes/257790597632317

Thanks for sharing :)
Cake Rocks!😆

Lovely! thanks for sharing!

Thank you so much! This is an amazing tutorial!!!
Toni, Pennsylvania, https://www.facebook.com/WhiteCraftyCakes

thanck you!!
Mari's cake

Beautiful Tutorial.Thank you for sharing :)

Fabulous thank you for sharing xx
thanks for looking x

great, thks so much…I want to try to make some myself now!
Aggie Patisserie, http://www.facebook.com/aggiepatisserie

Lovely tutorial, impossible to go wrong with such accurate instructions! Thank you so much for sharing! :-)
https://www.facebook.com/pages/Mnhammy/157709861054848?fref=ts