
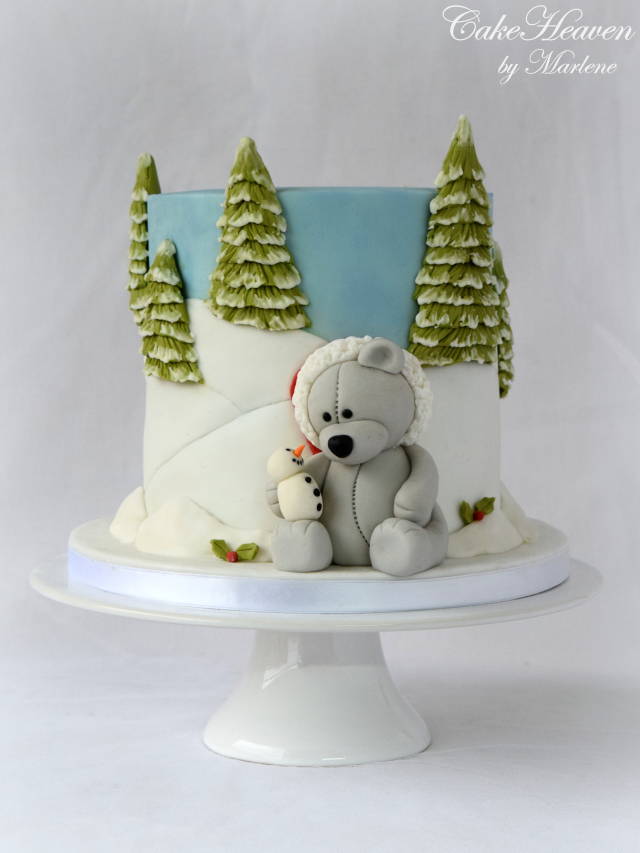
Fir Tree Tutorial
I had quite a few queries re how I did the Fir Trees on my ‘Sharing some Christmas Love’ Cake. I have prepared a short tutorial for those who are interested.
Tutorial by – CakeHeaven by Marlene
Photography – Joseph Debattista
EQUIPMENT REQUIRED:
• Green gumpaste
• Rolling pin
• Craft Knife
• Veining Tool
• White soft peak royal icing
• Piping Bag
• No. 1 Piping Nozzle
• No. 2 pointed paintbrush
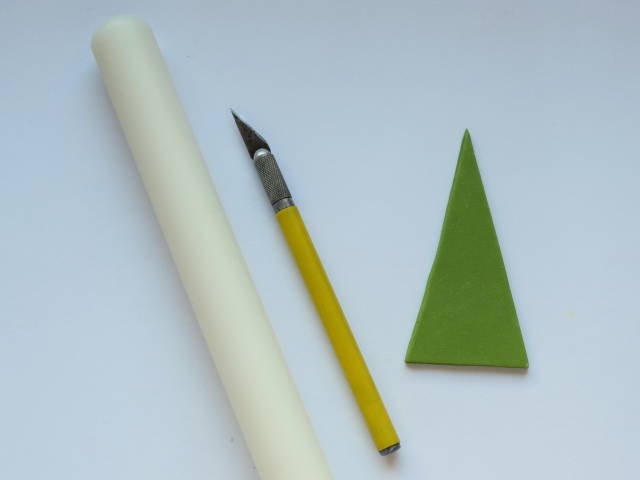
1. Roll out green gumpaste to about 3mm thick and using a craft knife cut out a triangle a little smaller than the size of the desired tree.
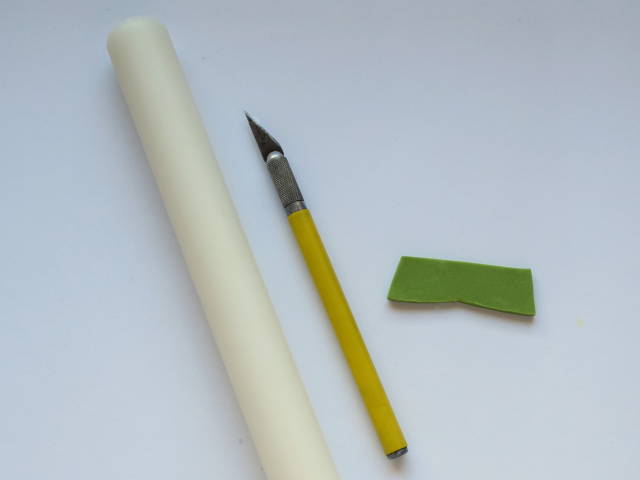
2. Roll out green gumpaste to about 3mm thick and using a craft knife cut out a strip of paste. The top side should be straight, while the bottom side should have an indent in the middle and rounded edges as shown in the photo.
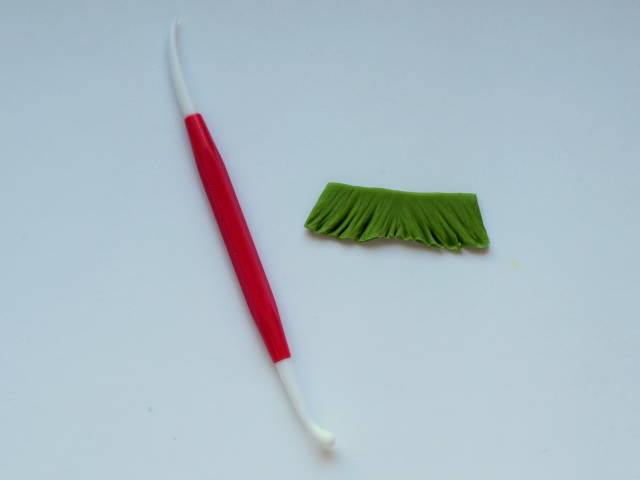
3. Using both sides of a veining tool, mark grooves in the strip starting from the outer bottom edge upwards, to obtain the effect shown in the photo.
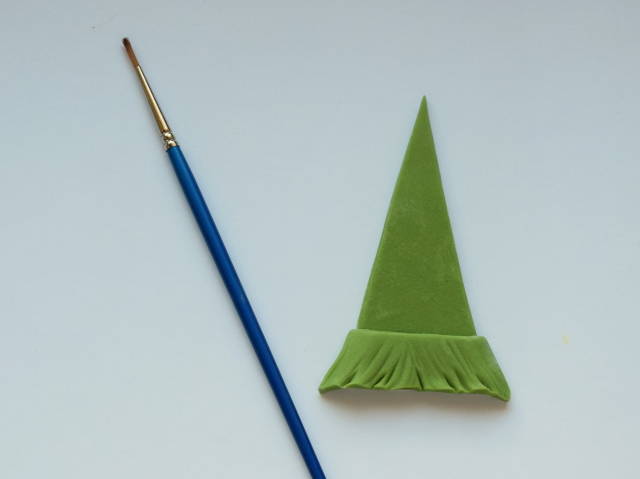
4. Trim to size and attach to the base of the triangle with a little edible glue.
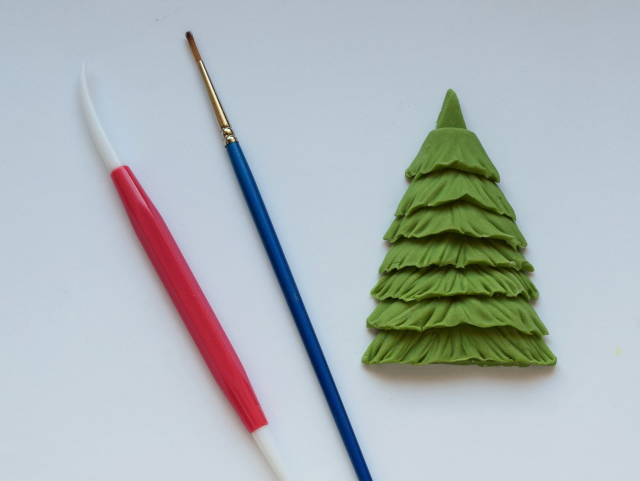
5. Continue adding similar strips, one overlapping the other, until just under the top of the tree. The number of layers used depends on the size of the tree.

6. For the top of the tree, roll out green gumpaste to about 3mm thick and using a craft knife cut out a triangle with the lower edge indented in the middle and with rounded edges as shown in the photo.
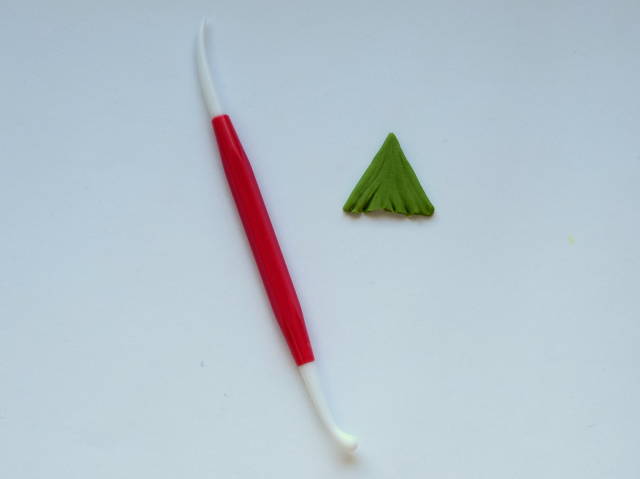
7. Mark groves all over using both sides of a veining tool.
8. Attach to the top of the tree with a little edible glue.
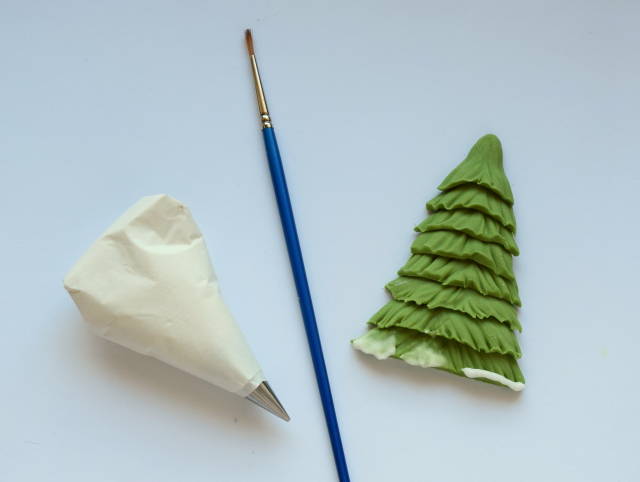
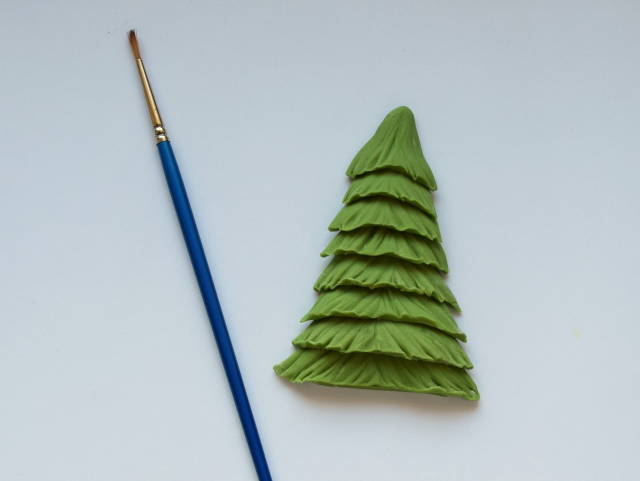
9. Using white royal icing pipe small amounts of royal icing at the edge of the bottom layer of the tree. Using a damp thin brush, pull the icing from the edge to the inside of the layer to obtain the snow effect (brush embroidery technique).

10. Continue applying royal icing and using the brush embroidery technique for all the layers and at the top of the tree to obtain the snow effect as shown in the photo.
Marlene - CakeHeaven
51 Comments

Wonderful thank you!
Blossom Dream Cakes at www.facebook.com/blossomdreamcakes

Awesome!
Lori's Custom Cakes

ohh so cute,thanks for sharing

Thank you so much for sharing the tutorial! I did admire those gorgeous trees!
Toni, Pennsylvania, https://www.facebook.com/WhiteCraftyCakes

Thank you so much !

Thank you for sharing!!! 😍

Adorable thank you for sharing

Thank you for sharing.
Elena

Lovely!!! Thank you for sharing! xxx
CUPCAKES & DREAMS My facebook: https://www.facebook.com/pages/CUPCAKES-DREAMS/115882865103239?ref=hl
Thank you!