
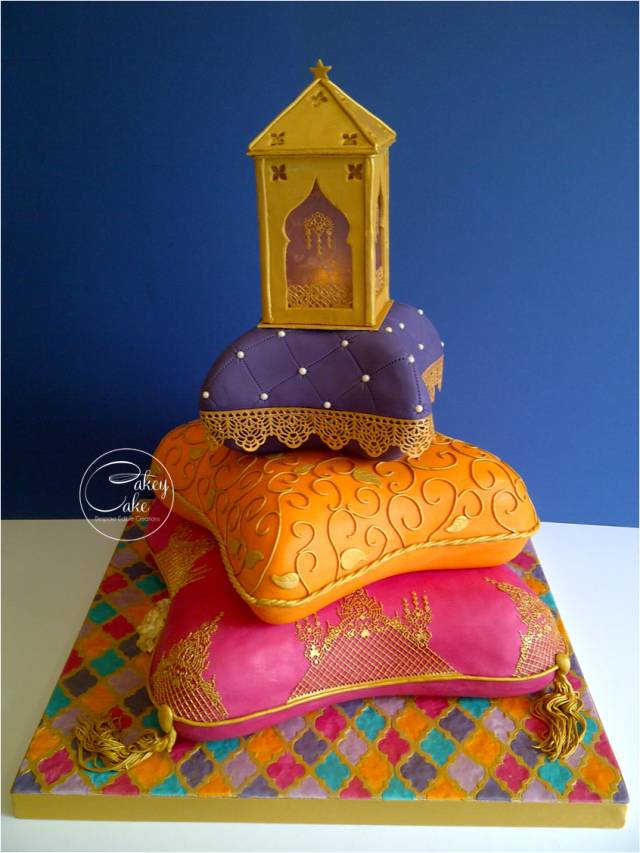
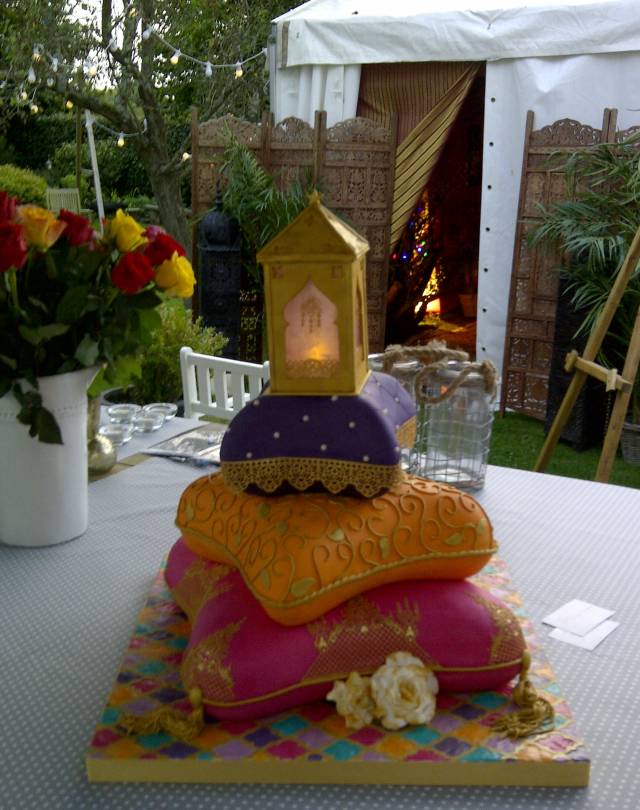
Edible Lantern Tutorial
This tutorial has been really popular on my Facebook page so I thought you might like to see it too. It will help you create your own edible lantern which you can either use as a cake topper or as a stand-along sugar piece. I have made mine in a Moroccan style, but you can just as easily make it in another style. I apologise for the sometimes appalling photography!
You will need:
- Coloured isomalt
- Small loaf tin
- Silicon-backed greaseproof paper
- Sugarpaste – coloured teddy bear brown (the colouring is optional)
- CMC powder
- Edible old paint/spray/air brush colour
- Suitable window imagery – an ordinary print out from the internet will do
- Plunger cutters
- Modelling tools
- Sheet polystyrene/styrofoam
- Ruler
- Hot glue gun
- Cling film/wrap
- Stiff Royal Icing
- Extruder gun
- 3" cake card
- Gold cake lace (optional)
- Battery operated flickering candle (optional)
1. The first stage is to find something suitable to mould your Isomalt in. I used a 3″×5″ (1lb) loaf tin, and lined it with a strip of silicone backed baking paper and gave it a good spray of cake release spray. I learnt by trial and error that it’s important to cut the baking paper longer than the base so that you have ‘handles’ to grab hold of to lift the set Isomalt out with. I used Squire’s Kitchen ready-tempered pink Isomalt (http://www.squires-shop.com/uk/product/sk-ready-tempered-isomalt-pink). One bag is slightly more than you need for ONE panel, so you’ll need 4 bags if making a similar sized lantern to mine. Melt the Isolmalt in a pyrex jug in the microwave (NB. Follow the instructions on the packet – I learnt the hard way that if you leave it in the microwave for too long the sugar burns and loses its colour). Pour enough to just cover the bottom into the loaf tin and leave to one side to cool. Take care. Molten sugar really burns. Again, I learnt the hard way. Ouchy!
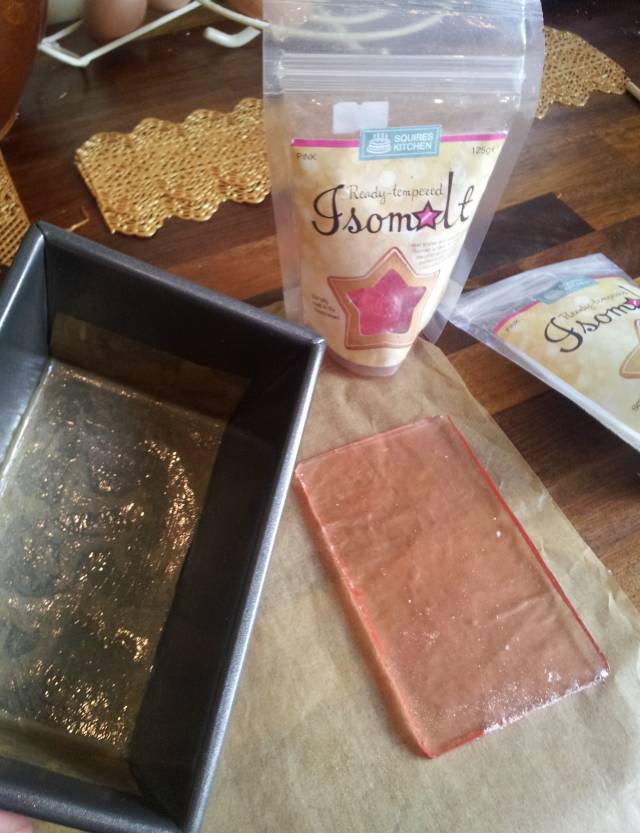
2. Using the baking paper ‘handles’ pull the cooled slab out of the tin. Peel the baking paper off the set Isomalt and leave to one side on a non-stick surface (NB. The non-stick bit is important as depending on atmospherics your Isomalt slab may become quite sticky). Repeat until you have 4 reasonably similar looking slabs.
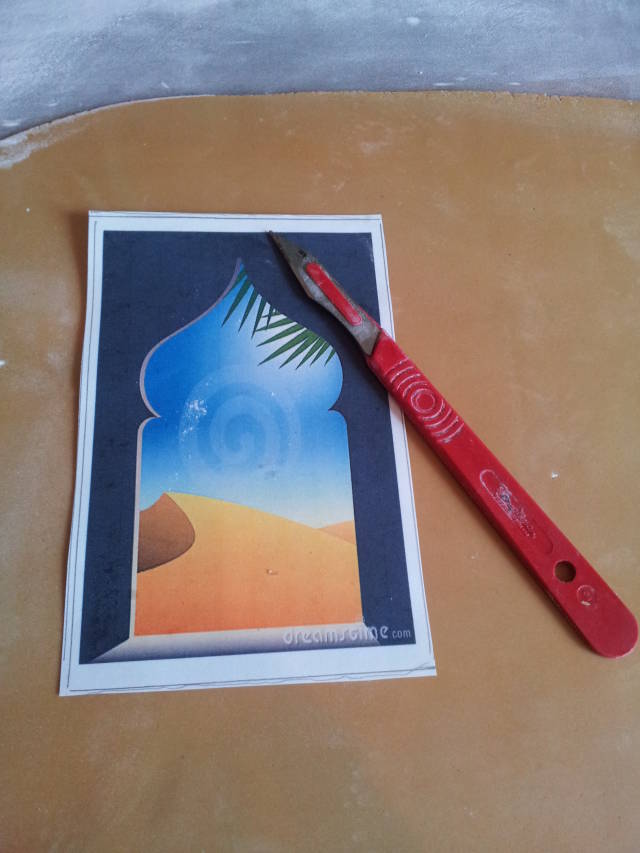
3. Moving on to the sugarpaste panelling now. I used Renshaws teddy bear brown coloured sugarpaste to which I added some CMC to strengthen it. I used teddy bear brown because I find it provide a really good base colour for painting with gold and if you miss any bits it doesn’t glare at you quite so obviously as a white base would. Roll it out to a thickness of about 5mm. Find a suitable image on the internet for your panel windows and resize until it is just slightly bigger than the base of the loaf tin (no science here I’m afraid – I printed off about 7 copies before I got it right). Print it off and place on your sugarpaste. Get yourself a really sharp craft knife. You’re going to need it…
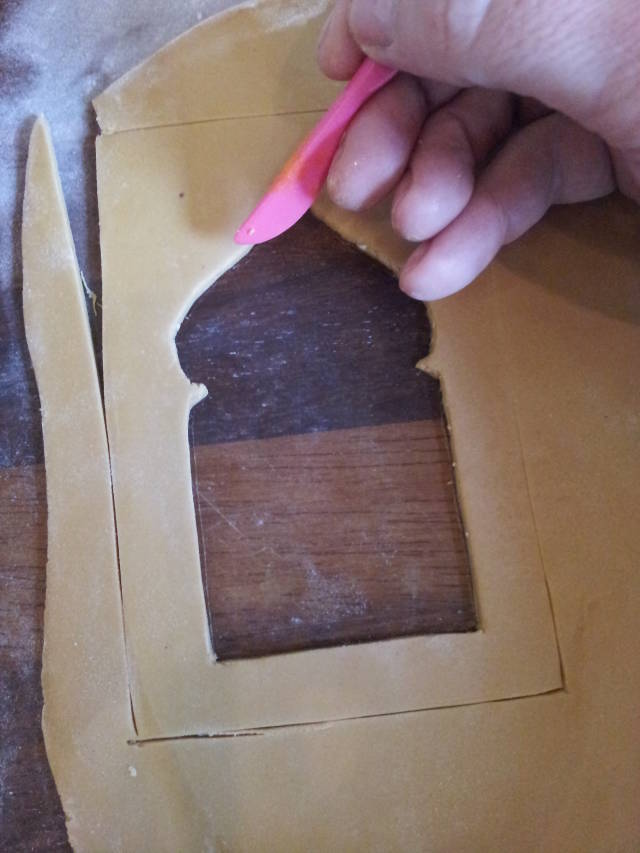
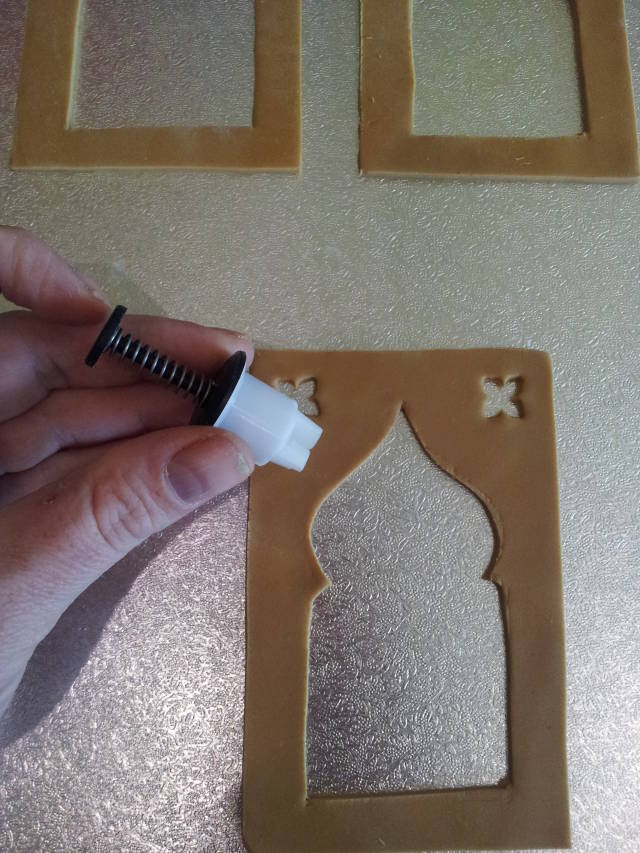
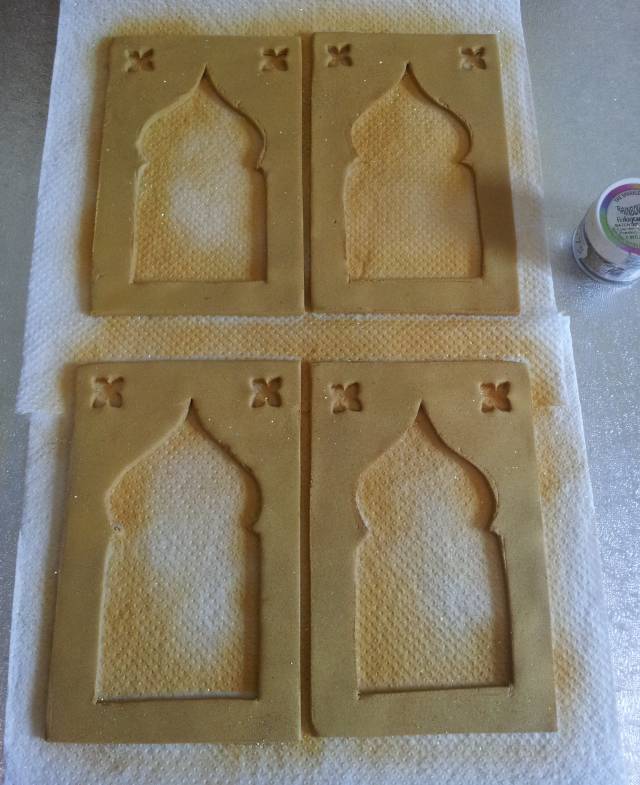
4. Holding the image in place with one hand, take your really sharp craft knife (and a ruler, where possible) and cut around the image and the border, cutting through the paper and the sugarpaste. Mind your fingers! Remove the central piece to create the window and use a plastic tool to neaten up any edges that haven’t come away cleanly. Repeat until you have 4 panels.
5. Choose a suitable cutter to make cut outs in the corners. Now put your panels to one side to dry out.
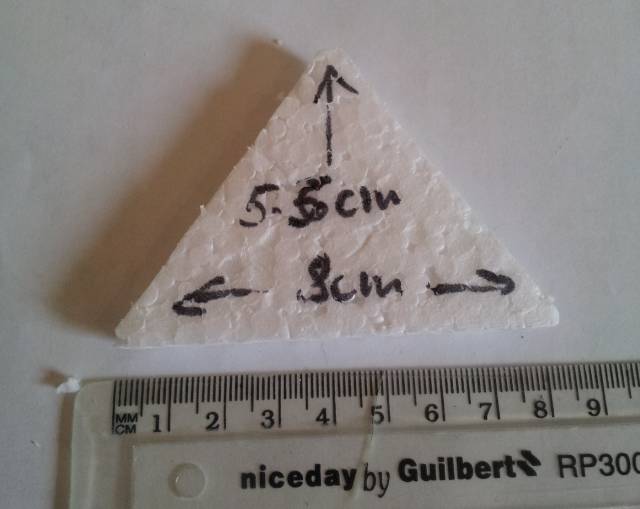
6. So now we’re moving on to make the pyramid apex for the top of the lantern. To make the pyramid structure I used polystyrene sheets, which you can get online or at craft stores very easily. I have, for some reason, switched from inches to cms here. I don’t know why, but basically I am trying to make 4 triangular pieces that will both fit together to make a nice apex, and sit comfortably on the side panels. Again, a bit of trial and error needed here and lots of checking and rechecking against the side panels and with the other triangles. Eventually I settled on 5.5cm x 8cm, but don’t take this as read as your measurements may come up differently! Cut out 4 identical triangles.
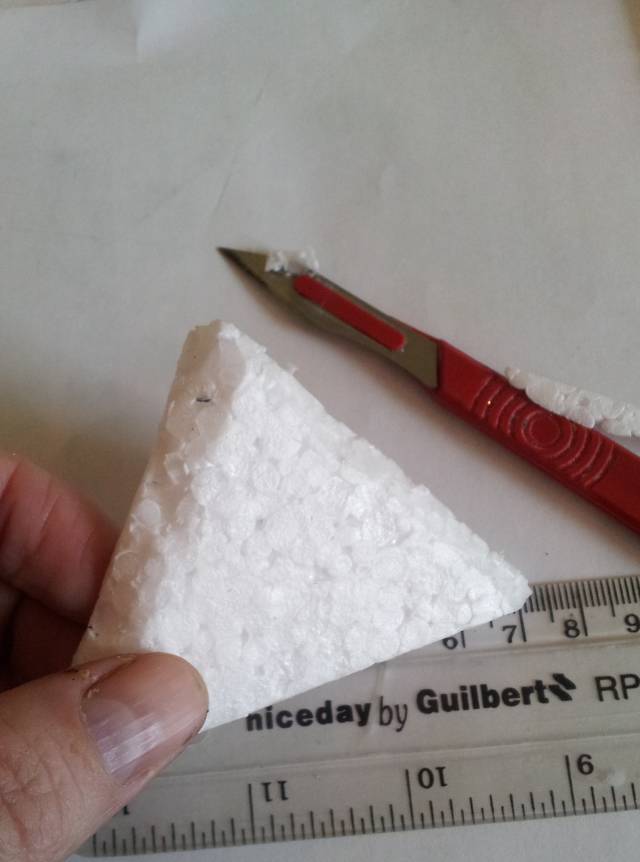
7. Now, you’ll need to take your sharp craft knife again and carefully bevel the shorter edges of each of your triangles so that they fit together in a pyramid.
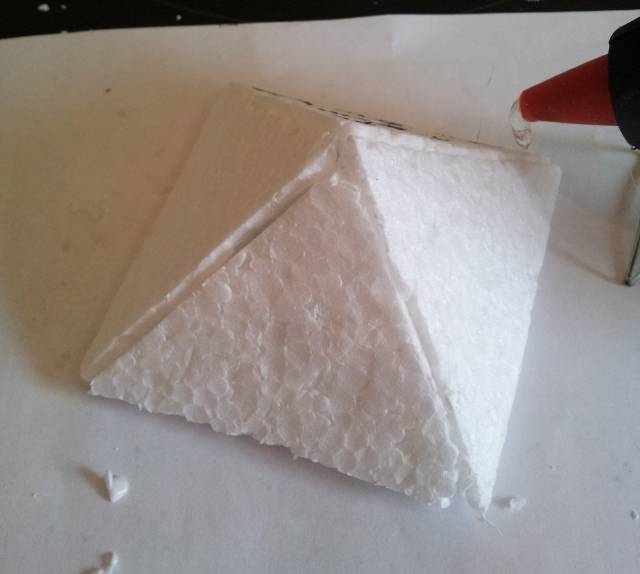
8. Once you bevelled all the edges you can use a hot glue gun to secure the triangles together in a pyramid, one triangle at a time! You should end up with something like this – an imperfect, but serviceable pyramid. And if you’re anything like me you’ll want to check your sizing against the side panels again!
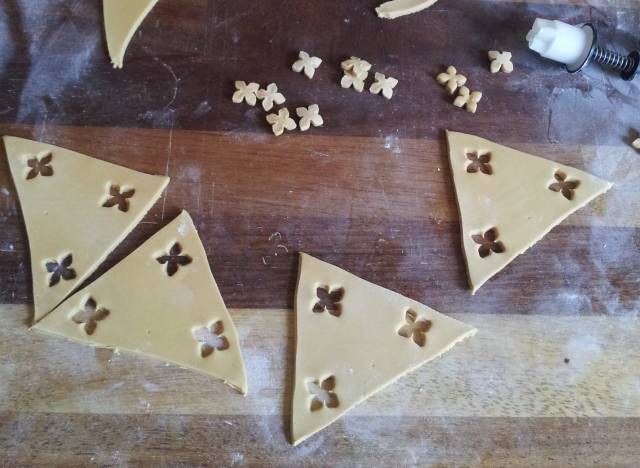
9. Roll out some more teddy bear brown sugarpaste, again to about 5mm thick and cut out 4 triangles – these triangles will need to be about 5mm bigger in every direction than the polystyrene triangles we were just cutting. Pretty them up a bit with your plunger cutter.
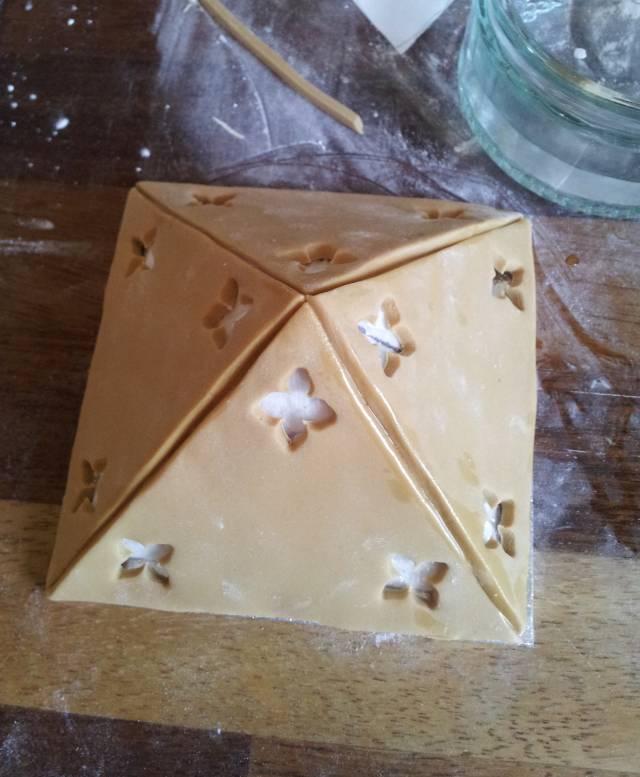
10. Now, wrap your polystyrene pyramid in cling film, tucking the edges up inside it, and place it on a cut-to-size cake card (mine was 3" square – popped back to inches there, haven’t I? I like to keep you on your toes!). You can glue it in place if you want to. Take your triangular pieces of sugarpaste and lay them against the sides of the pyramid, using a little water to stick the seams together (you will only need water because your sugarpaste is laced with CMC which will act as glue when moistened). When all four panels are in place you will have something that looks a bit like this:
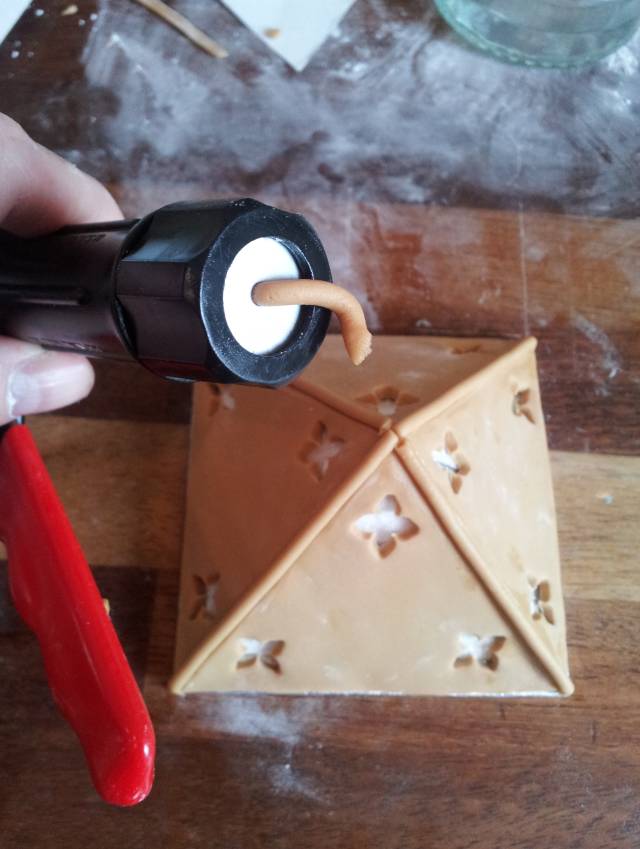
11. Use some teddy bear brown sugarpaste loosened with Trex (white vegetable fat) in your extruder gun and pipe edging over your seams to make it look a bit more ‘finished’. It should look a bit like this. I then also cut out a star to place on the apex and put it to one side to dry out.
12. I then airbrushed everything gold and sprinkled with gold sparkles and set it aside to dry again (you don’t have to have an airbrush – the canned gold spray works just as well, but you’re going to need rather a lot so it could work out expensive).
13. Lay the sugarpaste side panels over the Isomalt panels and stick in place with a little water. Trim any overlapping sugarpaste from the top and bottom of the panels, but not the sides. Now cut out any cake lace decoration you would like to use on the ‘glass’ panels and stick to the panels using a little water. You don’t have to do this – it looks just as good without.
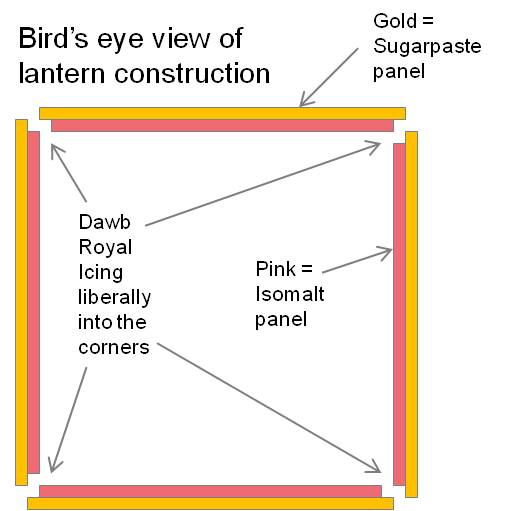
14. This next bit is a bit nervy… Make up a batch of stiff royal icing and dawb it liberally down the inside edges of each of the panels. Now butt them up against each other and hold in place until the royal icing starts to set. If you can get them to stay together long enough to get all four panels on they will then support each other until the royal icing has set completely. Wipe away any royal icing that has seeped onto the outside, squeeze it all together again for good measure and leave it to dry.
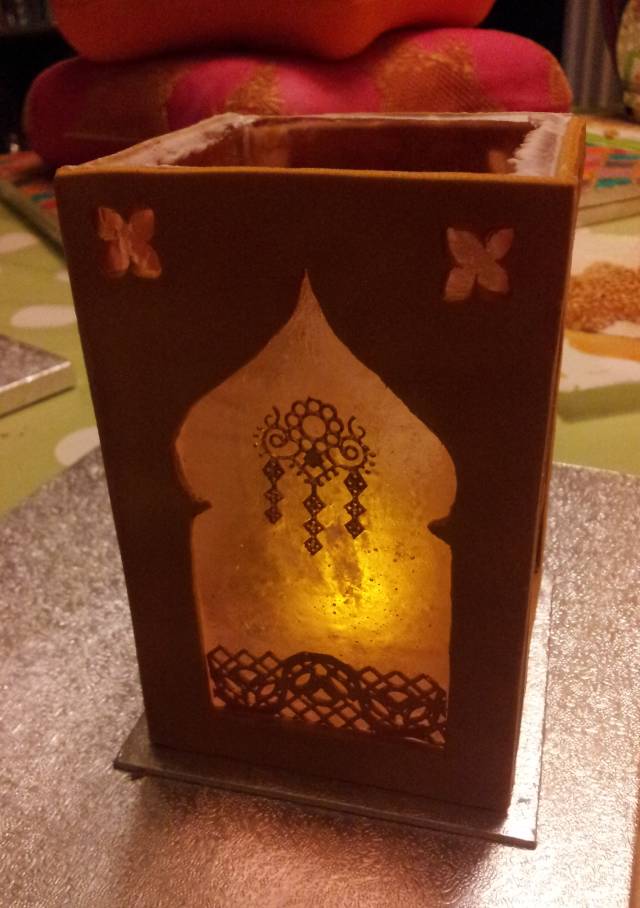
15. In the next photo you can see that I have popped it onto a 3" cake card, but it isn’t stuck, I’m just checking my measurements again. I’ve also popped a battery operated flickering night light inside because I couldn’t resist a little play, and actually, by the time it had reached this stage, I was feeling rather pleased with myself!
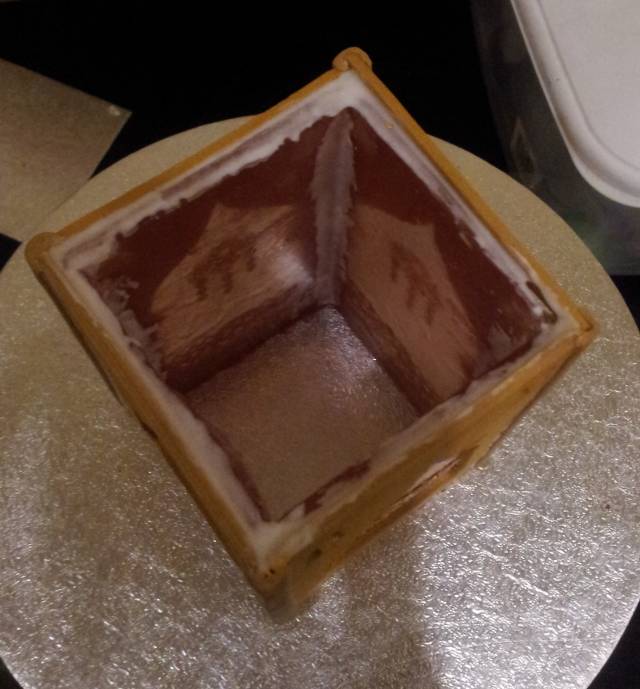
16. Firm up every joint with more royal icing, just to be extra sure that it’s not coming apart. This is what it should look like from the inside. A bit messy really, but you can see how liberal I’ve been with the royal icing.
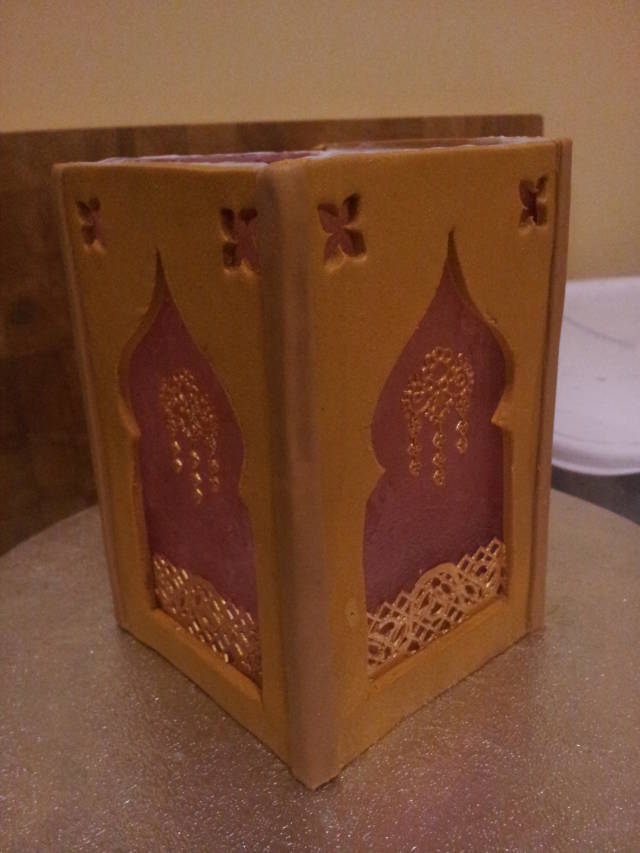
17. Roll out more of the trusty teddy bear brown sugarpaste and cut thin ribbons of it which I think wrapped around each side corner of the lantern to neaten it up and hide any royal icing seepage.
18. Attach the lid (again with royal icing) and neaten the edges again with more extruder piping. And now air brush all the extra trimming gold too. Take care when doing this as you don’t want to get any gold on the window panels. You can use a piece of copy paper or kitchen towel to protect it if you like. NB I have left the bottom open. The base cake card that it will sit on will be attached to the top tier of the cake, so that I can insert the battery candle and when I assemble at the party venue.

This lantern was used as a topper for a Moroccan themed cake, but the tutorial would work just as well for a stand-alone piece, or a Christmas Lantern.
Thank you for reading this! I welcome your feedback :) x
www.facebook.com/childscakeycake
CakeyCake, http://www.facebook.com/ChildsCakeyCake
28 Comments

That is so cool! Thank you. I will also visit your page and give you a big like x
Sassy Cakes and Cupcakes
Thank you so much. I’m sorry the pics are so huge – I should have resized them. I’m such a novice…! lol :)
CakeyCake, http://www.facebook.com/ChildsCakeyCake

Thank you, lovely tutorial x
Thank you :) x
CakeyCake, http://www.facebook.com/ChildsCakeyCake

I love it — thanks!!
S. Faisal --

Harriet this is super! The photos are great, love the step by step instructions…..don’t think you have missed anything, brilliant thank you :) Shall share on my FB page. Alpa x
Simply Alpa

Awesome…thank you xx
Fabulous!! thank you so much for sharing <33333333333333333333
Dubey Cakes
Lovely comments! Thank you everyone x
CakeyCake, http://www.facebook.com/ChildsCakeyCake

Thanks so much!
Sweet Rocket Queen - https://www.facebook.com/sweetrocketqueen