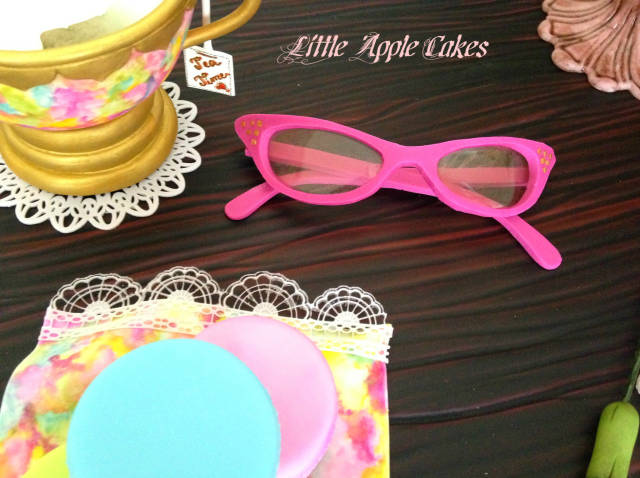
Reading glasses with gelatin lenses tutorial
Thank you so much for taking time to follow my tutorial. I decided to make this tutorial because I have heard a lot of people complaining how hard gelatin is to work with. Hopefully I will be able to help someone out there.
This is my first tutorial and I would love to hear your comments (good or bad) about it.
PICTURE 1.
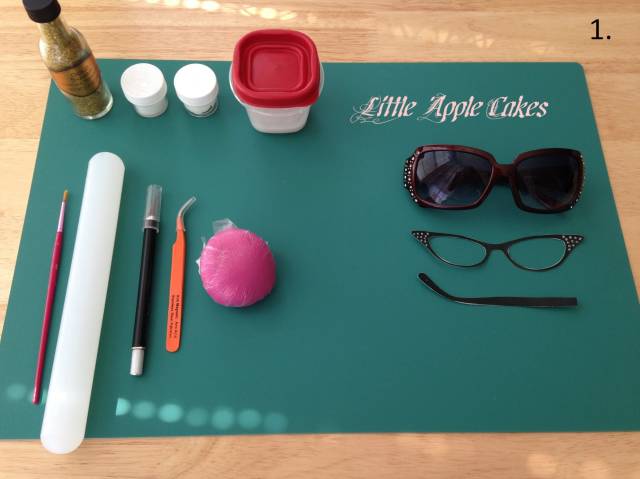
- To make glasses you will need:
- Sugar crystals
- C. starch, shortening and water (alt. gum glue)
- Old clean glasses
- Template, a lot of templates can be found at www.readers.com (you should have the front picture and the side picture, make them smaller or bigger on your comp. and print out on cardstock)
- Paintbrush
- Rolling pin
- X-acto knife
- Tweezers
- Fondant/Gumpaste mix (I used 75/25 ratio)
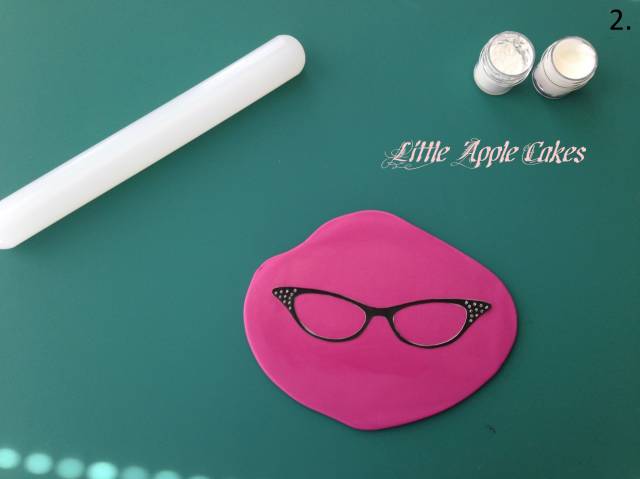
PICTURE 2.
Roll out your fondant/gumpaste mix to desired thickness and put a generous amount of shortening on top, it will help your template stay in place while you cut.
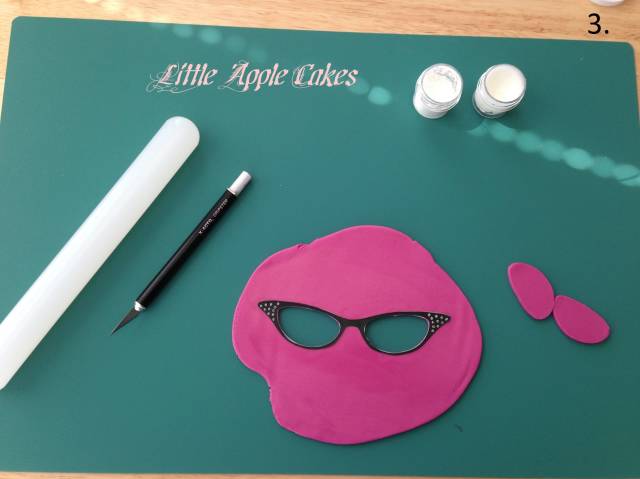
PICTURE 3.
Start by cutting out the lenses first, if you cut the frame first it will keep moving when you start cutting the lenses later.
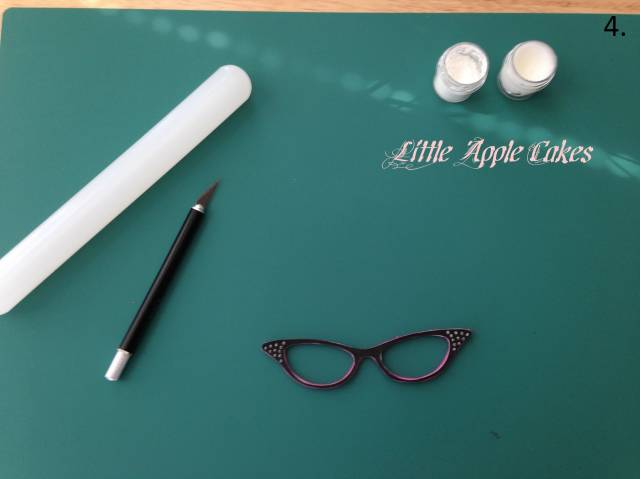
PICTURE 4.
Keep your thumb on the inside of the lenses as a support while you’re cutting out the frame, it will keep gumpaste in place and your frame will have a good shape. Use your fingers to correct any imperfections while template is still on.
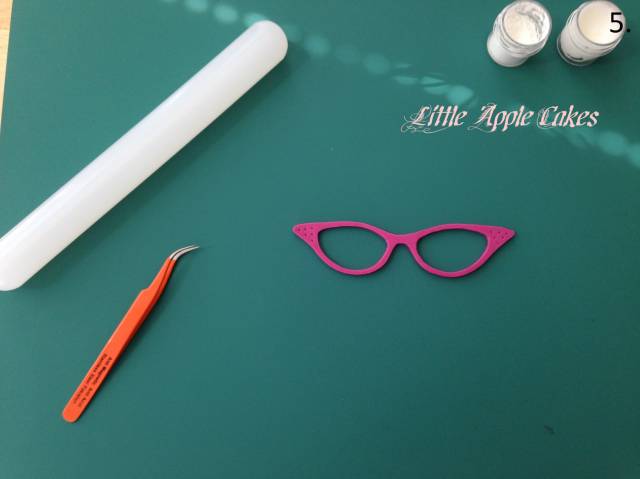
PICTURE 5.
Remove the template and using the tweezers (or a toothpick) make small indentions where you want the decorations to be.
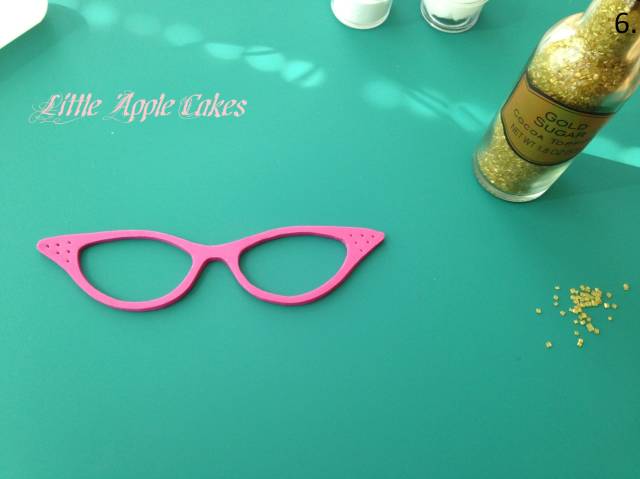
PICTURE 6.
Use a pointy painting brush and put just a little dab of water or gum glue (almost nothing) in each hole.
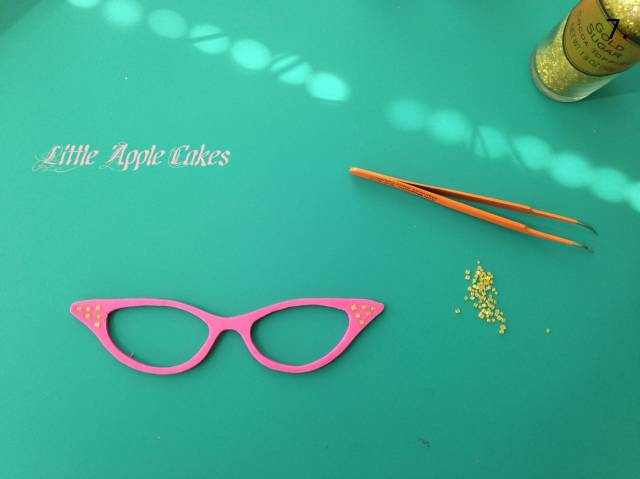
PICTURE 7.
Use the bigger crystals and place them over each hole, pressing down lightly with the help of the tweezers.
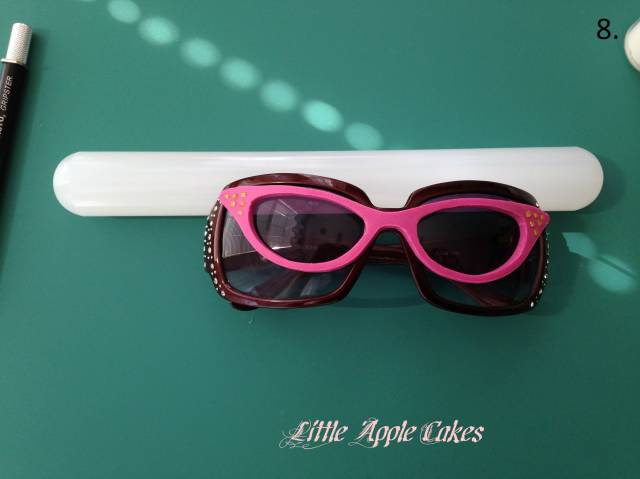
PICTURE 8.
Place the glasses over your old pair of glasses to dry for 2 days. It will give them a nice curved shape.
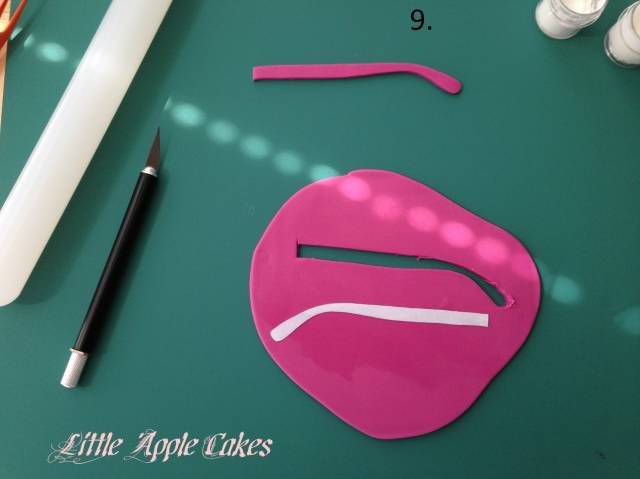
PICTURE 9.
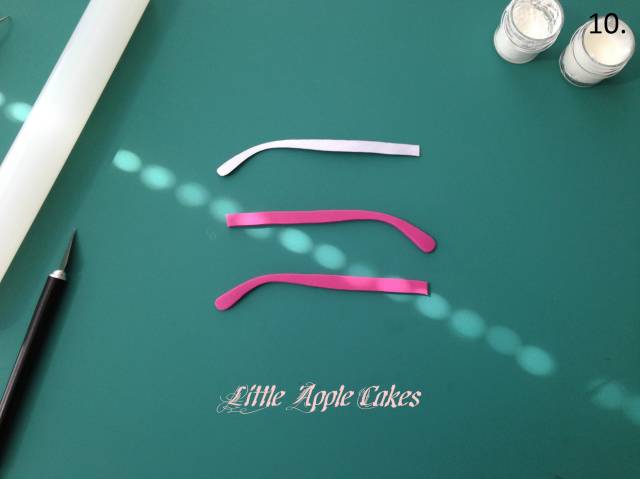
Roll out the remaining gumpaste/fondant mix and cut out a pair of temples (sides), even if the template is the same I always turn it around when cutting the other side (just to be sure).
PICTURE 10.
Use your fingers and with the help of the template shape the temples. Don’t forget to press down at the end of each temple, the spot that goes behind the ears is always more flat than the rest. Leave to dry for 2 days.
OPTION: AS SOON AS THE TEMPLES ARE A BIT DRY (NOT STICKY ANYMORE, YOU CAN PLACE THEM ON TOP OF EACH OTHER, MAKING AN HORIZONTAL “X” THAT WILL MAKE THE FRAME FIT BETTER WHEN PUTTING EVERYTHING TOGETHER.
MAKING THE LENSES
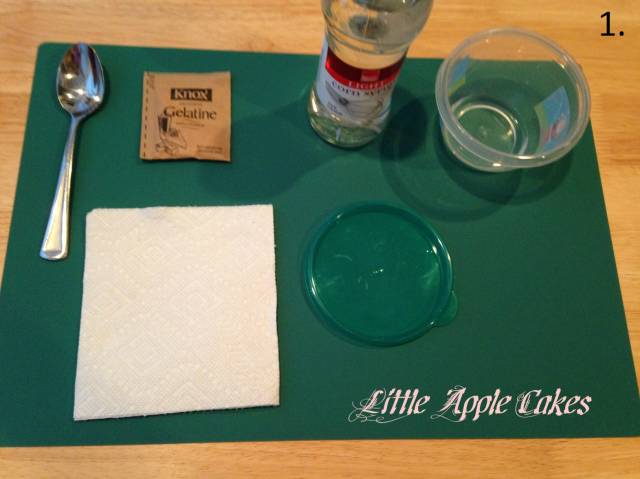
PICTURE 1.
You will need:
A small package of gelatin,
1 oz. cold water
¼ teaspoon corn syrup
Teaspoon,
Paper towel
Flat plastic top
PICTURE 2.
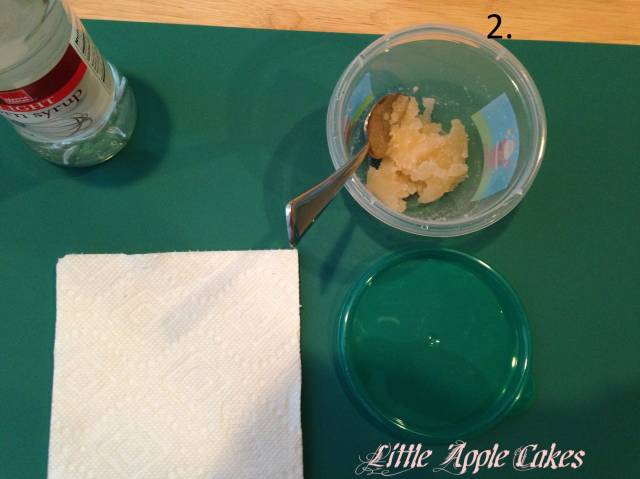
Put the gelatin to bloom (pour gelatin package into the water, not other way around). It takes just around 30 sec. to a minute for the gelatin to bloom.
Then put it in the microwave on high for around 20-30 sec. As soon as it starts to foam and boil turn off the microwave. If you listen very carefully you will hear your microwave making a different (more dull) sound as soon as the gelatin starts to cook).
Stir and pour in ¼ teaspoon corn syrup and microwave it one more time. Stop as soon as it starts to boil.
Use the teaspoon to pick up all the foam on top (the more foam your clear out the clearer the lenses will be). Don’t forget to use the paper towel and clean your spoon each time you pick up any foam, otherwise you will be putting it right back into the bowl.
NOTE: AFTER MANY TRIALS AND ERRORS WITH GELATIN I DECIDED TO TRY THE CORN SYRUP METHOD. I WAS THINKING “WE PUT CORN SYRUP IN EVERYTHING FROM SUGAR LACE TO FONDANT AND CHOCOLATE SO WHY NOT HERE” AND IT ACTUALLY HELPED. IT GIVES THE GELATIN A GOOD CONSISTENCY WITHOUT IT BEING TOO MOIST OR WET, IT JUST SETS BETTER.
Pour your gelatin mix into a flat plastic bowl top and leave to set for 24 hours. If your top is not flat you can try taping it on each side to the table. Remember if the top is not flat you will have more gelatin on one side than the other… and that means trouble ;).
PICTURE 3.
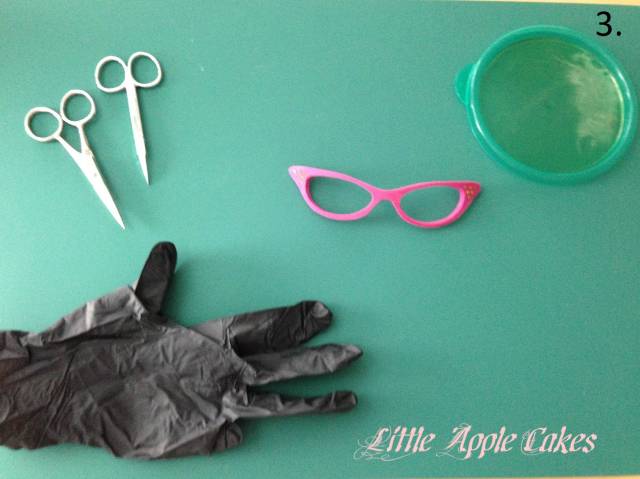
After 24 hours your gelatin should feel set but still very flexible and bendable. Here comes the tricky part (knowing your gelatin), the sides are always drier than the rest and the gelatin is always more moist in the middle. ALWAYS USE PLASTIC GLOVES WHILE CUTTING GELATIN, OTHERWISE YOU WILL HAVE FINGERPRINTS ALL OVER YOUR LENSES. Take out the gelatin from the mold, and cut around removing all the edges (they dry the fastest and will probably not have time to attach themselves to the frame because they dry out so fast). BE CAREFUL, TOO MOIST GELATIN WILL MELT YOUR FRAME AND IN THE END MAKE IT SO SOFT THAT IT WILL BREAK. If you are not sure if your gelatin is dry enough to be placed on the frame, turn it upside down and place it back on that top mold for another 15-20 min. REMEMBER, TOO DRY GELATIN CAN’T BE SHAPED, IT DRIES AS HARD AS PLASTIC AND IT’S VERY SHARP. BE CAREFUL!
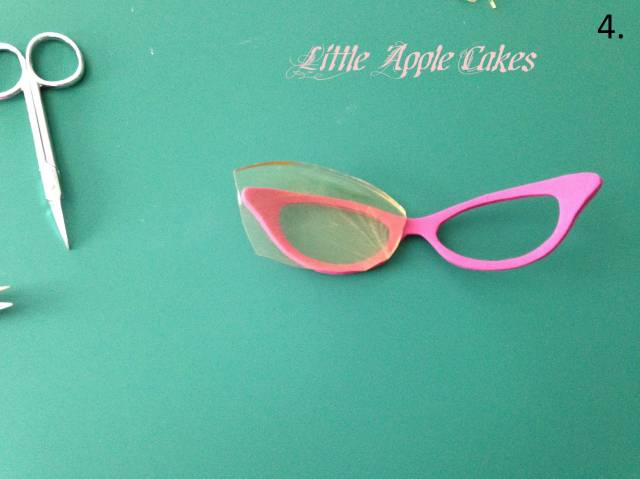
PICTURE 4.
Cut out a piece of the gelatin and place it over the frame. Follow the outer edge of the frame and cut out the lens, try not to move it too much, as gumpaste softens up it will leave smudges on the lenses. Gelatin will attach itself to the frame, you don’t need water or gum glue for this.
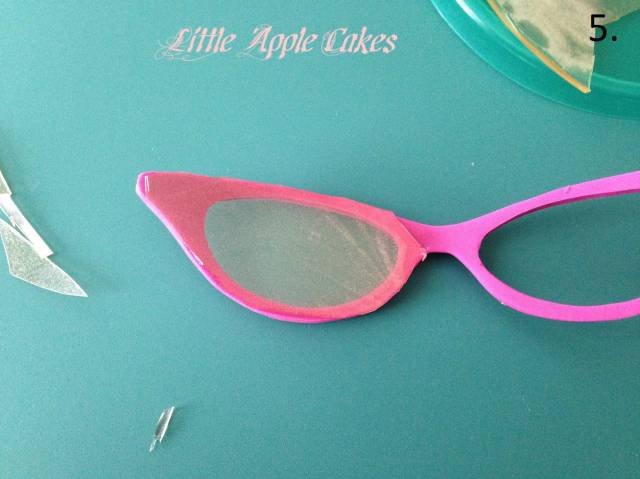
PICTURE 5.
REMEMBER GELATIN SHRINKS WHILE IT DRIES, you don’t want to cut too much and end up with a hole between the lens and the frame.
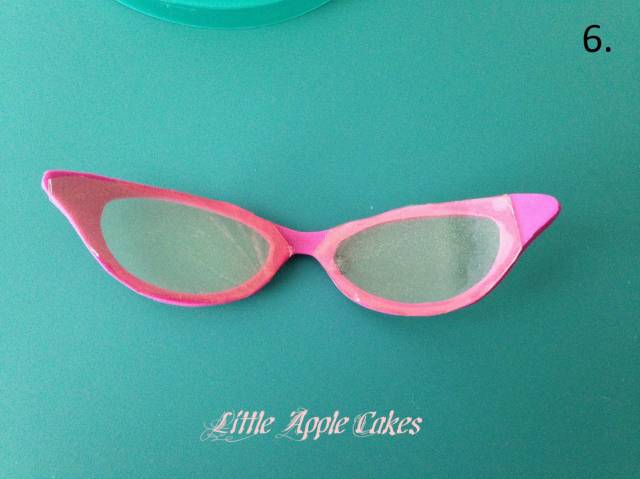
PICTURE 6.
Congratulations, you are all done!!!
Leave the frame to dry over a bowl (lenses up, so it doesn’t lose it’s shape while drying, you will know when it’s dry, lenses will be attached to the frame and hard as plastic.
The best way to attach the frame to the temples is by rolling two small balls of gumpaste/fondant mix, attach them in each corner of the frame with a bit of gum glue and place the frame on the temples. If you wish you can also do it with royal icing or melted chocolate just make sure the colors are the same, you don’t want white icing or chocolate to show.
THANK YOU FOR WATCHING, I HOPE YOU LIKE IT!
Selma S.
Selma S. ~ Little Apple Cakes
34 Comments
Gorgeous glasses!! They are brilliant, you are so clever!! Tutorial is brilliant, you did a great job!! Thank you for sharing!! :-) x
https://www.facebook.com/elliwarrencakedesign https://www.facebook.com/elliricci elliricci@hotmail.com https://www.instagram.com/elliwarrencakedesign/
this is excellent!! wow! thank you for this amazing and very different tutorial. x
'It Always Seems Impossible Until It is Done' Nelson Mandela http://www.facebook.com/CakesByFifi
Thank you for sharing! Excellent tutorial!
The Cake Nook
Thank you so much Elli, Fiona and Zoe, you are always so sweet!!! <3
Selma S. ~ Little Apple Cakes
Beautiful tutorial !!
Wow! Very clever!! Thank u so much for Sharing!
You’re so welcome ladies, I’m happy you like it!
Selma S. ~ Little Apple Cakes
Wow!!!! Amazing tutorial
http:www.facebook.com/page/ BouquetCakes
GREAT idea and amazing tutorial!! thank you for sharing!
Brilliant Selma, love them! Thanks for the tutorial xx
sugar and art - perfect combination! sugarmagic22@gmail.com
