Stacked Books Cake
Stacked Books Cake
 expand all pictures
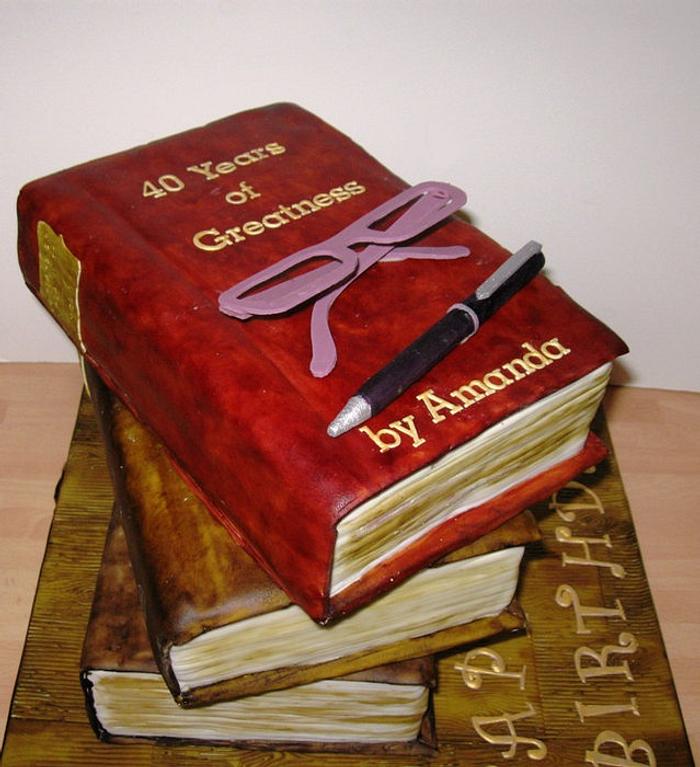
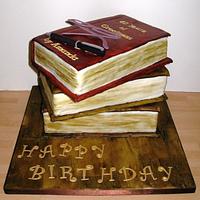
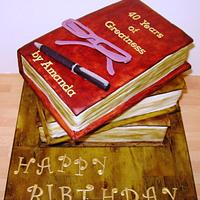
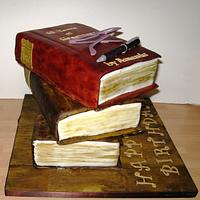
I baked three 9.5″ square cakes, two chocolate, one vanilla, each cake made one book with very little wastage. I cut two layers about an inch deep and kept the crusts for me (perks!) I then measured and cut through the cakes at 6.25 inches to make them rectangular, book shaped.
The offcuts were used to make the middle layer of each cake (no waste – see?) so they ended up as a nice meaty 3″ or so high. The chocolate one was sandwiched with chocolate buttercream, the vanilla one with vanilla buttercream and raspberry jam.
I cut foamcore boards a quarter inch wider and half an inch longer than the cakes – this was to give a quarter inch lip on three sides which would be covered with sugarpaste to give the impression of the back cover.
The boards were covered in foil and cakes attached with a dollop of buttercream, with one long edge being flush with the board. I shaved a little off the spine edge to round it marginally and added a groove a little way in along the top before crumb coating the cakes.
These were easy enough to ice (although they do look a little rough but I’m sure it’ll improve with practice and old books do look a little battered don’t they?) I rolled a strip of ivory fondant long enough to cover the three edges for the pages. I used a palette knife to knock into the edges to give the grooved effect of pages. It wasn’t quite obvious enough for my liking so I also used a sharp knife to score more lines. I then rolled out another piece of fondant (a little thicker than usual) to cover the top and spine. Once placed on the cake, I used scissors to cut the fondant slightly larger than the top of the cake to give the impression of the cover board, I used a finger to accentuate the groove near the spine. A thin strip of fondant was then attached to the edge of the boards, mitred at the corners and covering the edges to hide the foil.
At this point, they don’t look quite right being entirely ivory ‘n all. I used Sugarflair gel colours thinned down with alcohol to paint the ‘books’. Caramel/Ivory was used on the ‘pages’, this was quite thinned down to give a more subtle colour. When I came to painting the ‘covers’, I kept the gels quite thick to get a deeper colour and give it a leather look. I used a paintbrush to paint the edges of the board but a sponge to do the main cover. The three colours I used (from bottom to top) were Dark Brown, Caramel/Ivory (surprisingly dark and interesting looking eh?) and Chestnut (fabulous, rich colour!)
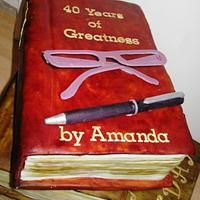
I cut a template from card for the spine labels and cut three shapes from ivory fondant. Using a cheap n cheerful letter press kit from eBay, I embossed the book title into each label and attached with sugar glue. Only the top book needed to have a proper title on the front, this was cut using FMM tappit cutters.
The glasses were made from pastillage using a template cut from card. A small bead of sugarpaste was glued to the edge of the glasses and the arms attached to the bead. A piece of bunched up kitchen towel was put under the arms to support them away from the eyepiece while they dried. The pen was half pastillage, half sugarpaste to give me more time to work with it. A simple sausage shape with one end rolled to a point. A small strip of paste to make the cap ring and another piece for the clip. Once dried, the ring, clip and pen tip were painted with silver lustre dust mixed with alcohol.
The cake board was covered in fondant and then embossed with a wooden plank pattern and then given a wash of thinned down gel colour paste. The cakes were then stacked on the board, secured with some royal icing, bubble tea straws were used as supports between the layers. Happy Birthday was added using tappit cutters again (my favourite font because it’s designed to go on haphazardly so you don’t have to fret about lining everything up). The pen and glasses were attached with a little royal icing
Carol, Maidenhead UK, http://offtherailscakes.co.uk
5 Comments
Great job!
Good job!
Facebook: http://www.facebook.com/outrageouscakestampabakery
wow… stunning realism and colouration
You must never limit your challenges, instead you must challenge your limits
good job, well done!
Xclusive, HTTP://facebook.com/xclusivecakes
Thank you all x
Carol, Maidenhead UK, http://offtherailscakes.co.uk


