Cake Boards #1: York Stone Effect
I received a lot of interest in this cake board for my latest cake which had a boot on it and so have put together a few pictures I took during the process.
1. Roll out fondant onto board. Mix the fondant to the lightest shade of the stone and add bits of darker shades, roughly moulded in to the paste (I use fairly old fondant mixed with tylose to avoid ripping of the fondant at this stage and also mix bits of old and dry fondant in to create more of an ‘outdoor’ look!)
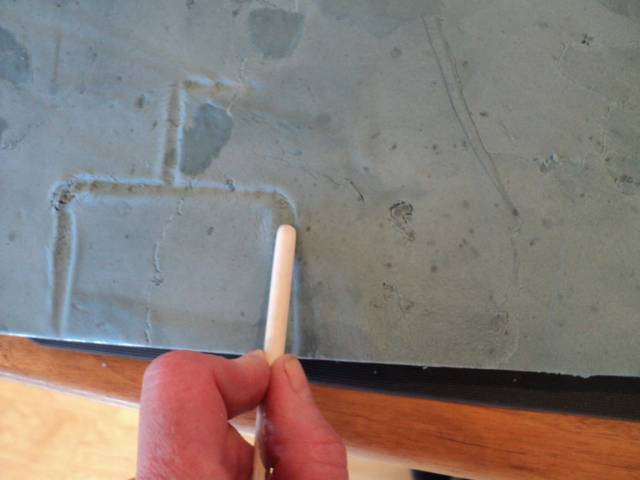
2. using the end of any round narrow instrument, mark the areas of paving out. I didn’t follow any picture or pattern, just made it up as I went along, so you can be as random as you like. Make sure you round off the corners of each ‘slab’ rather than make squares. smooth the lines where necessary.
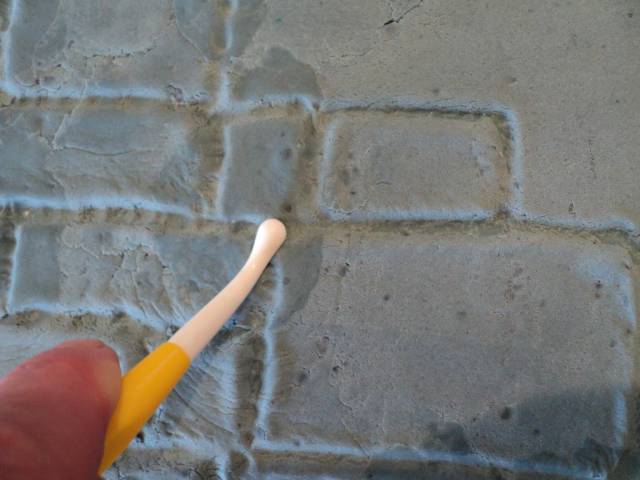
3. Use the flat of your hand to smooth the ‘stones’ a bit and work them closer together.
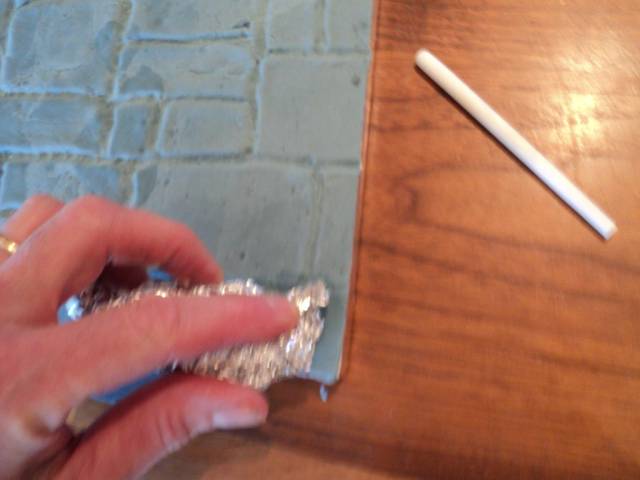
4. Crinkle up some foil and randomly squish it over the stones. Keep turning the foil and re-squishing so you don’t get repeated patterns.
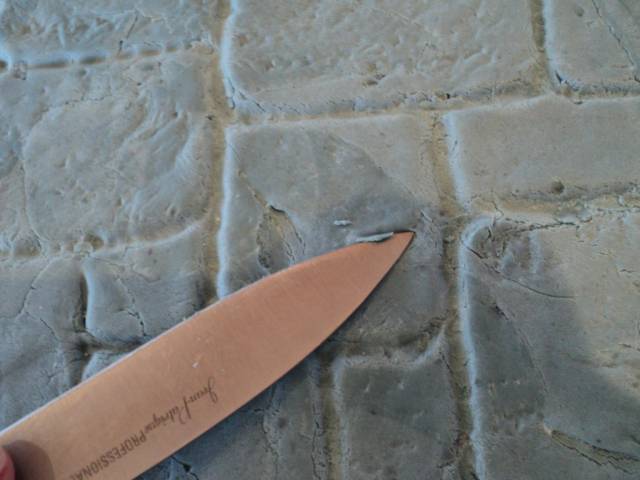
5. Use a knife to cut little pieces of fondant away to create dips in the stone if you wish.
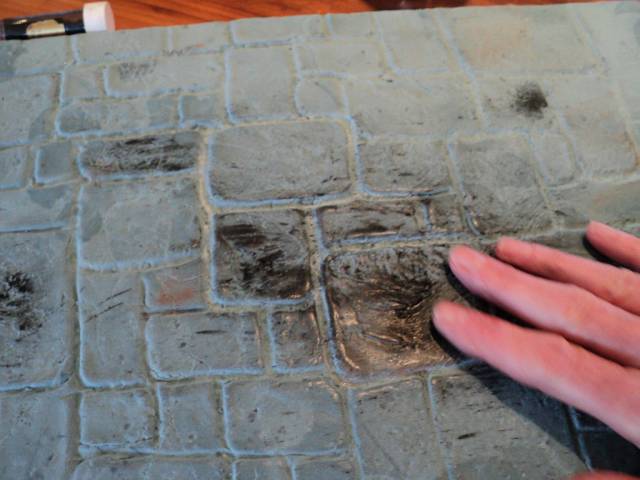
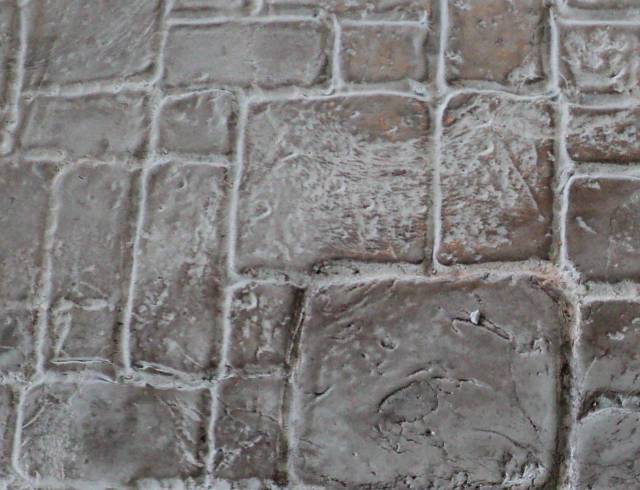
6. Create colouring of your choice. In this case I sprinkled Sugarflair dusting colours, starting with a little brown on my (super clean) fingers and dabbed here and there. I sprinkled black on the palms of my (super clean) hands and did the same, adding a bit more here and there. Then I sprinkled gin on my palms and rubbed all over the stones adding more gin where required to lighten areas. This can also be done with water but I prefer gin because it dries quickly, doesn’t leave a shine and also sterilises the board! If you have added too much colour, rub a bit more gin over and dab it off with a kitchen towel. As it dries it becomes matt.
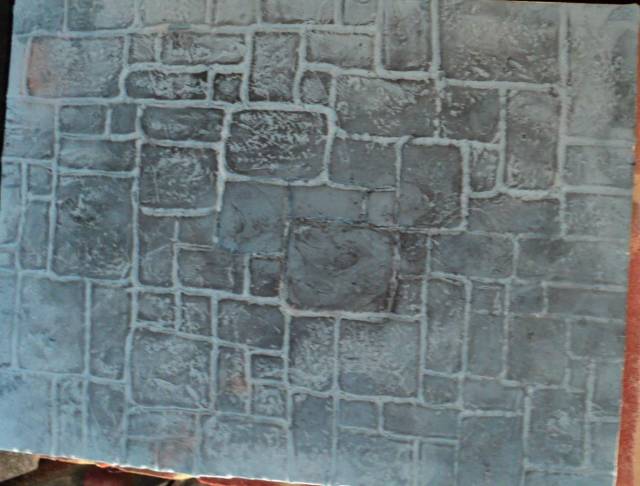
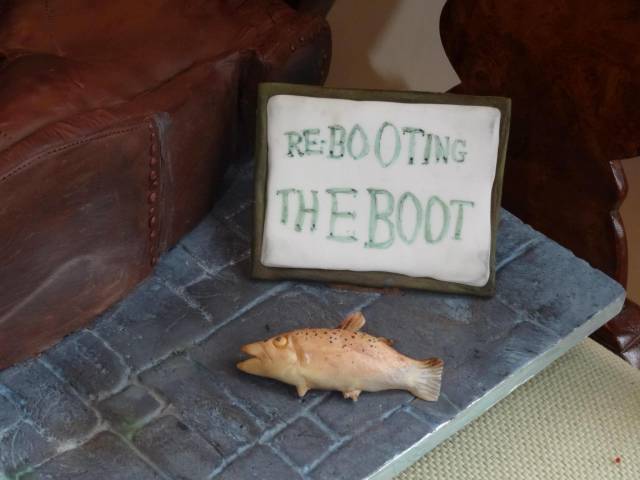
7. Here is the board with the boot on. I had to make a second board to match it because the boot was horizontal in the end instead of vertical (it was a very tall thin hunting boot and gave way to gravity! but they loved the cake just the same – thankfully I had time to rectify it).
Have fun! questions always welcome.
thank you for looking
xx
x
'It Always Seems Impossible Until It is Done' Nelson Mandela http://www.facebook.com/CakesByFifi
25 Comments
great idea, thanks so much for sharing it x
rere
thank you Marie 2 U Cakes. Always like to share tips! xx
'It Always Seems Impossible Until It is Done' Nelson Mandela http://www.facebook.com/CakesByFifi

Love this! Thank you. xoxo
Nina, Make Pretty Cakes, New Zealand, http://www.facebook.com/makeprettycakes
Thank you Make Pretty Cakes! xx
'It Always Seems Impossible Until It is Done' Nelson Mandela http://www.facebook.com/CakesByFifi

Good idea!!! Thanks!
Il Giardino delle Torte (di Silvia Costanzo), Palermo, Italy, http://www.facebook.com/ilgiardinodelletortedisilvia
Thank you Silvia!!! xxx
'It Always Seems Impossible Until It is Done' Nelson Mandela http://www.facebook.com/CakesByFifi
This is soooo helpful. Thank you
Rosie Cake-Diva
thank you Rose Cake Diva!! so pleased it is helpful! xx
'It Always Seems Impossible Until It is Done' Nelson Mandela http://www.facebook.com/CakesByFifi
awesome, thank you! I will def give this one a go.
Melanie - A Cake Creation, NZ, www.facebook.com/acakecreation

thanks for your sharing your tricks
Emmy, www.emmylovescakeboutique.com, Aruba