Tutorial - Brush Embroidery
What is Brush Embroidery?
It is a decorative technique used in sugar craft art. A paintbrush is stroked through royal icing leaving behind brush strokes which resemble stitching in fabric. It looks so beautiful and effective and it is not overly time consuming, what could be better!
How can I use Brush Embroidery?
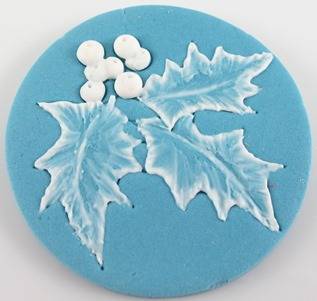
2D and 3D flowers, 2D animals and objects, ocean wave tips, fur (e.g. adding texture in a structured way) and as an outline/border. These images could be put on, for example cakes and cookies and pastillage plaques.
Fur:

Waves:
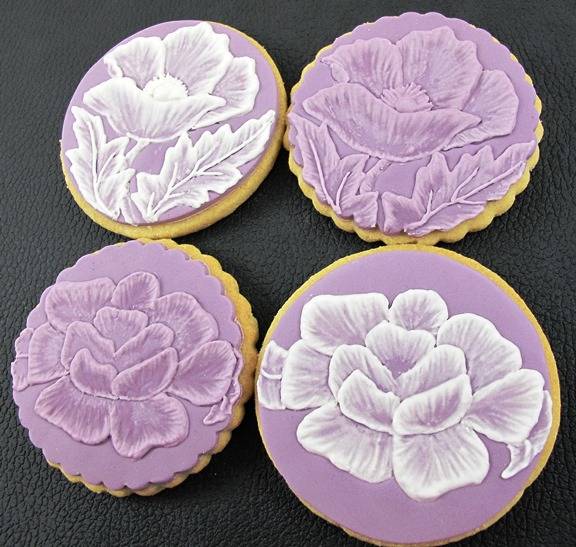
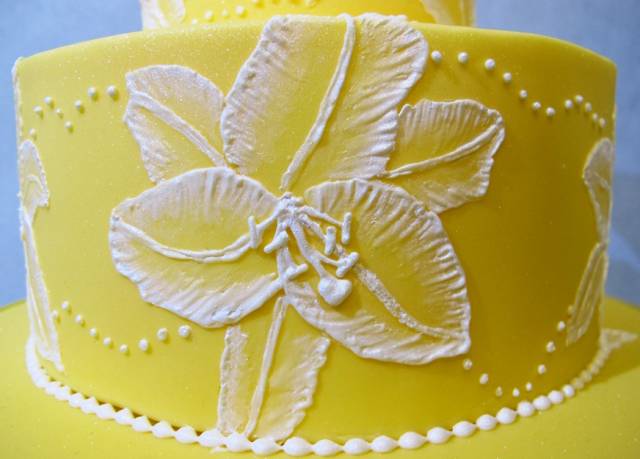
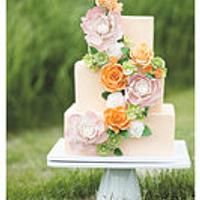
2D flowers on a cake:
What Materials do I need?
Soft peak royal icing, piping nozzles (PME sizes 1, 1.5 and/or 2 depending on size of image) and piping bags, gel colours to colour icing if needed, flat palette knife, a small-medium sized good quality pointed paintbrush used for sugar craft only (size 2 pure sable AES is ideal), cooled boiled water, paper towels, piping gel (optional)
How do I transfer the image to the sugarpaste or pastillage?
NOTE: UK residents -only use pencil on a pastillage plaque (e.g. items removed and not eaten), yes it is non-toxic, but it is not classed as edible (see FSA guidelines http://www.food.gov.uk/news-updates/news/2012/apr/glitter)
1. For a freshly covered cake, cookie or rolled out pastillage;
- Emboss the image with a patchwork cutter or metal cutter
- Transfer the image using silicone/baking parchment paper (Trace the image with and edible pen on parchment paper -it will bead, don’t worry, reverse it and smooth onto the cake with your hand gently, it should transfer This if from Lindy Smith’s book ‘The Contemporary Cake Decorating Bible’ which I recommend highly for your collection, it is a good all round book, covering most techniques)
2. For a dried sugarpaste/pastillage surface;
- Scratch the image on free-hand using a sterilised pin/scribe
- Scribe (series of dots outlining a traced image which is placed over the surface of the sugarpaste) the image on the cake using a sterilised pin/scribe
- Draw on the image free-hand using an edible pen (us this only if the icing is darker than the colour of the pen otherwise it will show through and spoil the look of your work)
What consistency should the royal icing be and why?
Use soft peak royal icing made from bridal icing (confectioners) sugar (or the equivalent in your country) and dried Meri-white/egg white/albumen if possible. Bridal icing sugar is sifted several times so it does not need sieving before use and has a finer particle size and as a result is much nicer to pipe with.
Icing should always be ‘paddled’ before adding it to a piping bag. This serves two purposes, firstly, it re-beats the icing to off-peak consistency if it has been sitting a while and secondly, it gets the air out so you can pipe continuous lines without them breaking on you. Mix any gel colour in beforehand or whilst paddling. To slow down the drying time of the royal icing/give you longer to work, you can add a small blob of piping gel whilst paddling.
If you have no idea where to start with Royal icing and don’t know how to make it get yourself Eddie Spence MBE’s book ‘The Art of Royal Icing’ or use the internet for free information, just make sure it is from a good source!
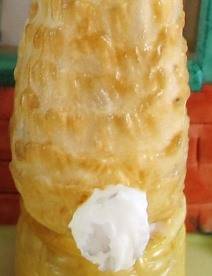
The picture sequence below shows paddling the icing, push the flat side of the spatula down and in a left-right sweeping motion, this will beat and remove air at the same time, it will go from looking fluffy/spongy/matt to smooth/shiny/no air pockets. This will take around 30 seconds to a minute depending on how much you are paddling

How do I do it then?
NOTE: Your image and icing should be ready at this point.
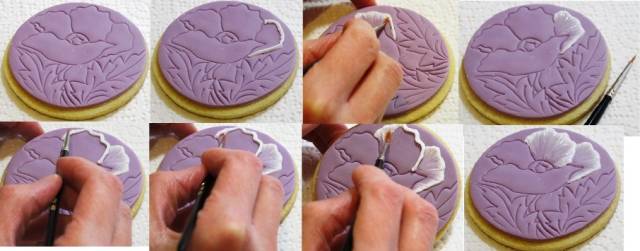
Apply royal icing to your first outline (scratch pipe or drop line piping depending on if the image is on the side or top respectively), how much you apply will depend on whether you are aiming for an outline, delicate or heavy effect.
outline example:

delicate example:
heavy example:
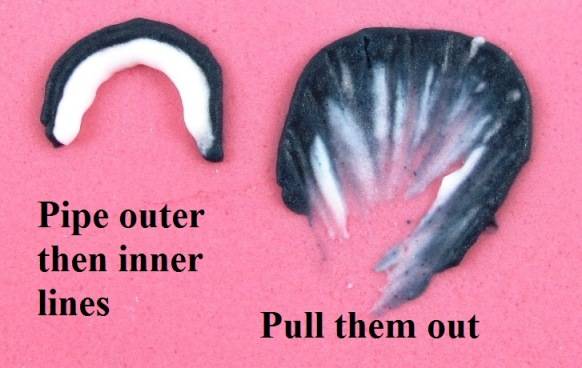
- If you are piping petals, pipe round one petal edge at a time, if it is large petal apply you may want to work on one half at a time
- For leaves pipe one side of the leaf, work on it then pipe the other side of the leaf
- See later for stems
Dip your paintbrush in the water then dab it on the paper towel, you want the brush to be damp only not dripping wet
Use the damp paintbrush to pull/stroke the icing in from the inside edge of the icing towards the centre/base of the subject on the direction of the general shape of the object and/or its veining if a flower/leaf.
- NOTE 1: The outer edge line of the icing should remain unbroken and you want to see the brush strokes.
- NOTE 2: If you do not get defined lines either the brush is too wet or the icing is too runny/old. * NOTE 3: You want to icing to fade in towards the middle/base , for an outline it fades almost immediately, for delicate it fades by about 1/3rd to half way in and for heavy you want to fade it in ¾to almost all the way to the middle.
- NOTE 4: Re-damp the paintbrush whenever the brush starts to drag through the icing/no longer pulls it.
- NOTE 5: if the icing has not pulled in as far as you want, then apply more to the edge and pull it in, DO NOT blob it on in the gap, this will not look good!
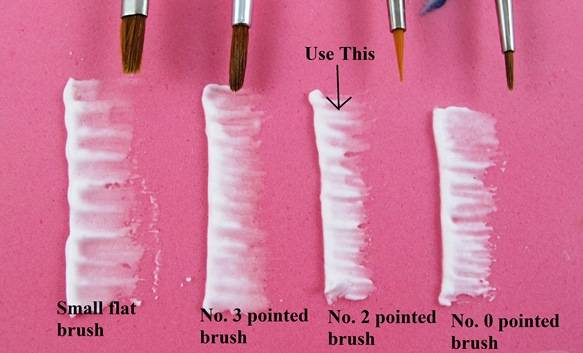
Different size/shape paintbrushes will give a different look but the no. 2 brush is my favourite all-rounder.
The order to pipe is:
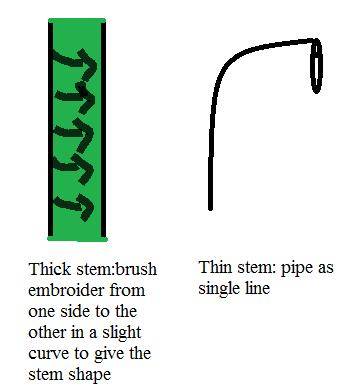
- stems first (example below) NOTE: for thick lines you could also pipe lines next to each other and blend them together with downward strokes –
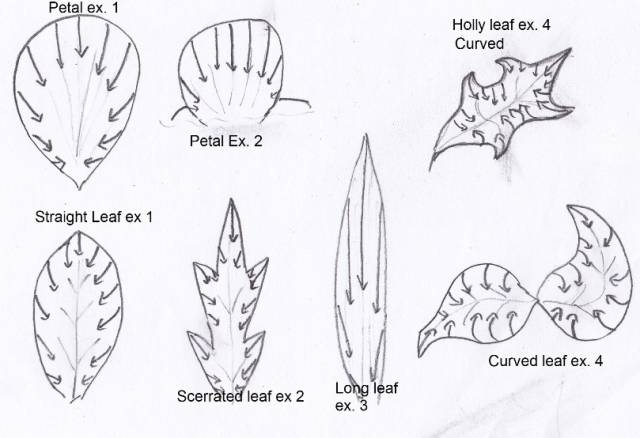
- Then work from the background to the foreground of your chosen subject, for example for a flower, do the outer petals, then move to the inner ones and finally pipe the centre. NOTE: if there are leaves directly behind the petals these should be done first as they would be most ‘outer’. Lastly, you can do any leaves attached to the stems. Examples of the direction/s to pull the icing is shown below;
- If you want to pipe lines for the veins for the leaves or other line detail (you may want to use a smaller nozzle size to do this so it looks delicate), do so once the brush embroidery on that part is finished. You can also create veining by dragging the wet brush though the icing at the centre to essentially take it away and reveal the base (like a negative) which is most effective if piping one colour onto a different coloured base. Flower centres can also be added when flower is complete (let it dry first if you do not want to disturb your brushwork). Add texture to flower centres by piping them as many small dots. Stamens can be piped as scratch piped or drop lines (see pictures for examples).
To add further interest and definition to your work, you can do the following:
- Paint once dry with pearl, gold or colour (coloured edible dust dissolved in re-juvinator spirit/iso-propyl alcohol or confectioners glaze so it does not dissolve the royal icing!)

- Bush strokes in different directions for adding depth and movement
- Make icing thicker/more raised on one side to give illusion of greater depth or apply different amounts to different parts of the image to add more perspective.

- Apply one/several colour/s of icing to a different coloured base
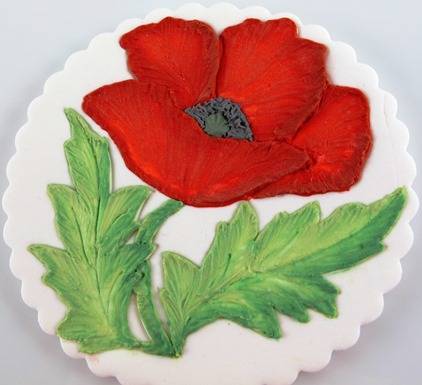
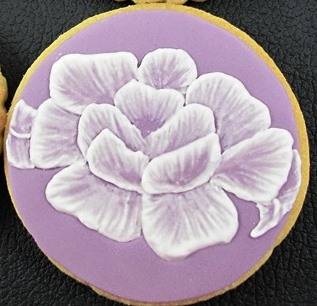
- Add shading detail to the image using a darker shade of icing (pipe on one side and pull in once first colour is applied, only put on one side – imagine which direction the light is coming from and this will help you decide which side the shadow/shading will be) or paint on shading after applying same rule. The coloured picture above has shading, and a graphical representation is shown below.

- Pipe two different coloured lines of icing one inside the other and pull in to create a two-tone effect, e.g. on petals
- Pipe onto the edge the edge of cut-out dried and veined petals for a 3-D effect and stick the flower together giving extra depth to the flower and vintage feel. This amazing idea comes from Collette Peters Craftsy class ‘Vintage Cakes modern Methods’ which I took and enjoyed very much; http://www.craftsy.com/class/vintage-cakes-modern-methods/127
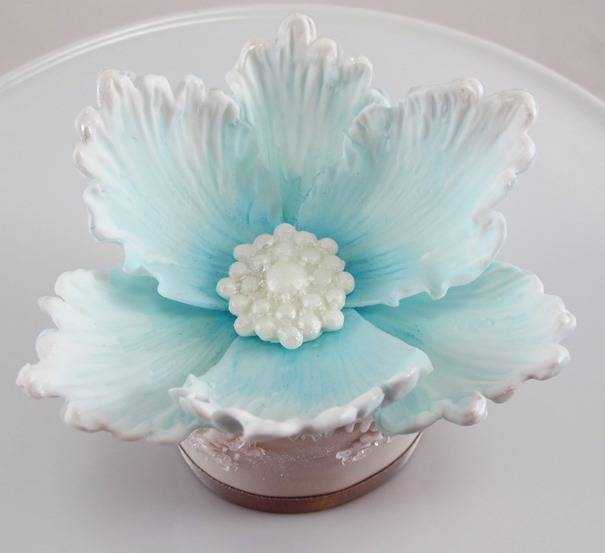
I used a peony cutter and baby blue Sugarflair coloured gumpaste, dusted the base lightly with dark blue dust and brush embroidered the top. The centre is one of the Karen Davies broach moulds painted with pearl and there is also pearl highlights painted on the petal tops
15 Comments

Great tutorial thank you for sharing

Such a lovely and detailed tutorial! Thank you so much for sharing!

Very nice tutorial, thanks!!
El Postre Cakes & Sweets

awesome tutorial thanks
This is a great, great tutorial!! Thank you <3
thea jo, http://www.facebook.com/bakermamacakes, www.bakermama.com
thanks so much for taking the time to leave a comment x

Wow, this tutorial is amazing! Thank you so much for sharing it with us!!
Toni, Pennsylvania, https://www.facebook.com/WhiteCraftyCakes

What a wonderful tutorial!
Excellent tutorial! Very detailed! Thanks for sharing! xxx
Pauline Bakes The Cake! http://www.facebook.com/paulinescakes
Fantastic tutorial! I love how detailed you were, thank you :)