Gum Paste Flowers #4: Carnations (not made on floral wire)
To make (non-wired) gum paste carnations, you’ll need: gum paste, rolling pin, small modeling tool (or popsicle stick, chopstick, etc.), carnation cutter or a scalloped round cutter, shaping foam, dusting pouch, dog bone/ball tool, veining tool, frill stick, gum glue, food safe brush, empty egg carton.
Making the Base:

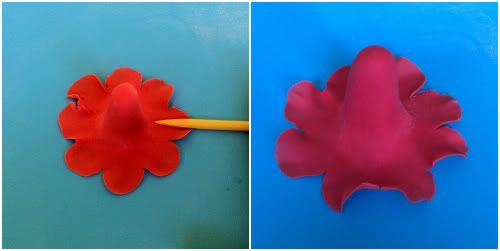
Dust work surfaces to precent gum paste sticking. Roll a marble-sized (or larger, depending on the size of carnation needed) ball of gum paste. Elongate the ball and then flatten one end to form a golf tee shape. Place the flat end on work surface, and use the modeling tool to roll out the edges in all directions, until the gum paste is very thin around the handle.

Position the cutter so that the base is centered, and cut. Move base to shaping foam, and use a dog bone/ball tool to thin and widen the edges. Either keep the base on the shaping foam and use a veining tool to ruffle the edges, or move it to your work surface and use a frill stick/toothpick to ruffle up the edges. Leave the base on a flat surface to dry. It needs to be completely dry before you start adding petals.
Adding the Petals:
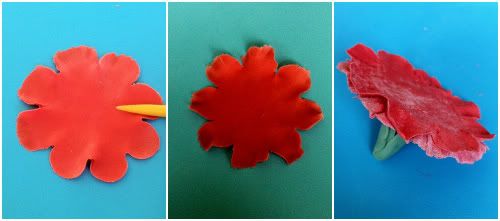
Cut multiple petals and keep extras covered until ready to use. Place petal on shaping foam, and using a dog bone/ball tool thin the center, and then thin and widen the edges. Move off shaping foam to ruffle edges with a frill stick or toothpick.

Brush the flat end of the base with a little gum glue, and add a petal, using your fingers or a modeling tool to fluff the edges. Ideally, you want each petal to dry completely before adding the next. I like to place my carnations in the cavities of an empty egg carton to dry.
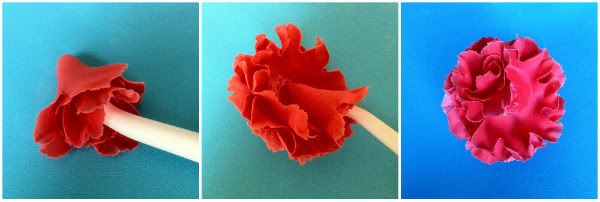

Keep thinning, ruffling, and adding petals, until you’re ready to fill in the center—for me this is usually after the fourth or fifth petal. For the last few petals, I like to fold them into quarters and position them around the center of the carnation, using my frill stick to fluff the petals and fine-tune their positions.
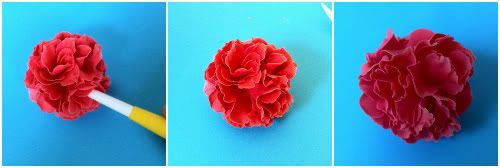
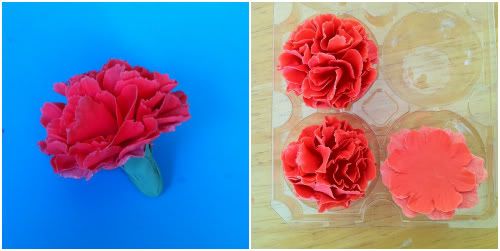
Adding the Calyx
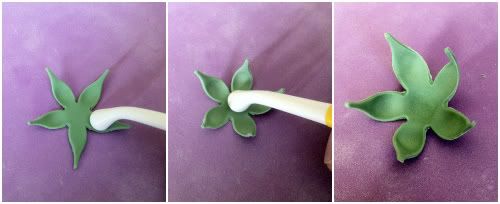
Roll green gum paste very thinly and cut with calyx cutter. Place on shaping foam, and using a dog bone/ball tool thin, widen, and cup each petal on the calyx, and then cup the center. Keep the tips pointy.

Lightly brush the base/carnation stem with gum glue and position calyx. I usually add my calyx before building my carnation. If you put it on last, just be careful not to break the carnation petals.
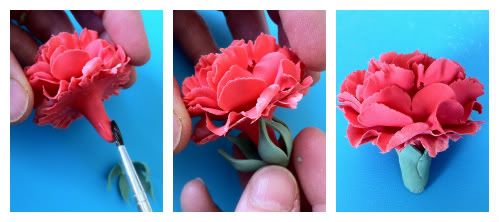
I made a video playlist on YouTube demonstrating this technique:
4 Comments
Thank you so much for your tutorial, and for sharing your flower making skills!!
Toni, Pennsylvania, https://www.facebook.com/WhiteCraftyCakes
Thanks for posting ;)
-- Michal, http://cakesdecor.com | My Facebook: http://www.facebook.com/michal.bulla
thank you for sharing..beautiful Carnations!!
Deemz, https://www.facebook.com/pages/Deemaz-cupcakes-etc/206346586043185
Great tutorial cant wait to try this!!
