
transparent glass effect
http://zuccheroinfesta.blogspot.it/2014/09/effetto-vetro-trasparente-bicchiere.html
Tutorial edible transparent glass
needed:
- 12 g of gelatin (gelatin sheets)
- 1 brush for food
- 40 ml water
- 1 cup
- food film
- time and patience q.b. ;)
Process
We start hydrating the gelatin in the water. (I proceed by cutting the sheets into strips, put them in a dish and cover it well spaced with 40 ml of water).
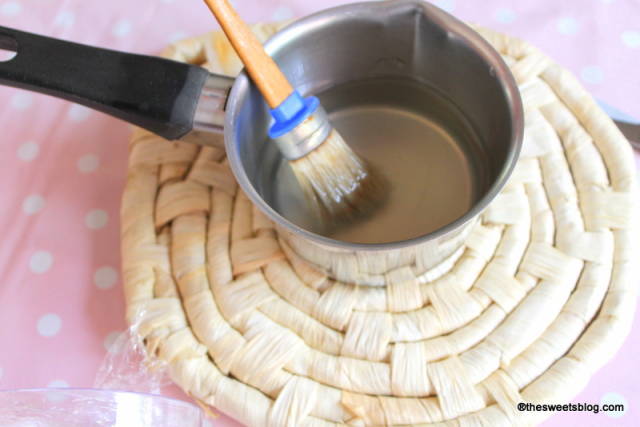
Wait 10 to 15 minutes, then move the jelly in a small saucepan and let it become liquid and transparent as water. Now take a glass, wrap with plastic wrap.

please join the film as best you can, without leaving creases. Well then Dip the brush into the gelatin and
started to fill the glass with precise brushstrokes and thick.
http://2.bp.blogspot.com/-EjSHX-vml04/VCWZX8jtm_I/AAAAAAAAu4w/YXQfm2u8924/s1600/1-IMG_7768.JPG
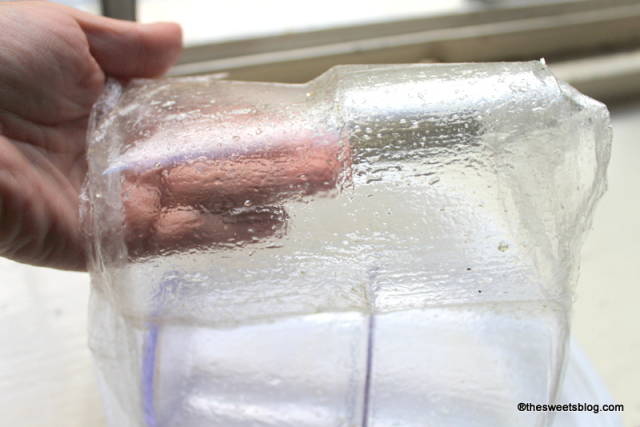
There seem to be coated with water, but do not worry. Repeat this process two more times after five minutes, if in the meantime the gelatin has solidified into the saucepan, melt it, allow to cool and repeat again. Let dry the glass a couple of hours and repeat the process again, then wait for it to dry again, and repeat the steps again until you finish the jelly inside the pan.
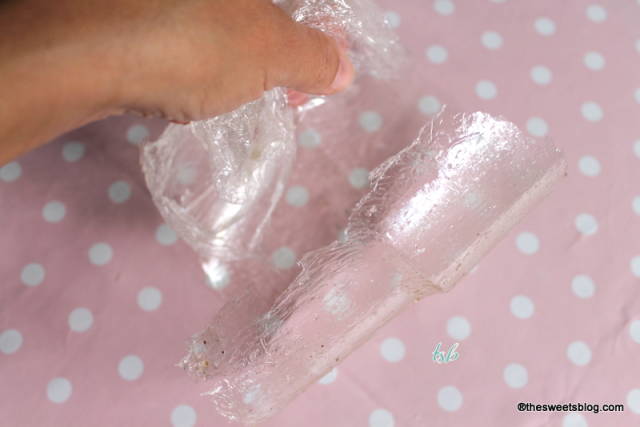
It will help you know that you can put the pan in the refrigerator during breaks, you can go out, make your comfortable, continue the day dopo..insomma relax .. the glass and there waiting for us. When you finish brushing all the gelatine and the glass will look completely dry to the touch, start with phase three, remove the film from the plastic cup with great delicacy ..

Next
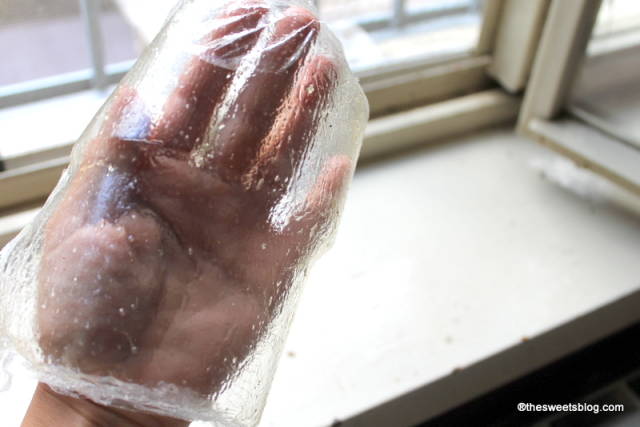
Now, let’s move to the last phase, gently unplug the film from gelatin ..
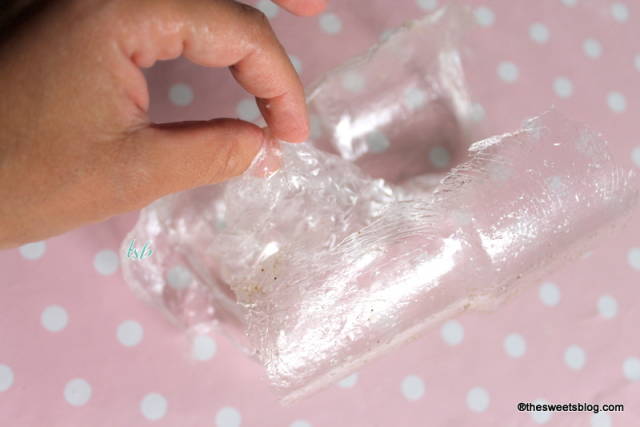
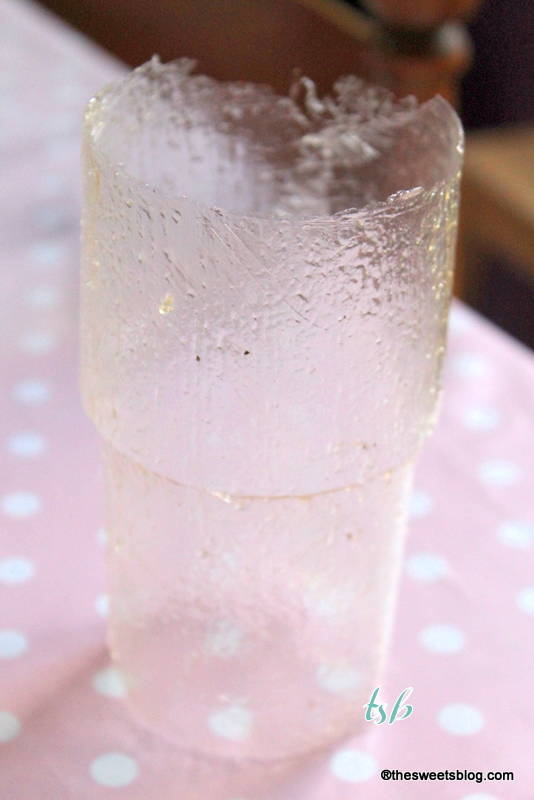
And here it is TADAAANNN …: D
Questions? Oh yeah … so I attached the back of the cup with jelly, the kind that we use on waffles wafer.
Important: With regard to the imperfections can proceed in three ways, in my opinion, 1) there frigates and cover with some decoration, I know, granulated sugar on the rim of the glass for example .. 2) cut out of the rim of the glass with scissors 3) rebuilt the damaged parts by repeating the procedure only on the affected part.
Ginestra - http://www.ginestra.ifood.it/
9 Comments

Looks amazing! Thanks for sharing
Kath's Cakes https://www.facebook.com/pages/Kaths-Cakes/369485736483786

thanks so much…. I have my first isomalt project imminent, this will be so useful
You must never limit your challenges, instead you must challenge your limits

thanks for sharing! Ü

Wonderful thanks for sharing!
Kristyne & Sofia

Interesting. I can see using it partly filled with soft royal icing as a glass of milk for Santa Claus.
Shirley
Good ideas Cakeicer!
:D
Ginestra - http://www.ginestra.ifood.it/

Fabulous tutorial!
Tampa, Florida facebook.com/pages/curiaussiety-custom-cakes
Amazing, thanks for sharing
Thanks !!! :)