
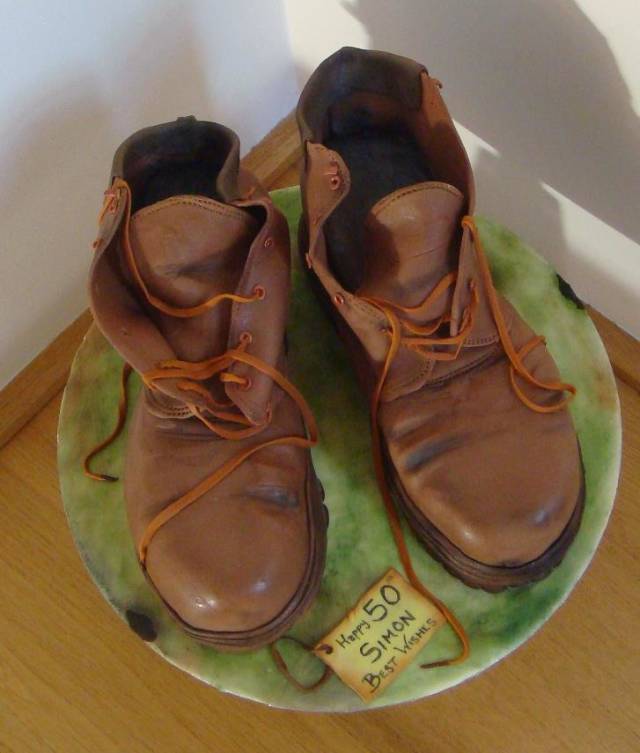
3D Cakes #2: Making Simon's Mountaineering Boots
These have been my most popular cake and CakesDecor very kindly selected them as Editor’s Choice last year. I have been promising for ages to put together a tutorial to making these for those of you who have said ‘I can’t do that’. I hope you will be able to see that, yes you can. All you need is a cake, a pair of real boots as ‘models’ on a stool. Paper. Ruler and cake decorating edibles
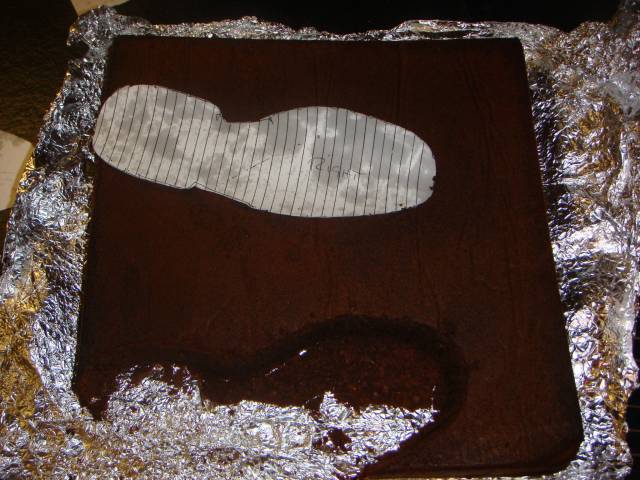
1. Cut out the shape of a shoe sole. I did this by placing my boot on the paper and marking the outline with a pencil. I then decided what size I wanted to make the cake and scanned the sketch and saved it as a jpg. I then placed that onto an A4 Word document and (holiding the shift key) pulled the corners in until it measured the correct size. Your page needs to be on 100% view. I used a 10" square chocolate fudge cake for this. Simply print out two if you require a left and right and turn one of them upside down.
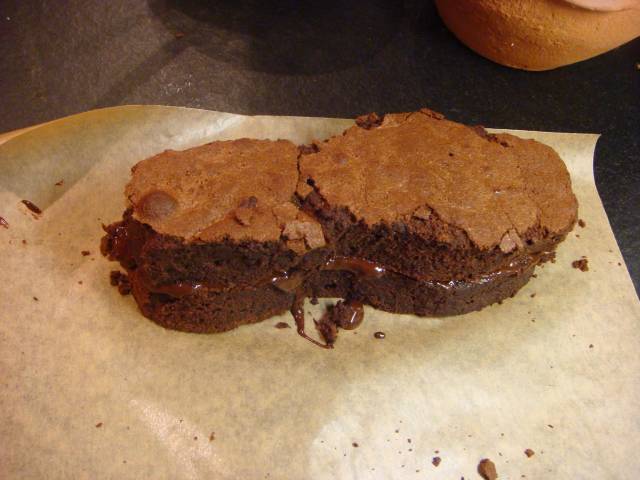
2. Cut layers of cake, applying ganache in between. making each layer slightly shorter to match the shape of the shoe until you reach the height you require.
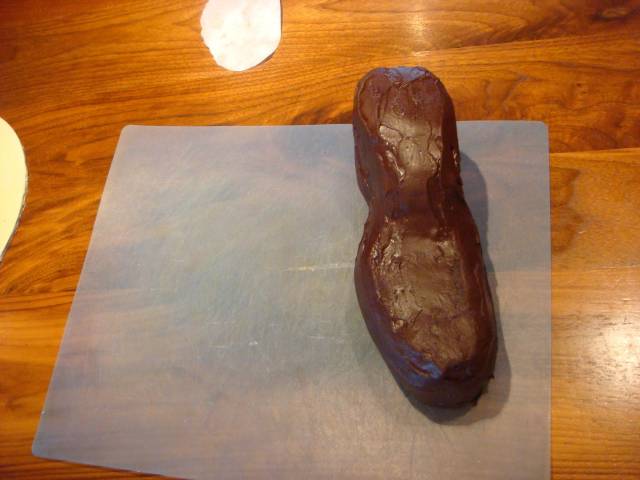
3. Cover the boot(s) with ganache and leave to set overnight if time allows. In the morning smooth the surface using a hot knife dipped in boiling water and leave to set again.
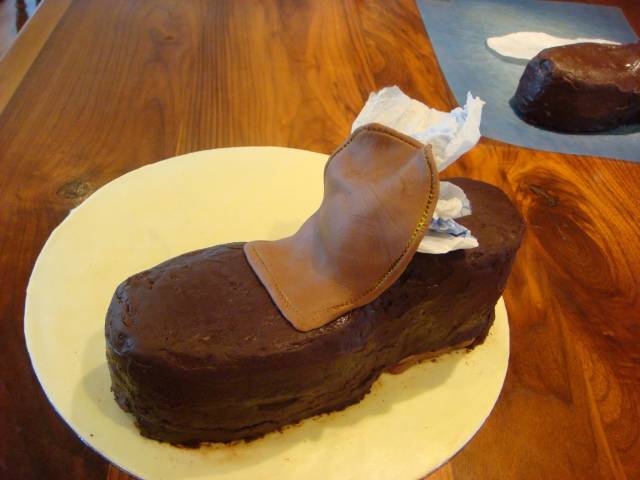
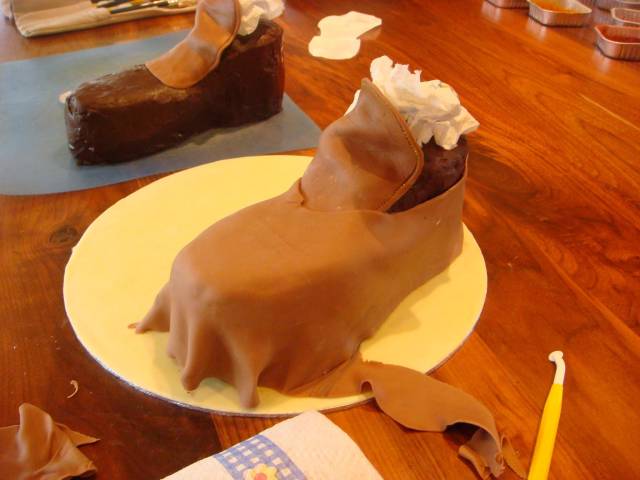
4. Start making the ‘uppers’. Inspect the real shoe to see which order the stitched pieces of leather are sewn on to the boot to decide which areas of the upper to apply first.
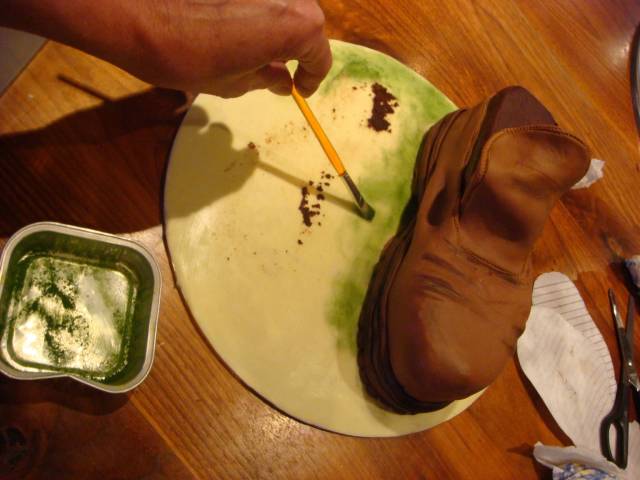
5. Continue to add the ‘leather’. Apply ‘stitching’ as appropriate using either a stitching wheel or small fork or even a toothpick (time consuming but does the job!). Make creases and dirty marks on the boots as you go along if required. I dipped my stitching wheel into yellow colouring powder to introduce ‘yellow thread’. Slightly lengthy processes as you have to keep applying the colour to the stitching wheel.
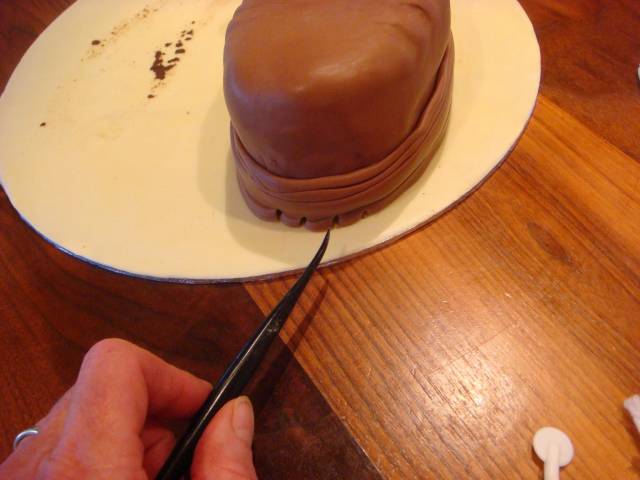
6. Add a strip of paste around the bottom of the boot and press it close to the boot to form the outer sole. mark with a tool to create ‘studs’ and crease lines.
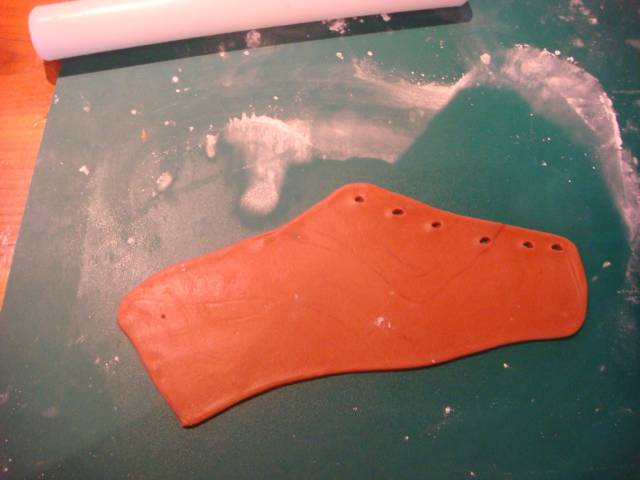
7. Make the sections for the lacing and poke holes through while still soft. Apply stitching and allow to ‘sit’ for a short while before applying to the boot cake to make it easier to handle.
8. At this stage I coloured the board with greens and browns before adding the second boot (which I made at the same time as the first one).
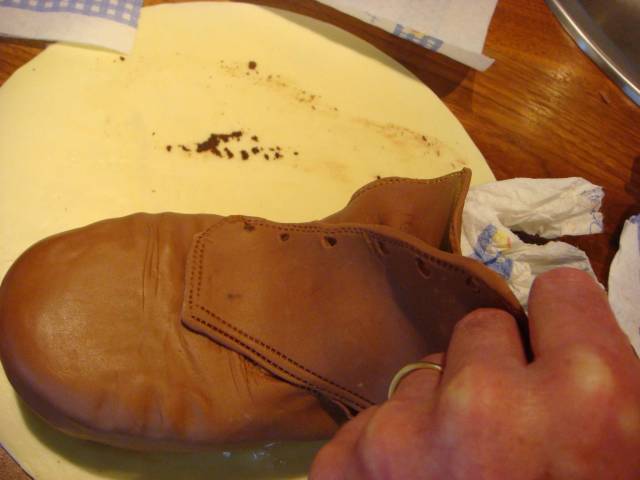
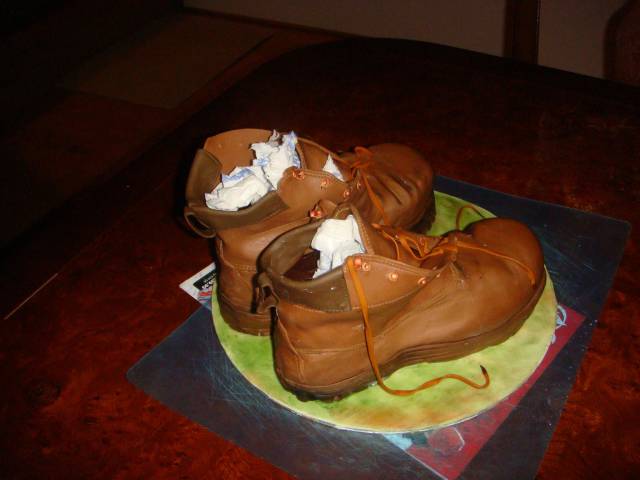
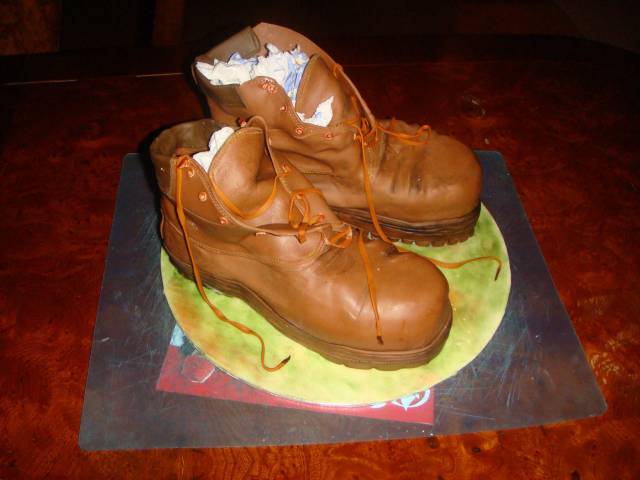
9. Continue to add the features of the boots, including eyelets and laces. Laces are easily made by rolling long strips of paste and cutting as long a ‘lace’ as possible. Cut this into the sizes required as you go along ‘lacing’ the shoe (I didn’t take photos at this stage as time was running out!). Leave to set overnight if possible with the kitchen roll in places.
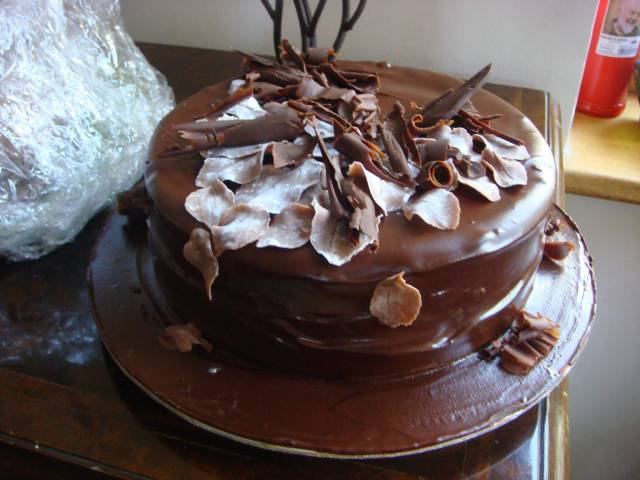
11. The essential ‘cutting cake’ (they won’t want to cut their boots straight away!). This was being shared at my husband’s workplace and they were very appreciative of this or they wouldn’t have had any cake at all because he wanted to take the boots home to his wife and daughter to enjoy.
12. And the final boots. I made the label out of sugarpaste and the words are a standing joke… not intending to be as formal as it looks!
I hope this is helpful. There are more tutorials on my Facebook page and at some point I will put a handbag tutorial together for this site. This tutorial can also be found on my page
https://www.facebook.com/media/set/?set=a.419123754838496.97298.183774861706721&type=1&l=10c808cab7
Thank you for looking! If you make any boots using this guide I would love you to post them on my Facebook page.
xxx
'It Always Seems Impossible Until It is Done' Nelson Mandela http://www.facebook.com/CakesByFifi
18 Comments

Awesome Fiona! Thank you for sharing this:) You are the master boot cake maker!
Wow this is stunning, so life like. Thank you so much for sharing such a wonderful tutorial.
Roo's Little Cake Parlour
Wow! A tutorial for my favorite pair of boots? You are awesome, Fiona! Thanks for sharing! :) <3
Pauline Bakes The Cake! http://www.facebook.com/paulinescakes
thank you so much Delicia Designs, Roostorm and PaulinesCakes! What lovely comments and I am so, so pleased that you like the tutorial! thanks also to Michal for so kindly sharing it on Facebook! It’s good to share xx I rather like the title of ‘Master Boot Cake Maker’! lol! :) xx
'It Always Seems Impossible Until It is Done' Nelson Mandela http://www.facebook.com/CakesByFifi
Thank you for sharing :)xx
Wanda-Bee

Thank you so much for sharing this amazing tutorial! You make it so easy to understand and follow, that even I might attempt to make some boots if I get a cake that calls for them!
Toni, Pennsylvania, https://www.facebook.com/WhiteCraftyCakes
Great tutorial, thank you so much for sharing
so glad you like this and find the tutorial easy to follow! Teaching is my first love and it is so important to me that the message is clear and easily understood. Thank you so much for the comments. I really appreciate it! xx
'It Always Seems Impossible Until It is Done' Nelson Mandela http://www.facebook.com/CakesByFifi
Awesome thanks for sharing
My pleasure Ciccio!! xx
'It Always Seems Impossible Until It is Done' Nelson Mandela http://www.facebook.com/CakesByFifi