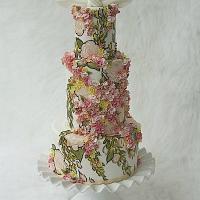
Tangled cake tutorial
Hi everyone! This is my first real tutorial and there are some missing photos so bare with me. I hope I have explained this clearly enough and that it’s not a terrible bore. :) Here we go:

I started by tracing and cutting (3) 12" circles and (2) 3 1/2" circles out of foam board with an xacto knife. The 12" will be part of the base of the cake and the 3 1/2" will be for top of tower/roof.

I then glued the 3 foam board pieces and (1) 12" cake board together and taped just so it would hold in place more, but I really didn’t need to do that.

I placed my pvc pipe/metal piece on cake board and traced where I wanted it. Then I cut through the top cake board and only 1 piece of the foam board, just enough to fit flush with the metal disk. (I would do this before putting the board together next time as having already glued the boards together this part was a bit of a pain)

I put some glue inside the cut out area and placed the piece snugly inside. Really I don’t think the glue did anything but to give me a little bit more peace of mind.

Then I used good ol duct tape to secure in to place. (Originally I was going to use a wood board and screw these pieces in. But when I talked to the gentleman at the hardware store and he had asked the weight, he suggested the duct tape as I didn’t need that much support and my client was on a budget)


I then measured the distance of where the hole was for the pipe to be inserted and cut out just enough for this cake board to fit on the top. (You will want to cut two of these, 1 to be used for underneath the cake) I also covered the pvc pipe/hinge/metal disk with duct tape and then glad press and seal to make sure it was not going to touch any food in any way.

I covered the base in reyonlds freezer paper. _(I cut the paper to about a 15" circle and then cut 1" strips all around so there would be enough to wrap around the base. I taped them down to the underside of the cake board). _

Then I changed my mind and decided I wanted to use pink scrapbook paper for the board after all, so I covered the cake board with the paper.

(Peggy from Peggy Does Cake has a fabulous tutorial on how to cover square cake boards which can be found here: https://www.facebook.com/note.php?note_id=254931557877651 ) I prefer round cake boards, so I cut 1" strips all around the cake board and fold the contact paper underside making sure to work out all creases. I’ll post a better photo tutorial on how I do that this upcoming week.

Then I added my ribbon and voila! Support board is ready for cake and RKT!

I used my other cake board that I had cut earlier for my cake and put on top of my cake. I cut out the circle so that I could place the cake on the structure easily. I cut, filled, iced and smoothed my cake to prepare for the rosettes. I slid the cake on to the structure and got to work on the tower.

Then I put icing all around pipe and built my RKT around. (At the top I had secured the other hinge/metal piece for the top of the house. I apologize for not getting photos of that part)

I rolled out a long strip of fondant and smushed on to the RKT and added lines. I didn’t smooth out the RKT because I wanted a messier feeling to this part of the tower.

I wrapped a thin layer of fondant around tower and the top too so it would be easier to secure the circular gray ‘stones’ later.

Started by painting this section yellow. I added some copper and brown after this too until I got the color I wanted. I used bunched up paper towel to soak up extra food coloring and give a more textured look.

I then started making flowers. (You could of course do this well in advance) So I use these awesome Ocello sponges (not like your normal gross smelly sponges) and always buy tons at a time and keep on hand. I had ruined my flower foam piece and decided I would try out one of these sponges. So I wrapped some press and seal around it and tried it out. It works great! So I have used it since. It leaves a nice marking on the backside of the flowers too that gives it more of a textured look. I dabbed each flower with a small bit of water and placed an edible pearl inside of each one.


The finished cake!
I had so much more I had wanted to do on this cake, but with all that happened with the top falling off I just simply ran out of time. There are a lot of steps missing. The top of the tower had fallen off at one point so while I was busy fixing that I didn’t even think to take any more photos. I realized I had not inserted the top metal disk firmly enough and this caused it to loosen. If I had to do this again, I would put the ENTIRE structure together before covering in duct tape/press and seal and adding RKT.
So for the gray covering on the tower I cut out a bunch of little circles and placed them all around the tower, mis-shaping them to look more like cobblestone/stone. I added on the window and vines/flowers. There is also ‘moss’ on the other side. For the roof I shaped it with RKT and secured on top of the white 3 1/2" board with icing. (Which I then put on top of the silver disk that is on top) I then cut out 3 different color strips and cut in to squares, different sizes. Added them all around the roof. I also put a thick skewer down center of roof to secure better.
For the base of the cake, I did rosette swirls using a 1M tip. Before adding the rosettes I sprayed a light mist of water on the cake so it would be tacky enough for the rosettes to stick. I start on the very bottom making the rosette end where the next will begin, so you do not see your ending part of your rose. Then I added a little flower in between where each rose meets and a small edible pearl in center of each rosette.
After the cake was all done, I took some vanilla extract and added in luster dust and mixed it together. I then painted the whole tower and all the flowers with it to make it sparkle. Client had picked out toys for me to place on/around cake. There are quite a few more photos showing how I made the RKT, fondant and filled/iced/smoothed the cake. Trying to get those all uploaded and organized on to facebook page but this link should work for now:
https://www.facebook.com/media/set/?set=a.401582376520814.100475.100000071655356&type=3
Tiff - MA www.facebook.com/sweetbeecakery
5 Comments
Great tutorial. Even I understand it :)
-- Michal, http://cakesdecor.com | My Facebook: http://www.facebook.com/michal.bulla
Thank you very much for the tutorial!
Thanks Michal! I’m hoping I worded everything easily enough. :) You are very welcome AngieW!
Tiff - MA www.facebook.com/sweetbeecakery
Thank you so much Tiffany for the tutorial. I understood it perfectly!
Toni, Pennsylvania, https://www.facebook.com/WhiteCraftyCakes
Thanks for the tutorial a have been wondering how to make that cake !!!
M&C's Petite Pâtisserie


