Cake painting #8: Little Red Cap – cake topper
Hi all!
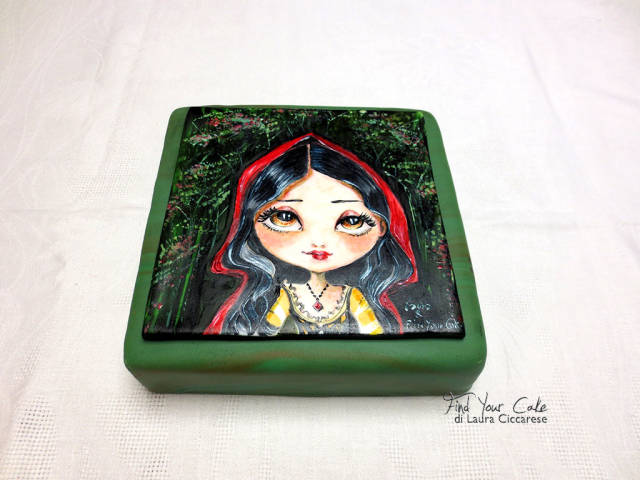
Today I want to show you a fondant hand painted cake topper based on my version of Little Red Cap.
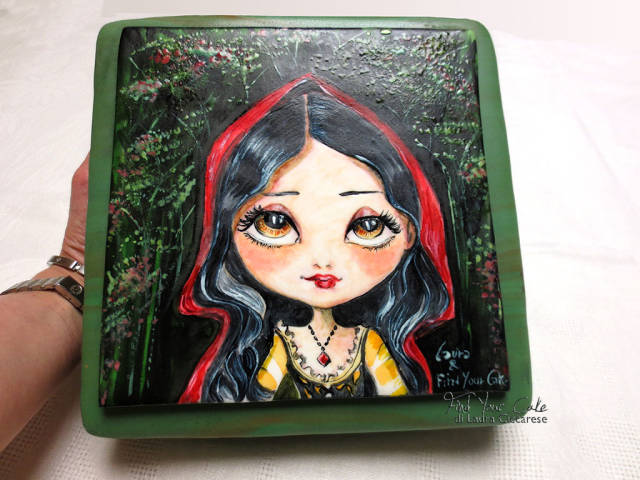
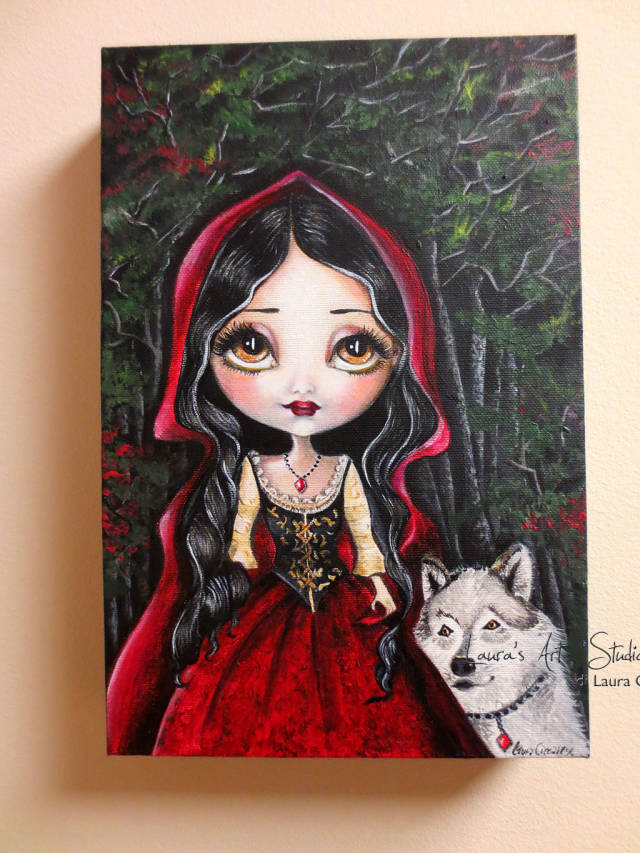
The idea was born on paper, a sketch made on a train trip, and then I painted it on a canvas with acrylics but, as someone of you knows, I love to paint on any surface, and so I painted it on fondant to make a cake topper.
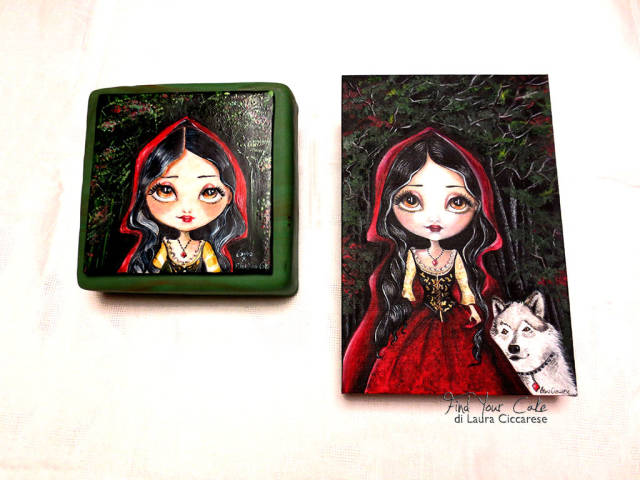
So here is my gift idea: the cake topper and the picture with the same subject.
Do you like the it?
For this cake topper, instead of taking the shots of the process, I set up the camera and made a video. I hope you like it.
This is my sketch
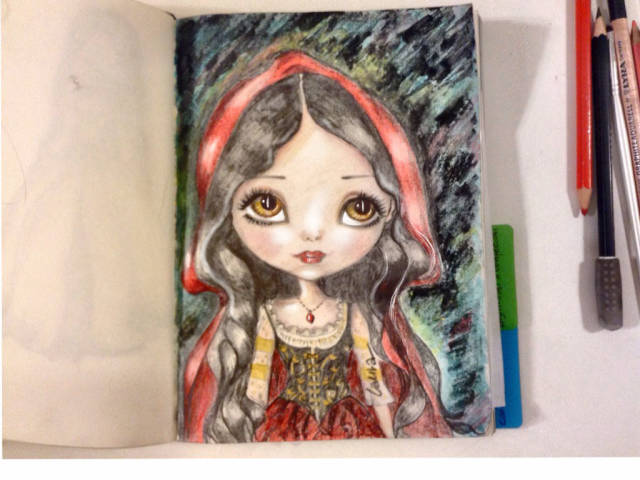
This is my painting
And this is the cake topper
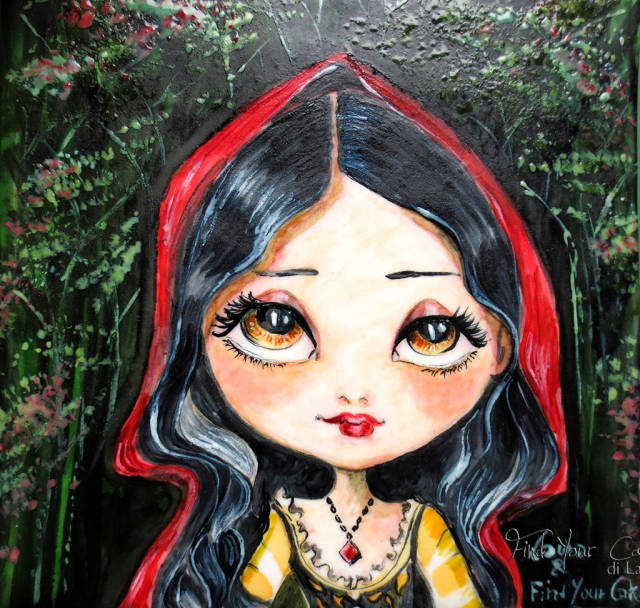
Painting and cake topper for a special gift
Tips how to paint
Before watching the video, here are some tips on the materials and techniques I’ve used:
Print of the drawing
Gel colors (I used the Sugarflair, but other brands are good too)
Food alcohol to dilute the colors
Small ball tool or pencil with rounded tip to transfer the drawing from the paper to the fondant
brown food pencil to tracing the drawing on fondant
Water brush (not essential but very comfortable) loaded with alcohol
A fan brush (optional)
Other brushes of various sizes
palette
Kitchen paper to clean brushes and to remedy small mistakes
A square fondant panel
A table lamp that will help you to better see the design on the fondant (but in the video I used only for a few seconds, to give you an idea, as it ruins the light of the video:))
Notes on the fondant panel
You can use fondant or modeling paste, but the really important thing is to stretch it without starch, sugar or other, so the colors don’t smeare. I usually roll out the fondant on baking paper and, after having the right size, I let it dry for a week so it’s easier to paint with the pencil. However, in this way it’s harder to engrave the drawing 🙂
So this is your choice!
To complete the cake topper I prepared a dummy cake with green fondant and I put on the fondant with Red Cappuccetto. In this way, the cake topper can be separated from the cake and kept for months!
Notes on the technique
To paint this cake topper I used the very diluted colors, like watercolors technique. As a medium I used alcohol but instead put it on the palette with the colors, I put it directly in the water brush: it’s great! (But if you don’t have it, you will use the alcohol to dilute the colors on the palette, as usual :))
I used this brush for the base of the painting; To paint the details I used a fine paintbrush and a fan brush to tinkle the leaves and flowers green.
While panting, keep a piece of sugar paste to test the color and the kitchen paper to clean the brush and to correct some mistakes.
Video
If you want, you can view the video with the whole speed painting on my YouTube channel:
https://youtu.be/j4aIVpnrI8k
I hope you like it!
See you soon!!!
Laura
Laura's Art Studio & Find Your Cake - http://www.facebook.com/findyourcake - http://www.findyourcake.it - www.laurasartstudio.com - www.facebook.com/laurasartstudio
7 Comments
You are incredibly talented! Thank you so much for sharing the tutorial!
Toni, Pennsylvania, https://www.facebook.com/WhiteCraftyCakes
Thank you Toni 😊
Laura's Art Studio & Find Your Cake - http://www.facebook.com/findyourcake - http://www.findyourcake.it - www.laurasartstudio.com - www.facebook.com/laurasartstudio
Sei bravissima Laura! Grazie mille per aver condiviso il tuo tutorial 💖
Clara
Grazie Clara 😊
Laura's Art Studio & Find Your Cake - http://www.facebook.com/findyourcake - http://www.findyourcake.it - www.laurasartstudio.com - www.facebook.com/laurasartstudio
Thank you for sharing, she’s so beautiful
You must never limit your challenges, instead you must challenge your limits
Thanks!
Laura's Art Studio & Find Your Cake - http://www.facebook.com/findyourcake - http://www.findyourcake.it - www.laurasartstudio.com - www.facebook.com/laurasartstudio
