Dirt Bike Topper Tutorial

I first made this topper a few weeks ago when Scotty wanted a motorbike on his cake. Gee whiz, this kid has always made me push my boundaries. The first year it was a 3D header (I had limited caking experience), then a John Deere tractor, then a 4 wheeler. This year was no exception. I had nightmares about this bike not standing up and falling apart.
I was thrilled when one of my cake idols liked my bike and I offered to do this tutorial for her. I thought I may as well put it out there for all to see. My directions are only a guide, as well as the templates. You can make the bike as big or as small as you would like. The photo and the templates I have provided will make a bike approx 6” long, from wheel to wheel. I hope you enjoy and please feel free to share.
Jaclyn
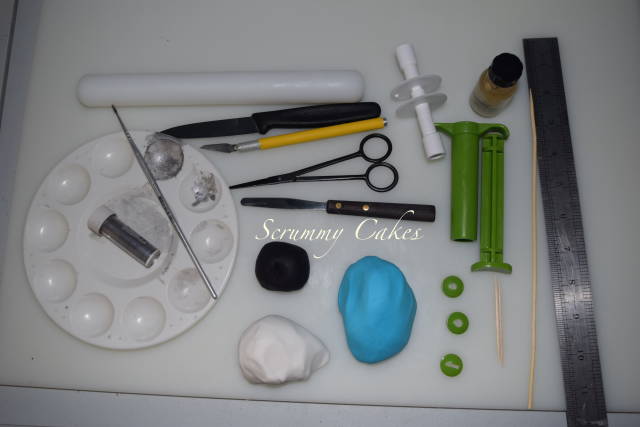
What you will need:
- Fondant – colour you wish to do the bike, white and black. (You can just use white gumpaste)
- Tylose
- Tylose glue
- Skewer
- Tooth picks
- Scissors
- Rolling Pin
- Xacto knife – or sharp knife.
- Small Palette Knife
- Ribbon cutter
- Sugarpaste gun
- Circle cutters
- Black food colouring pen
- Silver lustre dust
- Decorators alcohol or clear alcohol
- Fine paint brush
- Paint tray
- Ruler
Step 1.
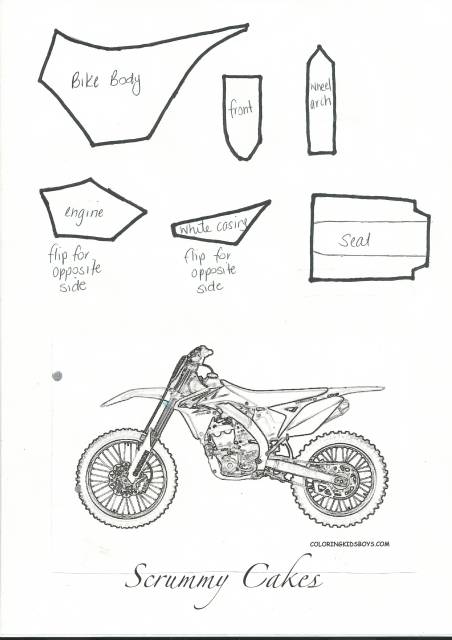
I printed out a colouring in picture of a bike, enlarge or decrease in size until you get the size you want. Print out a few in that same size, a couple to cut up for templates and one to keep so you can use it as your guide.
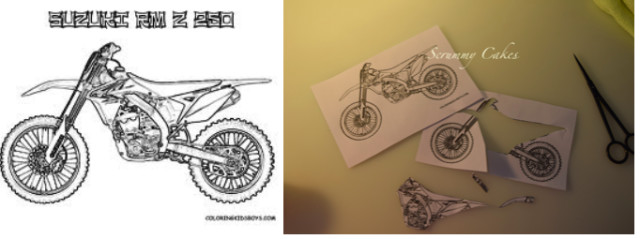
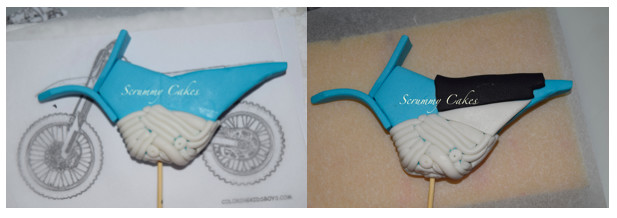
Step 2.
I cut out the main part of the body from one picture, the front wheel arch and the front of the bike where the handle bars sit. Using fondant with tylose kneaded through, roll fondant to approx 1/2” wide. I flip the icing over and the template and cut from the back. This way you don’t get as many finger prints in the front of the bike. Also if you have any cracks in your fondant, arrange your fondant so the front 3rd is free from the cracks (these won’t be hidden – I learnt this the hard way).
Cut with an xacto knife and use your fingers to smooth the sharp edges.

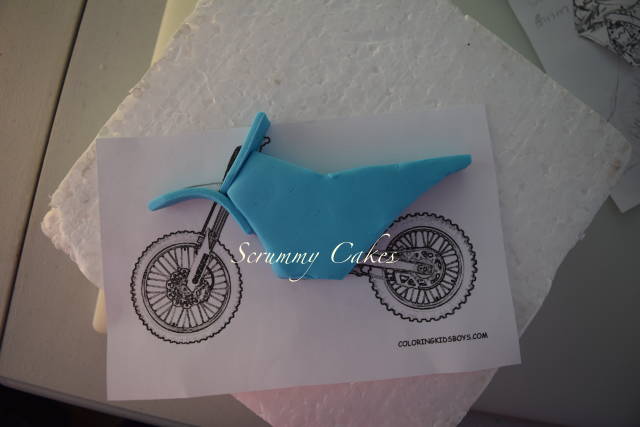
Step 3.
Roll the same colour fondant to about 4mm thick. Using a ribbon cutter (or ruler and knife) cut 2 strips to approx 1/2” wide. With one of the strip, using the cut wheel arch as a guide for length, add a little more to glue onto the underside of the bike. Trim one end into a point. Using tylose glue (or your glue of choice) glue the wheel arch on.
With the other strip, cut one end to a point and using the cut front of the bike as a guide, cut this length and add the length of the front of the bike as this will be glued to the front of the bike and meet where the wheel arch is glued. The handle bars will attach to this piece.
Using the uncut picture, place the pieces on and arrange them so the curves match. Use tylose glue to attach (or your sugar glue of choice). Insert a skewer into the base of the bike and colour with a black food colouring pen.
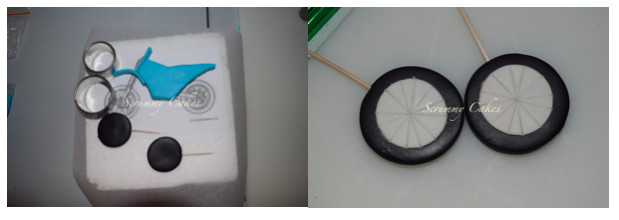
Step 4
Using black fondant with tylose kneaded through, cut out the wheels. I roll out the fondant and measure up the wheel with a round cutter. Make sure the wheels are a little thiner than the body of the bike.
From a thin white piece of fondant or gum paste cut a 2nd smaller round for the wheel rim. Using a toothpick or the back of a knife, mark the rim to appear like spokes.
Insert toothpicks into the wheels, use a black food colouring pen to colour and set aside to dry. (With my first bike, I attached the wheels at this point and found that they swivelled and they weren’t as sturdy.)
Step 5.
Using a sugarcraft gun, extrude out varies sizes of rounds in white gumpaste. (Make sure your gumpaste has lots of white fat kneaded into it.) This will become the motor of the bike. Arrange and glue over the bottom part of the bike (on both sides and the underneath), using thicker and thinner pieces as well as just circles. Do this to both sides. I marked out where the motor, the white casing of the bike and the seat would go.
Also using your picture as a guide, extrude round lengths for the front suspension and flats for the back suspension (extrude more then you’ll need in case of breakages). With black fondant, extrude a small round piece for the handle bars, form into a handlebar shape. Leave these to dry.

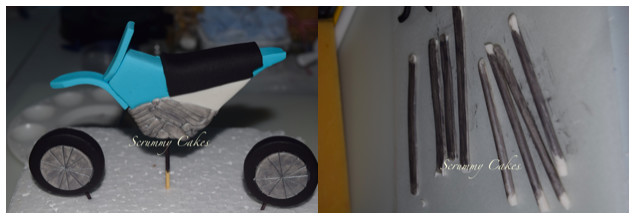
Step 6.
With more white, make the white bike casing for both sides, using the template. Attach with a bit of glue.
With a bit of black, make the seat. Using your template, cut one side and then measure the width of your bike and then flip the template and cut again. This way you will have cut the seat in one piece. Trim with an exacto if you need to.
Leave all pieces to dry overnight. I find that heat lamps help speed up this process.
Step 7.
Once dry, paint silver the motor, the rims of the tyres and the dried suspension pieces. Let dry.
Step 8.
Using the picture as a guide, place the body of the bike back on top and insert the wheels. Prop them up using foam or pieces of fondant. Once tyres are in place, roll a small piece of black and place in the centre of the wheel, attach the suspension pieces on one side of the bike as well as the top where the handle bars will go with tylose glue and let dry. You might need to trim these with an xacto knife. I found that I needed to let this dry for quite some time in order for it to be sturdy. I also use heat lamps to speed up the drying process. Repeat on the other side once dry, but remember to support the wheels.
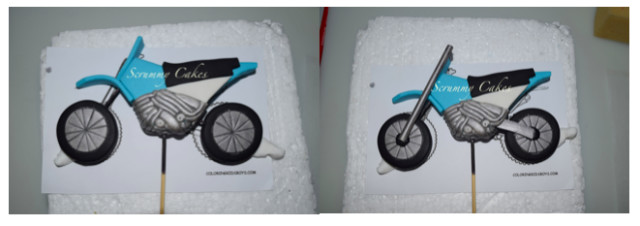
Step 9.
Once dried over night, stand upright and trim the skewer to correct height. Attach the handle bars. You can use a bit of foam to prop it up but I found that it stayed quite well. Using a food colouring pen, on the white part of the seat right the age of the birthday boy as well as on the front.

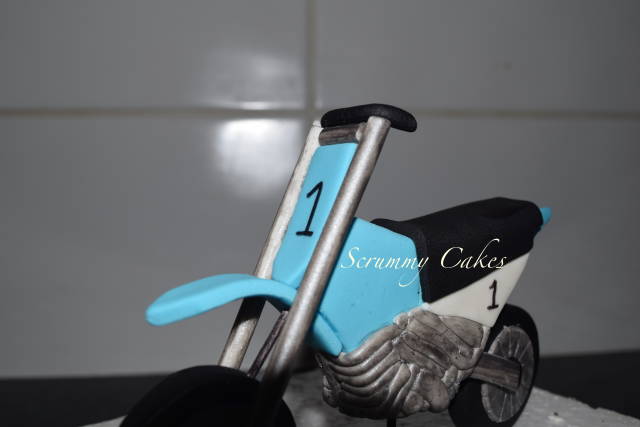
When arranging on the cake, I arrange ‘mud’ around the tyres for extra stability. As this topper has skewers and tooth picks, I would suggest the the customer not to eat.
I really hope that you enjoy this tutorial.
2 Comments
Perfect, thanks for sharing!
-- Michal, http://cakesdecor.com | My Facebook: http://www.facebook.com/michal.bulla

Well done! Thank you
You must never limit your challenges, instead you must challenge your limits