
Crown Tutorial
When I was making my Crown Royal cake I decided I wanted the crown to be hallow and made of fondant with tylose powder added to it. So I took pictures along the way incase anyone else wanted to make one too.
The pictures may not be exact to my description because I had one break on me and realized I needed to change the order I did things but forgot to take a new picture.
Here are the materials you will need
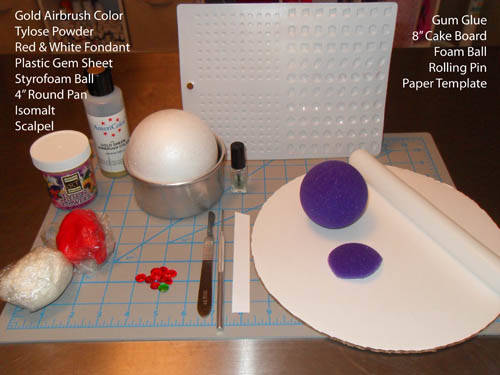
Instructions
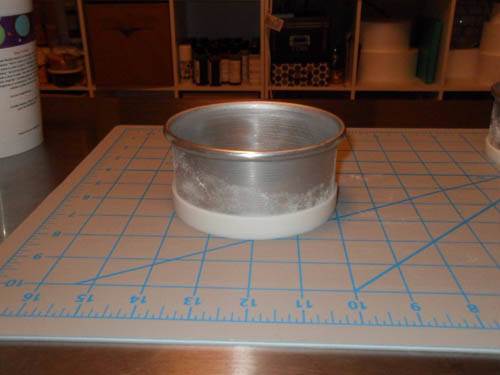
Step 1:
I used a 4" round cake pan to help shape the base of the crown. I cut a 3/4 inch wide strip of fondant and wrapped it around the pan.
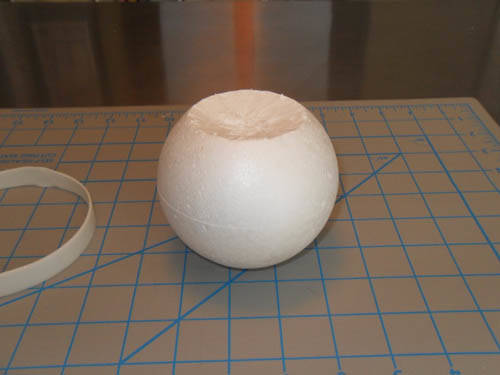
Step 2
I took a 4" styrofoam ball and cut a little bit off the bottom to give me a flat bottom. I then shaped the top of the ball with a inverted cone. This helped me shape the top of the crown.
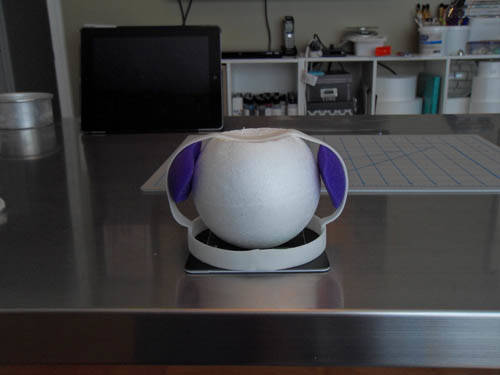
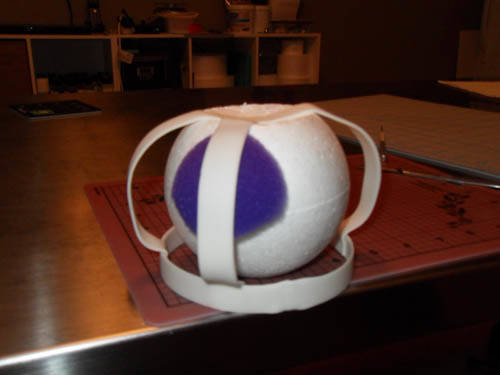
Step 3
After allowing the base to dry I removed it from the cake pan, placed my ball in the middle of the pan. I cut another 3/4 inch wide strip and I made the middle bar for the crown. I cut the tops off of foam balls to help hold the sides out from the styrofoam to get the shape I was looking for.
Step 4
Once the middle bar was dry I added one surrounding bar at a time. I cut the same width as the middle bar and used the foam ball to help shape each one. This took a couple days because I made sure the bar was dry really well before I removed the foam ball and moved on to the next.
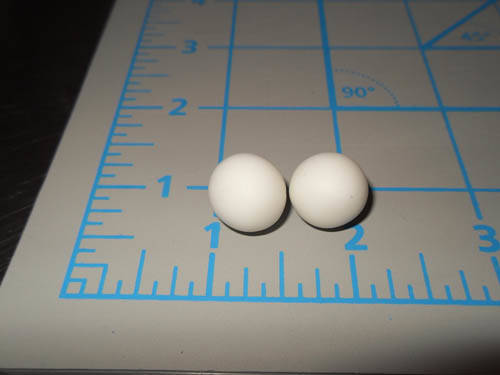
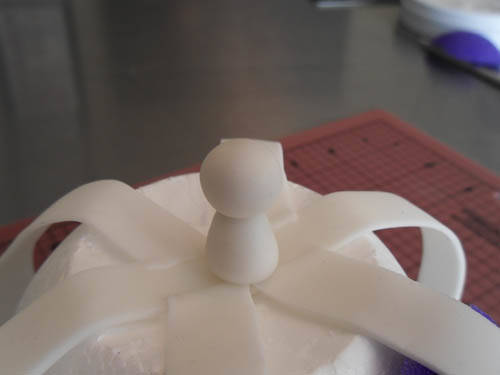
Step 5
Make 2 1/2 inch balls. One you will keep in a ball shape and the other you will form into a cone shape. Glue the ball on top of the cone. This will be placed on the top of the crown later after it has been painted. (Note this is one of the changes i made)
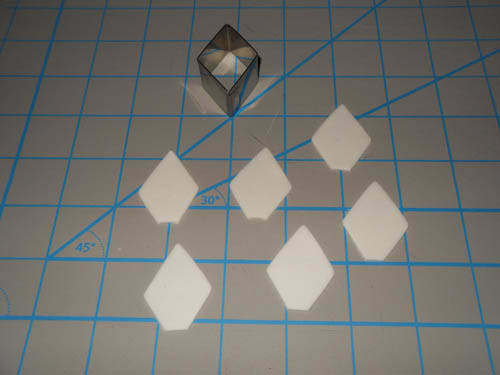
Step 6
Cut out 6 diamond shapes and trim off one of the points so you have a flat surface to glue it to the base of the crown.
Step 7
Airbrush the crown in gold. I also airbrushed the diamonds and the crown top piece at this time. Note this is an old picture. I did not have the crown top or the diamonds attached to the crown when I airbrushed everything.
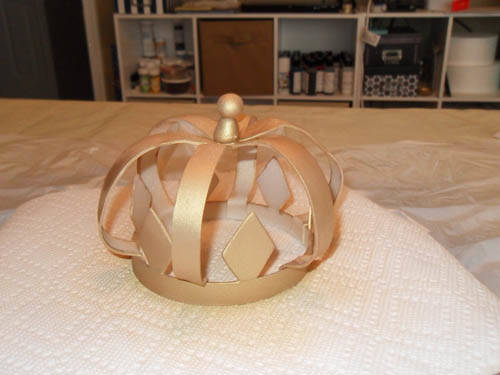
Step 8
When the gold diamonds were dry I glued on a red isomalt gem to each one.
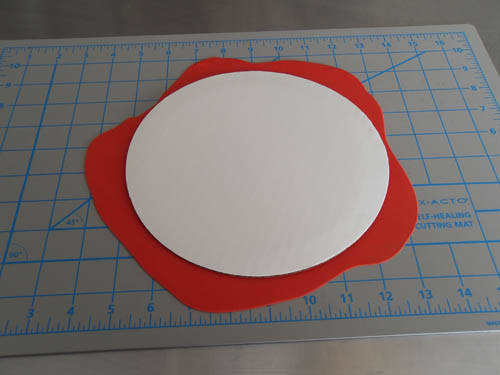
I rolled out red fondant and cut out a 8" circle to use as the fabric of the crown.
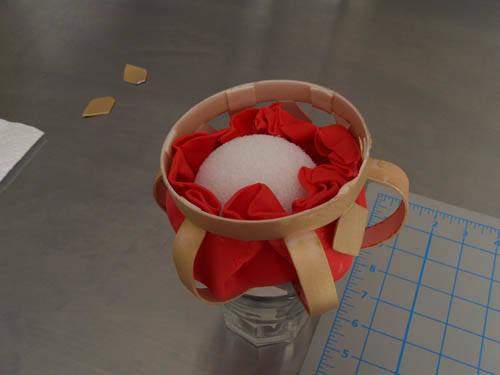
Step 9
I added some glue to the very top of the inside of the crown and also to the inside bottom rim. I put the red circle into the crown and pushed it up against the sides of the crown base. It was gathered in curtain areas to help form the puckering when turned over. While it was turned upside down I pushed what I could of the circle out to the crown bars. I actually did not use a styrofoam ball on my second go round on this.
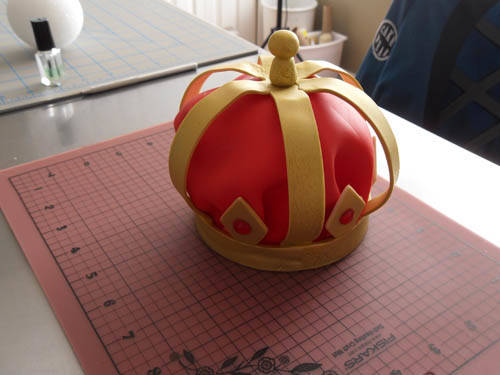
Step 10
After the putting the red circle in and before it was dry I glued on the diamonds. I added glue to the bottom of the diamond and the back. I used the red fabric to help support the diamonds in place. I also added the top piece to the crown at this time.
Step 11
When everything was dry I used clear melted isomalt to add the remaining red and green gems to the crown.
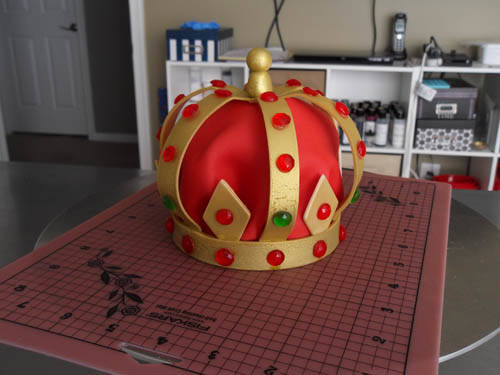
Thanks for looking and happy crown making!!!
9 Comments

Oh Jenn, this is so lovely!! What a great tutorial!! Thank you so much for sharing it!
Toni, Pennsylvania, https://www.facebook.com/WhiteCraftyCakes
so beautiful,thank you for sharing

Gorgeous!!! Thank you for sharing!! :-) x
https://www.facebook.com/elliwarrencakedesign https://www.facebook.com/elliricci elliricci@hotmail.com https://www.instagram.com/elliwarrencakedesign/
Thanks and your very welcome!
Thanks brilliant!
Elizabeth Miles Cake Design

Wow, great tutorial. Great looking crown.
Teri, Ontario, Canada http://www.TeriLovesCake.ca

Great tutorial!!! Lovely crown!!! Thanks for sharing!
Marlene - CakeHeaven

Great job Jen!
Jodie (https://www.facebook.com/pages/Sugar-Tales/293945807322699)

great tutorial, thank you for sharing!!!