Cactus Cake
Cactus Cake
 expand all pictures
My grandson asked for a succulent cake for his birthday this year. We sometimes watch YouTube together and watch the decorating techniques. I chose the cake recipe from Epicurious called Chocolate Stout Cake. My son had made some Coffee Stout and I thought it would suit the recipe and it’s one of the best chocolate cake recipes I’ve ever tasted.
https://www.epicurious.com/recipes/food/views/chocolate-stout-cake-107105
I made two 10 inch rounds and put one on a cake board to stay and one on a board with wax paper or parchment paper between the board and the cake. One of them needed trimming so I put them both in the refrigerator while I made the Swiss Buttercream frosting that I decided to use on the cake. The recipe for which I got from Gretchen’s Bakery site
https://www.gretchensbakery.com/swiss-buttercream-recipe/
I’ve used this recipe before also. The big plus for this recipe is that you can 4 days room temp, 2 weeks fridge, 2 months freezer. Well I’m living in Arizona and we’re having a bit of a heat wave during the days so as soon as I made it, it was in the fridge. I also decided to decorate it at night when it’s cooler around here.
I trimmed the round that had cooked high once it was cool. One of the problems with this cake is getting the terracotta color. I decided to make the Swiss Buttercream Chocolate. I made some chocolate ganache to add to the frosting. It made a lite chocolate look and taste to the frosting. If you want a heavy chocolate taste check out some other recipes but really the actual cake is intensely chocolaty. Then I frosted the cake center and put the rounds together. I dirty iced the cake and put it back in the fridge.
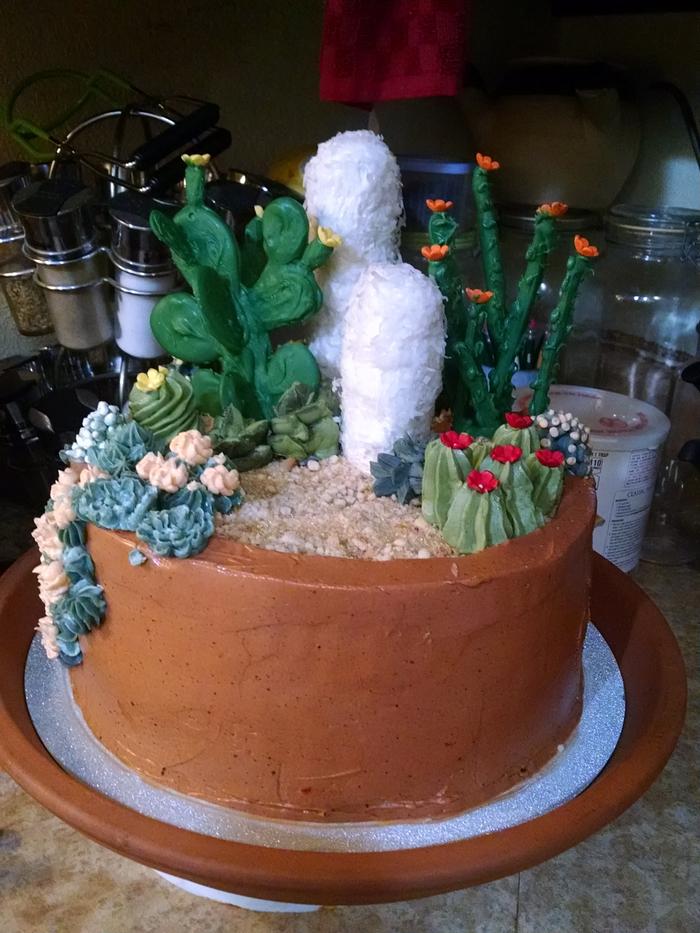
While I was contemplating the mixture of colors to make the terracotta color it occurred to me that terracotta was an “orange” brown. I took some of the Chocolate I’d made and added orange food color. Amazingly it was perfect. So I added my sample back into the chocolate bowl and added more orange till it looked like terracotta. I should note here that the mixing of the chocolate ganache and Swiss Buttercream was not totally successful. There were tiny flecks of darker chocolate in the the resulting terracotta. I have to admit I found it very attractive. I iced the cake taking care to make the sides as smooth as I could. Then I piped a large round of frosting on the edge of the top resulting in a lip of about 1/4 to 1/2 inch around the top using tip #2A. You could also just use the coupler without a tip. You’ve got to blend the side so it looks like part of the side then square it off to look like the edge of a pot. It doesn’t really matter if the top of the cake is smooth because it’s going to be covered anyway. Just don’t leave glops of frosting on top it does need to be flat. At this point I put the frosted cake back in the fridge to harden the frosting a bit while I made my cactus and succulents.
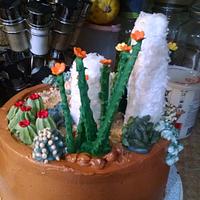
“Old Man” cactus’s.
That’s the white ones. I put the Twinkies in the freezer. Once they were frozen I cut the end of of one Twinkie then then i cut off the edges on the flat side then put a skewer up the center to be able to put it in a square of Styrofoam. Then I rounded it a little with my hands. That’s when it occurred to me that the edges on the flat side didn’t need cutting off but could be pressed into a round shape with my hands. Then I frosted it with the room temperature white Swiss buttercream. Again it occurred to me latter that frosting it with a gray green or juniper green would have been better. Then I rolled it in coconut and stuck the skewer in the Styrofoam. For the second one I cut both ends off of one Twinkie and one end off another, put the one with both ends off on the skewer first then the one with one end cut off so that the rounded part was on top. Then I frosted it and rolled it in coconut.
Prickly Pear and the Ocotillo.
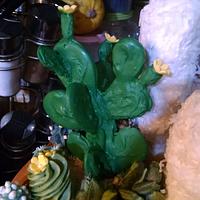
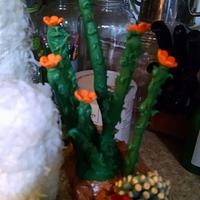
I used green candy melts for these two. Put some parchment paper on two small cookie sheets. I then put some candy melts in a plastic icing bag. I didn’t cut the tip off. I microwaved it for one minute and then squished it around. Everyone’s microwave is different depending on the wattage. For the first time I suggest 15 second increments until the candy melts. It was hot so you might want to give it a little time to cool but not to much. Or you could wear gloves. I did it gingerly with my bare hands. I cut the tip off the bag, squishing the candy melts out of the tip before I cut it. Don’t cut it to big and don’t hold it like you would if it had icing in it. The melted candy will flow out so keep the tip up and bent. Holding the bag over the parchment paper pipe out the shape of a Prickly Pear cactus. At the bottom of your cactus make a 2 inch point. This will be what you push into the cake to hold it in the cake. Make about 4 or 5 extra pads that are not connected to the cactus. Then put it in the fridge to set while you do the Ocotillo. For the Ocotillo just pipe out lines of candy that is about a1/4 in wide, 5 or 6 should do. Put it in the fridge to set. After you take it out the flat Prickly Pear and turn it over. Go over it again to round out the shape of the Prickly Pear pads. Pipe some “tunas” or a small up side down cones. This is what develops into the fruit and the flower sits on the end of it. They are green when the flower is in bloom but turn red when the flower dies and the fruit is ripe. So if you want to make some that are red without the flower go a head. Return it to the fridge and take out the Ocotillo. Turn over the branch pieces and pipe the candy melt on the other side as you did with the Prickly Pear. Put it back in the fridge to set. Once set take it out again and on the lines that will be the Ocotillo pipe little points, like thorns. It doesn’t matter if the points fall down into bumps, it still works. Put it back in the fridge to set. When ready take the pan out again and flip over the Ocotillo lines and put thorns on the other side then back in the fridge again. While that sets finish off the Prickly Pear, shave off part of one side of the extra pads with a knife or scissors. Put a little melted candy on the flattened side and attach it to the middle somewhere, where ever it looks good. Do one side at a time and put back in the fridge to set. This will give the Prickly Pear a three dimensional shape. Add a little melted candy to the cone like fruit at the top of the cone and attach to the pads. Add melted candy to the bottom of the yellow flowers and put them at the end of the fruit. To finish off the Ocotillo you’ll need a drinking cup that has sides that gradually slope outward so it’s narrower at the bottom then the top. Pipe some candy into a small cup cake paper. Drop it into the bottom of your drinking cup. Your candy melt in the cup cake paper should be cool enough so that when you put your Ocotillo branches into it it doesn’t melt. Arrange your branches so that they lay on the sides of the cup angling out and up. Put it in the fridge to set. When set carefully tip out the Ocotillo till you can reach the bottom and take it out of the cup. Put a little melted candy on the backside of one of the orange flowers and attach it to the top of each branch. Put both cactus aside in the fridge to use latter.
Claret Cup cactus cluster.
I’m not sure what tip I used for this. Try a large open star tip like # 6 or 7 with frosting colored with Moss green food color. Prepare the rose nail by putting a little icing on the nail then a piece of parchment paper. Put the icing in a Pastry/icing Bag with the tip you’ve chosen. Point the tip down on the nail and pull straight up from the nail to shape your cactus letting off the pressure as you reach the height you want. Pipe three in a cluster if you can or one at a time. Place on a cookie sheet holding the parchment paper to move it. Put a red flower on each one.
Barrel Cactus
Using the same tip and icing this time instead of pulling straight up twist it as you go up creating a swirl effect and you want this one to be fatter. Put a yellow flower on the top.
Queen Victoria Agave
Make some frosting colored with the Juniper coloring for the next succulents. Using the rose nail with a parchment square, make a cone like you would for making a rose, only instead of petals using a small open star tip like #19 put the tip next to the cone at the bottom and pull out going around the bottom of the cone. Make the next row a little shorter for each row till you get to the top creating a bush like effect. Using round tip # 2 and white frosting pipe a small thorn like tip onto each branch. It only kind of looks like the Queen Victoria Agave.
General bush.
This could be any number of bushes you find in the desert. Mostly it’s just filler. Using the rose nail with parchment square on it pipe the central core like you do for a rose onto the rose nail using round tip #10. Using the Juniper frosting and tip # 352 pipe leaves all over the cone to make a bush. Make three of four of these. Place them on the cookie sheet like the others
Aeonium canariense
Juniper frosting, specialty tip #81. Rose nail with parchment paper on it.
Do you know how to make a Chrysanthemum? This is done the same way only try to pull each petal out a little more. Make a couple. Place on the cookie sheet with the others.
Echinocereus viridiflorus cactus
Juniper frosting, Star tip #22, Rose nail with parchment paper, yellow flowers.
This is a smaller version of the Claret cup cactus only instead of red flowers you use yellow. These cactus are clustered in a group so pipe as many as you can on the same parchment square. Place on the cookie sheet.
When your done with your cactus put the cookie sheet in the freezer.
Sand
While they are setting put some Nilla Wafers in a Ziploc bag. Crush the cookies with a rolling pen or drinking glass or whatever till the cookies are finely crushed to make the sand. You can also use gram crackers. Bring your cake out of the fridge. Spread over the top of the cake. Sprinkle with the Gold sugar crystals to give it a little sparkle. This is the sand for the top of the cake.
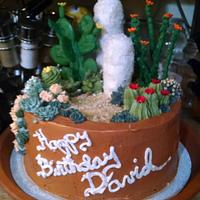
Now it’s time to assemble your cake. I started with the large items. I put the “Old Man cactus” in the back center. On either side of them I put the “Ocotillo” on the right and the “Prickly Pear” on the left. Then I arranged the “Claret Cup Cactus” in the foreground on the right and the “Barrel Cactus” on the left of the front. The “Echinocereus viridiflorus cactus” I put by the “Barrel Cactus” and the “Aeonium canariense” in front of that. Then I filled in with the rest of them. It still seemed kind of empty so I piped a few star like succulents around and going down the side to the left of the cake and put a few yellow piped flowers using tip #106. If I were to do it again I think I’d try to make the “String of pearls” or the “Donkey Tail” something like them anyway. Then I piped a few stars here and there. I piped the happy birthday on the side of the cake not in the sand area.
Lastly I found that the 12 inch terracotta plate is not 12 inches in the bottom. I trimmed about a quarter of an inch off a cake plate till it fit in the bottom then I did it again. The untrimmed plate that I used on the cake fit on top of the two trimmed plates. I thought serving the cake on a terracotta pot dish added to the effect but if you don’t want to go to the expense you can use whatever you have on hand.
Your cake is done Enjoy! I hope you’ll make a comment if you use my little tutorial.
If you notice any errors in the instructions please tell me. I’ll do my best to correct any errors.
MomCakes
