Giraffe Figurine Tutorial

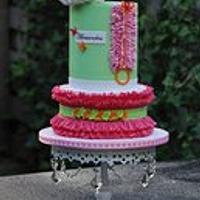
This tutorial is for the giraffe figuring sitting ontop of cake, for the tutorial to paint the bottom tier follow this link http://cakesdecor.com/Ciccio/blog/408

You’ll need : ball tool large & very small, 10cm long skewer, knife, small rose petal cutter or similar 2cm long,
veining tool, light brown petal dust, brush, edible glue, white fat, styrofoam dummy
fleshtone airbrushcolour (or Vodka mixed with ivory gel & tiniest dash red gel)
Gumpaste: Light Tan
Light Redish brown
small ammount of White & black

Take a large ball of gumpaste roll smooth, then into a cone shape, from the cone leave 3/5 of the cone as the body and mold the other 2/5 into a long neck , should end up body about 2" and neck 3" making figurine without head 5" high, brush a little edible glue onto your skewer and thread through neck into body then into styrofoam dummy leaving about 1/2" protuding from neck

Roll a log of the tan gumpaste to about 7" long and about 1/2" thick, cut this in the centre on a diagonal, at the opposite end of the cut, flatten and squeeze the ends to form feet, attach with a little edible glue leaving a gap at the back to allow room for the tail abot 1/8 ", repeat this same step for the front leg and attach where the neck becomes the body

For the feet you will need 4 round disks of the reddish brown gumpaste each about 1/2" round & 1/4" thick, to get mine even I roll 1 ball flatten then cut into 4, roll each into ball flatten then using the veining tool score through the centre pressing down to half way through to indent attach each of these to the legs allow figuring to dry overnight at this point

to form the head roll a ball of gumpaste into a sausage to about 1.5" long and 3/4" thick using your finger squeeze & roll to narrow 2/3 of the way down, using a piping nozzle on the shorter end of the head mark a mouth, using then your fingers press indents for where you want the eyes to sit, starting just where it gets more narrow. Use a very small ball tool form 2 nostrils by pressing in then up a little. attach to the neck with a little edible glue. allow to dry overnight again.

roll a very small amount of gumpaste into a long thin tapering sausage about 1.25" long attach between the rear legs as a tail, then with the red/brown gumpaste roll a small cone flatten andmark with a vainer then attach with a little glue to the top of the tail
For the ears roll out a little tan gumpaste and cut 2 rose petal shapes about 3/4 long, press together the wide end, and attach to either side of the head
For the horns roll out a thin sausage about 1" long cut in half and attach to each a small ball of the red/brown gumpaste then attach between the ears, I like to bend them a little to give character

Using a light brown dusting powder & a soft brush, dust colour around where his hooves become his legs, his tummy, nose, in his ears, and where his eyes will be

For the eyes roll out 2 small balls of white gumpaste attach with a little glue, then take 2 balls of black gumpaste 1/3 the size of the white and flatten & add over the top of the white, then I like to add 2 very small balls of white gumpaste to bring the eyes to life
Then roll 2 crescent shaped sausages & attach of the top of the eyes for lids, then redust the lids a little.

To make the mane roll out a this sausage of the red/brown gumpaste, thin out one side using a large ball tool, you want it to end up about 1/4" wide at the base and about 1/2" thinned out, then using small scissors cut the hair as showen you want it to be fine, then attach from just after the ears down his back to about where his front legs start, then I manipulate the strands so they don’t sit straight as this give character you want some strands flopping to one side some the other

using a very fine brush (iuse a DAS 5/0 round taklon white) and the Fleshtone airbrush colour paint on your giraffe print remembering to make random oblong shapes that curve around each other, I leave most of his belly bare and only come down 1/2 down his legs adding a few very small dots of colour where I finish, also I only come a little way down his forhead, allow to dry won’t take more than an hour or so

I hope you enjoy this tutorial…Jo xx
32 Comments
Fantastic tutorial :) Thank you for demonstrate how makeg giraffe .
Sory for my English :)
Wanda-Bee
Thank you :-)

Great job Jo!!! Excellent Tutorial!!! You did an amazing job!!! Love it!! xx
CUPCAKES & DREAMS My facebook: https://www.facebook.com/pages/CUPCAKES-DREAMS/115882865103239?ref=hl
Thanks Ana, Tutorials took me ages to do, so it’s nice when someones likes them…LOL
wow,this one is great,thanks for this excellent tutorial
Ria123

Really a lovely tutorial. Very easy to follow and shows all details. Xx
Chef Sam, BLOG: http://chefsamcakes.blogspot.com/, FACEBOOK: https://www.facebook.com/chefsamcakes
Very cute!
Sameen, Baked In Caked Out, https://www.facebook.com/bakedincakedout
Wicked Jo, it is certainly in my faves folder. Thanks for sharing :)
Sarah, New Zealand, http://www.facebook.com/#!/TheCakeTin
Adorable!!! Thank you for sharing this! x Ade
Love it! Thank you so much.