
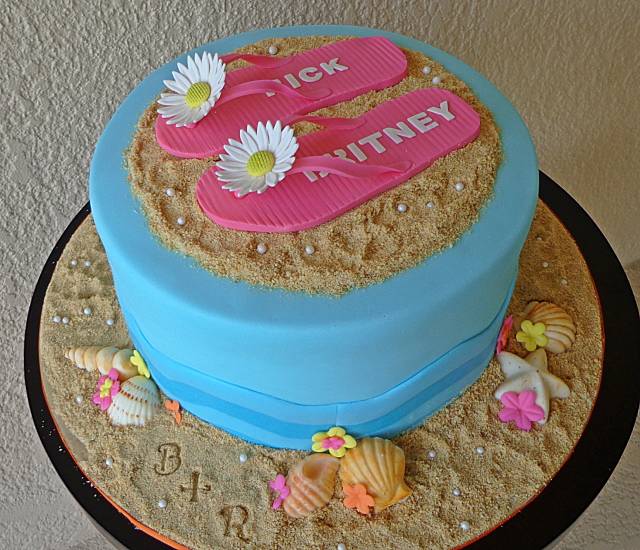
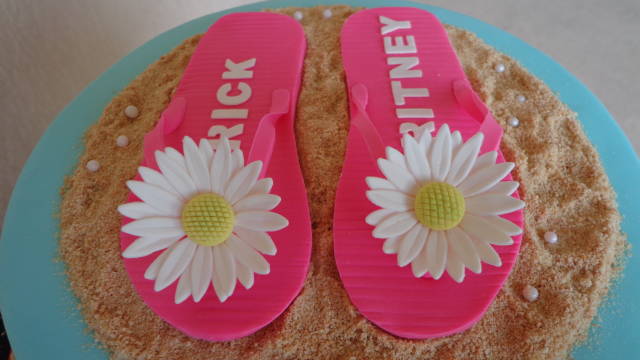
My First Tutorial #1: Sandals Beach Cake + Daisy Flower Tutorial
Daisy Tutorial
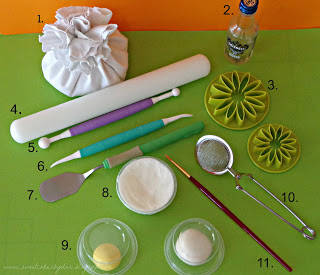
For the Daisy Flowers, here are the tools that I used:
1. cornstarch 2. vodka (or lemon extract) 3. daisy cutters 4. fondant rolling pin 5. ball tool 6. veining tool 7. small spatula 8. shortening 9. fondant (mixed with Tylose) and/or gum paste white and yellow 10.small mesh strainer 11.small fine paintbrush 12. petal dust.
Start by applying a little bit of shortening onto the palms of your hand and begin kneading your gum paste until nice and smooth. Next, dust your work surface with cornstarch. I like to fill a clean baby wash cloth with cornstarch, tie the end with a rubber band, and store it in a plastic bag/container.
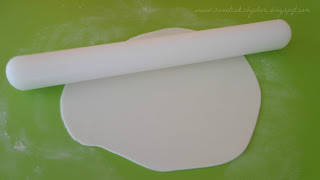
Roll out your gum paste about 1/8 inch thick using your fondant rolling pin.
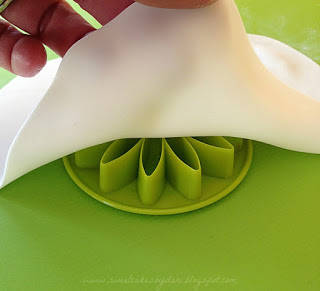
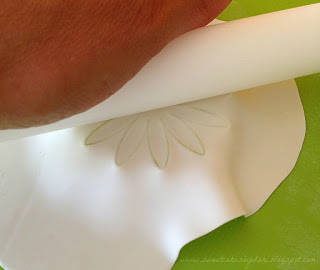
Place your gum paste over the daisy cutter, cut 2 flowers (one small and one large) and with the rolling pin roll back and forth until edges are smooth. Release flower from cutter using the ball tool. I like to cut mine this way because I find that it gives it a cleaner cut. You can also dust your work surface and cut the gum paste just like your cutting a cookie. If you prefer this method, make sure you have enough cornstarch and move the daisy cutter in a circular motion.
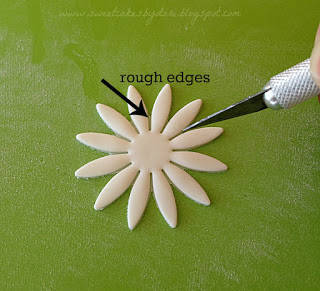
Once cut, you’ll notice that the edges will need to be polished. Gently use an X-Acto knife to clean them up.
Now, with your veining tool, mark a line from the center of each petal to the tip. There are many cutters out there that have this veining imprint already on them such as PME Daisy cutters. But due to the short time frame, I had to make due with what I had to make them look as realistic as possible.
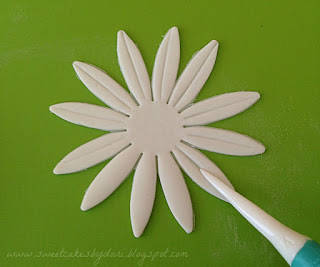
Place the daisy in the palm of your hand and gently widen each petal by rolling the ball tool from the center of to the tip to give it a curved look.
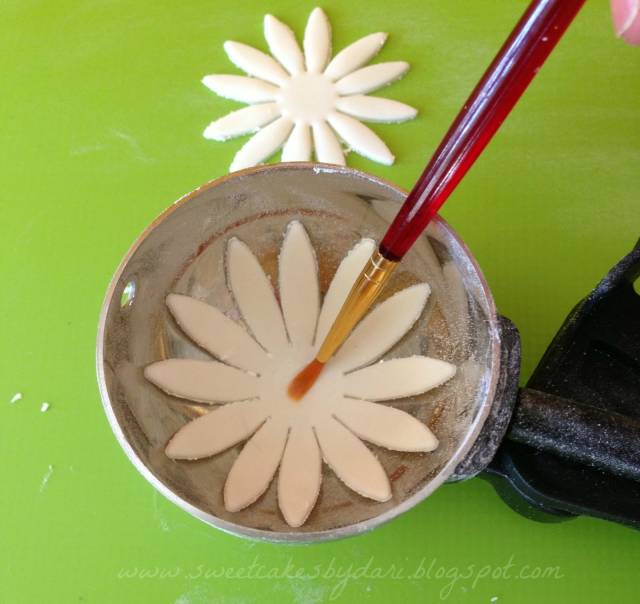
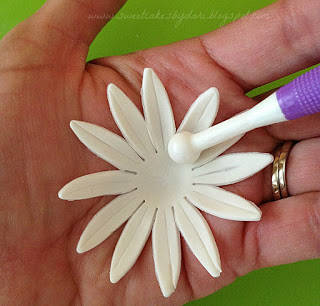
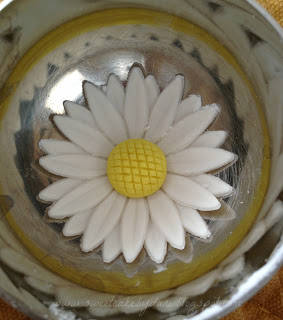
Position the flower in a forming cup (make sure to cornstarch the scoop so that the flower doesn’t stick while drying). I used a large ice cream scoop because I wanted my flower to have a more curved look, but you can use egg cartons, modelling forms, or Wilton forming cups. Brush center of the flower with a little bit of water or edible glue (click here for a great how-to-video) and position the second flower on top.
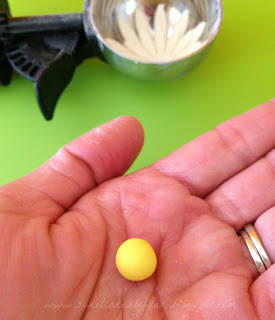
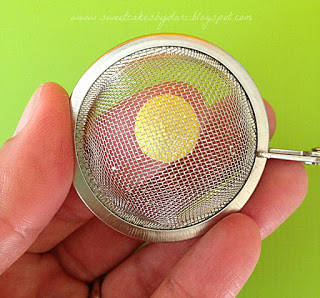
While the flower is drying, roll out about 1/2 inch of yellow gum paste. Now, once again, because I was in such a time constriction I didn’t have time to fiddle with trying to find Daisy center molds (let alone) order any on-line. So as I was stumped at around midnight trying to figure out how to make the center as realistic as possible I looked to my right and there it was. Just sitting there staring at me. Do you tend to talk to your utensils as I do when I’ve just about had it and my brain is fried? I know I do! Anyways, I started thinking about how my girls use their play-doh sets and sieve the play-doh to make strings. Then it hit me! What if I press the gum paste through the sifter to make an indentation. Well, here’s the result. Amazing!!!
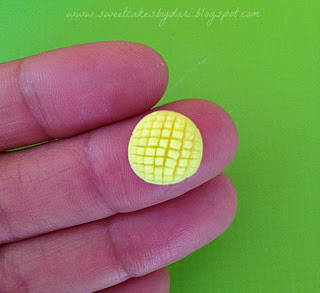
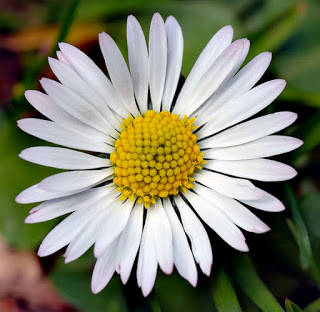
And here’s the final flower. Once dried you can clean up the edges one more time with a X-Acto knife and remove all traces of cornstarch with vodka and/or lemon extract. Shown in the sandals picture above, you’ll notice that the center of the flower has a hint of green as to match the real flower (picture shown below). With a small paintbrush just dab a little bit of green petal dust to achieve this look. And that’s all for now!
Thanks for stopping by and I hope you enjoyed this tutorial as much as I enjoyed making it. If you have any questions or comments, please feel free to send me an email or leave a friendly comment.
SweetCakesbyDari
3 Comments
Lovely, thank you x
Judy

Very nice daisy. Are you adding the tutorial for the flip flop sandals on the cake? Would like to know how you made them….. ❤️
Creativity is God's gift to us. Using our creativity is our gift back to God. Clarky's Cakes 😎
Jchuck,
Thanks for your inquiry. I’ve had that same question asked many times before. Since I only had one day of designing and making this cake everything was so rush, rush that I was only able to put together the Daisy tutorial. I’ll be happy to share how I did the sandal in a future tutorial so stay tuned!
SweetCakesbyDari