Snoopy and Woodstock dance in the snow PLUS how to make a Chocit Top Hat
Snoopy and Woodstock dance in the snow PLUS how to make a Chocit Top Hat

 expand all pictures
How incredibly lucky do I feel working alongside amazing cake decorators around the world to raise money and help make children’s wishes happen with the Make a Wish foundation? Very. I’m still pinching myself!
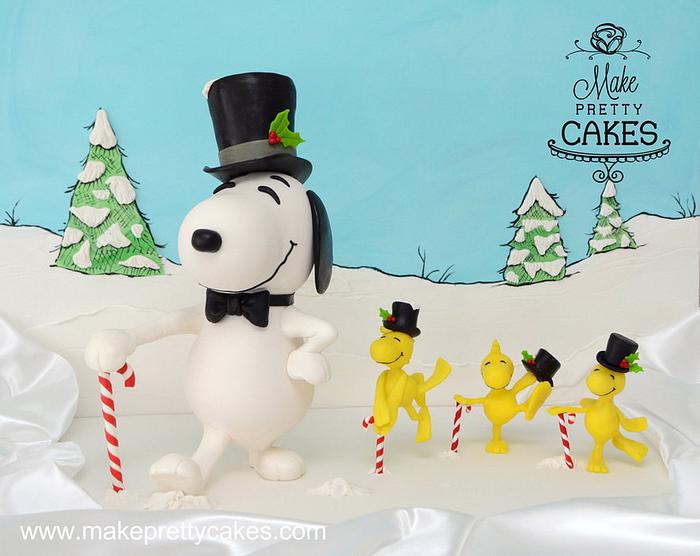
My movie choice was “It’s Christmastime Again Charlie Brown” and I chose the sweet dancing scene to recreate in cake. Want to see a short clip of it? So cute! http://goo.gl/olptZt
My mini tutorial contribution is on how to create the structure for the mid-air Woodstock which you can find bundled in the Volume 1 tutorial set sold in the tab shop at http://www.facebook.com/bakeachristmaswish
The cakes were 2 × 8″ chocolate mud, carved and ganached and covered with a 1:3 mixed ratio of fondant and Chocit Modelling chocolate. The birds are all in modelling chocolate, as are all the black details you see here, including Snoopy’s big hat. I am completely in love with modelling chocolate, as it was so stable and using a cake smoother, I was able to roll thread-thin pieces, which I used to create the smiles on all the figurines. What a joy to work with.
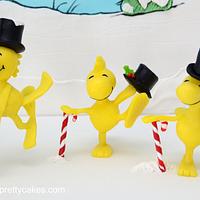
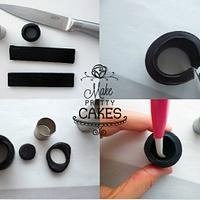
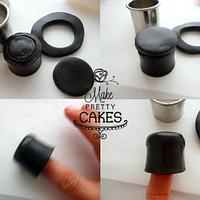
For the top hats, [PHOTO 1] I rolled and cut a thick slice of black Chocit and trimmed to size based on the birds head. The thicker it is, the more stable it will be. I then cut a small circle, placed inside the hat and used my flat modelling tool to scrape it up the insides to secure it in place. [PHOTO 2] Turn the hat over as shown, roll another piece of Chocit approximately the size of the entire top. Use your finger to smooth down the edges a bit and then, over a sheet of non stick baking paper, slide the hat back and forth with light, even pressure until the seams disappear as shown. Don’t press too hard or you will distort the hat shape. NOTE: My first attempts were skipping the small inside circle. But I soon found I was damaging the top of the hat each time. So that extra layer of Chokit allows you to be a bit more “rough” without hurting it. PHOTO 3: After the seams have gone on the sides, final step is to turn it upside down and repeat the sliding motion on the baking paper to perfectly smooth the top. Use a set of cake smoother and “roll” the hat into shape by sliding between two cake smoothers in alternate directions. For the final bottom lip of the hat, roll your Chokit modelling chocolate on top of baking paper and place a plastic bag over the chocolate. Cut your circle shape over the plastic so the result is a more rounded edge. Lift the piece off the baking paper easily without distorting the shape, but gently pressing up under the paper. Place the top of that and gently curve the sides up as shown in the bird close-ups.
Many thanks for looking and please share the links around so we can help make lots of wishes come true!
Nina xoxo http://www.facebook.com/divaliciouscakes
Nina, Make Pretty Cakes, New Zealand, http://www.facebook.com/makeprettycakes
45 Comments
Adorable :-)
This is the coolest Nina!! One of my fav’s for sure! :) xx
Keren, New Zealand, www.facebook.com/icedbykez
Just adorable! I totally love it!
You’re very sweet, thank you so much! xoxo
Nina, Make Pretty Cakes, New Zealand, http://www.facebook.com/makeprettycakes
Nina I love Snoopy and those cheeky woodstocks. You are such a clever, talented, gorgeous lady and it was such an honour to work with you on the Bake a Wish Project xxx
Sarah, New Zealand, http://www.facebook.com/#!/TheCakeTin
Wow, Sarah, thank you for your very kind words and I’m so happy we have met. The honour was mine indeed – standing alongside the Kiwi 7, you are all so lovely! Chuffed to bits to have been included. Let’s hope this venture is wildly successful for Make a Wish!!
Nina, Make Pretty Cakes, New Zealand, http://www.facebook.com/makeprettycakes
Thank you Elli! You always have a kind word for me! Much appreciated. :)
Nina, Make Pretty Cakes, New Zealand, http://www.facebook.com/makeprettycakes
Adorable! thanks for tuto!
Nadine A.
You’re very welcome Nadine! Have a peek at the HUGE tutorial bundles on offer from http://facebook.com/bakeachristmaswish :)
Nina, Make Pretty Cakes, New Zealand, http://www.facebook.com/makeprettycakes


