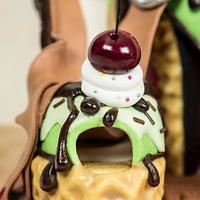
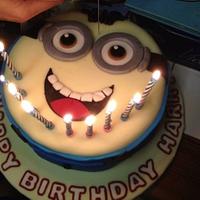
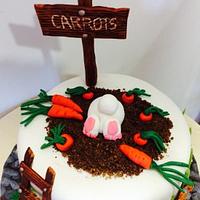
i saw lynsey from sugarwhizz most of her figures where attatched on that cake when she landed at cake international ,and they are dummy cakes not sponge inside so will work on them months in advance . richards cakes also dummies
jenny,thirsk north yorkshire,http://www.darrowbycakes.co.uk
I’ve not made a cake nearly as fancy as those pictured, but to figure out scale I usually stack up cake dummies in the sizes I will be using then I can visualize sizes and scale. I would start modelling months in advance. You can keep them when they are dry. Store them in a dark place to preserve colour. They can be attached to the cake easily if you build the characters with internal support that extends out the bottom. That is another reason I build on cake dummies they are foam and I can push skewers and figure supports into the dummy. A good wet sticky piece of fondant under the characters will also help them stick to the finished cake. I do that when I need a little extra support.
Hope that makes sense and is at least a bit helpful. I would ask one the people who do this type of cake often for tips and pointers.
Good Luck
Teri, Ontario, Canada http://www.TeriLovesCake.ca
Many thanks for your advice. Will source some dummies the size I plan to use for the cakes. will need to watch a lot of tutorials for modelling next ;0)
Sarah x
As cake dummies can be pricey and you may want to have a carved cake you could always try making an replica of your cake out of things like card / newspaper etc. You could even cover it in paper masha. Then you will be able to keep it to look at, use for measurements and check sizes.
Making your figurines on a cocktail skewer is a great way to secure them on the cake. Also regarding the traveling never underestimate the power of royal icing. When dry it is like cake makers cement. Hope it all goes well. x
CakesWorth
Both of the cakes you’ve shown have been carved before being covered with fondant. It also looks like they’ve only used one large piece of fondant to cover the entire cake. If you’re not experienced at covering cakes with a large piece of fondant (“The Mat” is an awesome tool to help with this) I would recommend you covering each tier separately. If you cover the tiers separately I would recommend stacking the cakes without frosting and carve at the same time so that you get the look you want. The first time I carved I was scared to death but carving little bits of cake at a time made it easier. You can always mix discarded cake with icing to make unusual base shapes and then cover everything with fondant.
You will want to be sure to include a good internal support system. Anything over 4 tiers I use “single plate system” (SPS). You can find these on line or at your local cake supply store. Since you are going to be traveling a distance with the cake this might be a good option. Typically I am able to just use bubble straws under each cake round (at least 4 per tier) to give support. Just make sure they are all level.
They’ve also air brushed color to give dimension which takes your cake to the next level. If you don’t have an air brush machine you can achieve dimension using petal dust.
My figurines tend to be about 3" – 4" in height. You can use spaghetti as an alternative to the cocktail skewers for internal structure and a way to attach them to your cake. It is a great edible alternative. I attach heads, arms, legs, and feet with spaghetti all the time. You can make the figurines from gum paste or fondant with tylose powder. You will have a bit more “play time” with fondant as it doesn’t dry as quickly as gum paste. You could also make them out of modeling chocolate (a tasty alternative). It is a more pliable and forgiving but you have to cool frequently to set the chocolate. The warmth from your hands will cause it soften pretty quickly. No problem making your figurines well in advance. I do it all the time. Doing them in advance will help eliminate stress (I don’t work well under stress and I’ve been selling cakes for quite a while now) and give you time to remake if you’re not happy with the outcome. As mentioned earlier, store them covered and in an area that is dark. Many times I just moisten the bottom of the figurine with water and they stick pretty well. Royal icing and a piece of moistened fondant are also great choices. You could also use coffee stirrers or small straws as anchors in the cake to help secure them.
Best of luck!
You can do it! I’ve us completed my 12th cake and first stacked and handpainted for my baby girls 1st birthday! I was terrified lol
I agree with what has been posted above…..first draw it out to scale, big piece of paper and play around with sizes, then use cake dummies or anything you can mold to make a replica. Cut out your models from card and start placing them on to size them. You can start making your figurines in advance, just make sure you use good fondant or fgum paste, use a skewer in them so you can attach them later and store them in an airtight container away in a cool place. Airbrushing I have yet to try, but I use petal dusts to add depth and color. Melt a little cocoa butter so you can brush it on…you only need a touch, you can also use vegetable oils. Good brushes are a must both large and small. Take your time, plan well and you will do it😊
Vee Walker Caballero
Thank you so much for taking the time to respond. As a home baker I usually use pics, Pintrest and google for my cakes. would like to try come up with something all by myself, proving harder than I thought eek.
All your feedback is so valuable to me, thank you so much
Sarah x


