
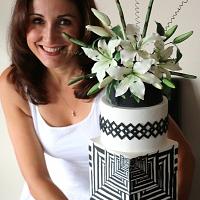
How to make a Dahlia Without Cutters

To Make this you will need
Sugar Glue
Tylose
Bakels RTR Pettinice (Or something like Satin ice but if you can Bakels is what I use)
Food Colouring (I use rainbow Dust Progel colours and for this coloured Red pettinice with Burgundy and purple to get a deep maroon)
Crisco (white Vege fat)
A paint Brush
A snap lock bag separated into two sheets (You only need one side of the bag)
And a cell bud (Preferably on a wire)
To get your Pettinice (icing / fondant etc) ready I add 1 teaspoon of tylose to 375 grams of Bakels pettinice and leave to rest for at least 12 hours

Put a thin layer of crisco onto the cell bud

Take a tiny piece of icing

Make at least 6 little sausages of icing

Place between plastic. I use Glad Snaplock bags separate into 1 half … then place the icing on the plastic and fold over the top

Push the icing down making sure you push out towards the ends

Thin it out concentrating on the edges

Gently cut it into two… these wee petals make two of the inner centre petals

Repeat with all your little bits of icing

Gently fold over one side of the bottom of the petal

Using a tiny bit of sugar glue fold the other side of the petal and secure at the base with the glue

Start placing these around the cell bud. The crisco will secure the icing.

put all of these petals on. On this one there are twelve of these.

Put them all on concentrating on the top centre

Take another tiny ball of icing and start again….Make more petals .. ONLY a TINY bit bigger.. I made about another 18. Once these are stuck on you need to make more.

Make these petals slightly larger and make them singular now not two out of one.

And keep making them until you have about 16 to 18. Then fold them and glue them as before

Add these a bit more fanned out, to create a real looking bud, add all the petals you have made

But for the pointed ends start pinching the tips of your petal.
Wee tip: if you put the tiniest bit of sugar glue on the centre of the end and pinch the petal will not split at the end I was tired at this point so I left it to dry overnight and started again the next night

Make more petals in singles again… and go a bit larger this time

You need a lot of petals … at least 20

Again Fold your bottom petal on one side and add a tiny bit of sugar glue

Fold the other side of the petals and pinch the tips as before

Once you have the shape you want and have added the petals are far out circumference wise you need to start adding the petals under the others to start getting a more rounded shape

Between making and adding more petals support the ones you are putting on with foam or wee containers… anything you can find lol

Now you need to make more petals about the same size now as the last ones

Again folding them… there is a lot of repetition in this type of flower!

after adding all the petals leave it at least overnight to dry. If you have made this on a wire, you can just hang it upside down to dry and you won’t need to support it

Once dry you can dust this if you want to!

The Lemon Dahlia here has been made the same way with more rounded ends (NOT pinching the tips) It has about 40 to 50 of the tiny centre petals…Where this one only had around 30 so you can experiment with petal shapes and amounts.

And now its finished! Oh dear will have to find something else to make lol
Dahlias are not easy and not for those who are impatient. They are fiddly and have a lot of petals. I made this dahlia with a lot less centre petals than the lemon Dahlia as I feared it would be too too complicated and the amount of centre petals might put people off trying. Please note, This is Just MY way of making this flower! I am sure others have other ways that might be better, faster, more beautiful etc, etc, etc… But I have been asked how I make it so wanted to share with you all xox
20 Comments

Brilliant thank you for sharing x
Find me on Facebook Littlemisscupcake,exmouth,Devon

Truly beautiful. And a test of patience! I applaud you!
Radhika, Singapore, http://sinsationscakes.wordpress.com/

Thanks for this! One of the areas I really want to improve on is my realistic sugar flowers so I really appreciate you taking the time to make this tutorial!
Violet - The Violet Cake Shop™ - http://www.facebook.com/TheVioletCakeShop

This looks brilliant! Thank you very much for this tutorial! :-)
https://www.facebook.com/elliwarrencakedesign https://www.facebook.com/elliricci elliricci@hotmail.com https://www.instagram.com/elliwarrencakedesign/
Such a gorgeous flower and an easy tutorial. Thank you for sharing with us!
Gulnaz Mitchell, New Zealand, https://www.facebook.com/pages/Heavenlycakes4you-by-Gulnaz-Mitchell/113619242162187

Absolutely Brilliant!!!! Thank you for sharing Lisa!!!! xxx
CUPCAKES & DREAMS My facebook: https://www.facebook.com/pages/CUPCAKES-DREAMS/115882865103239?ref=hl
OMG that’s absolutely perfect! Thank you for sharing your method.

Lisa, wow, amazing tutorial! Thanks a lot. :-)
Dina @ miettes, http://www.facebook.com/pages/miettes/257790597632317

Great! There are so many flowers what possible to do without cutters. These dahlias are beautiful !
https://www.facebook.com/ZoricasCakeArt/ http://www.zoricascakeart.com/
Beautiful dahlias, awesome tutorial, TFS! :-)
Kath's Cakes https://www.facebook.com/pages/Kaths-Cakes/369485736483786