Princess Doll Tutorial
As promised here is the tutorial to make a princess cake. You do not need a Barbie Doll topper and you could even use a shop caught one, but keep only the torso area… or even better, model your own, which will be my next one. Each photo has instruction with it and please feel free to ask questions.
I am hoping you will all give it a go and send me your photos too and as I have done before, make an album with your work and tag your page with the photo.
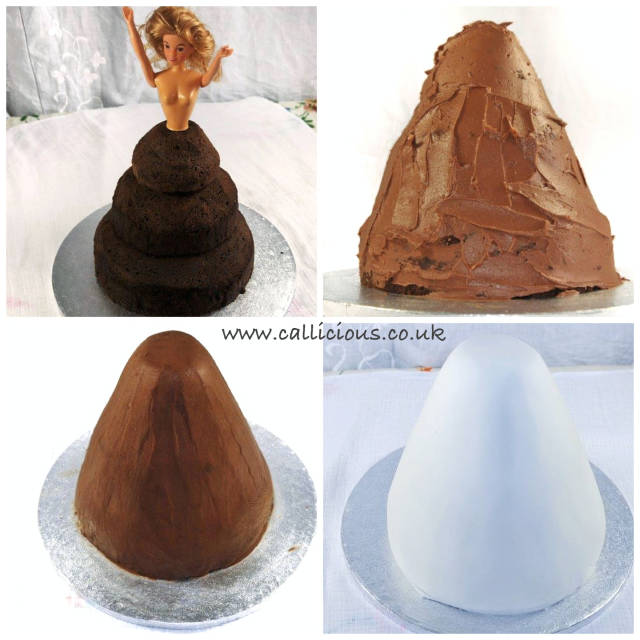
If you have a domed cake tin, then great, if not, then this is what I did. 8”, 6” 4” round chocolate cakes, stacked and choc ganached and covered
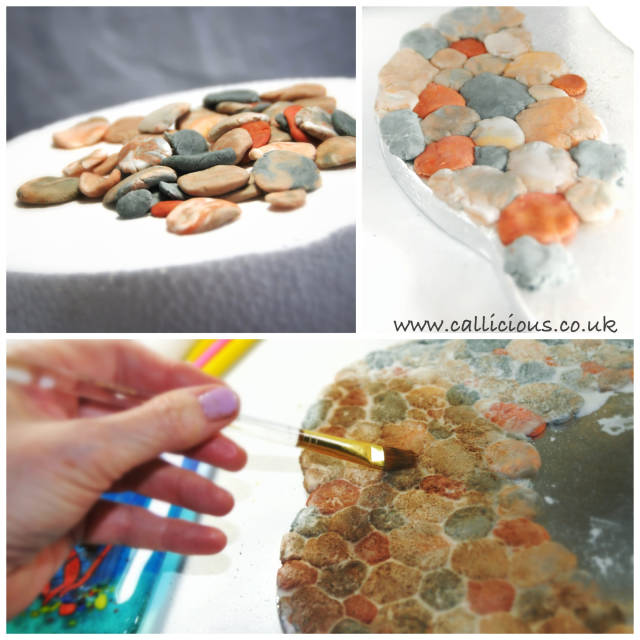
I used a photo of Spanish Cobblestones as my reference for the board. As you can see, I used different colours of fondant, mixed up randomly and made into pebbles. After placing them all on the board, I then used crumpled foil ( like I did for my WoW book cake cover) to create a texture on the pebbles. I spread a thin layer of royal icing over the bard and when dried, dusted with brown to create more texture effect.

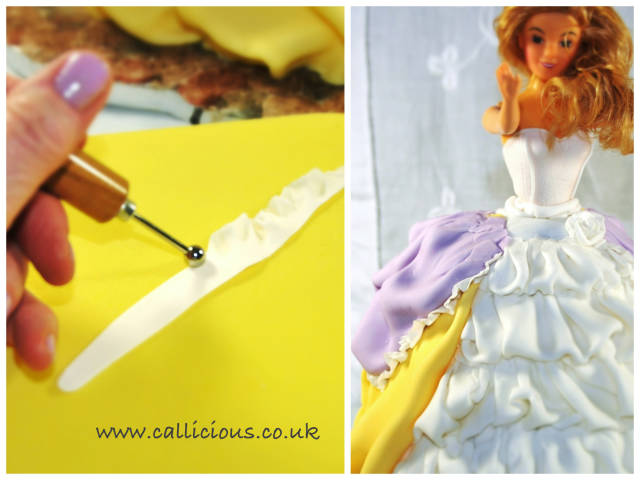
The ruffles for the front of her dress I used this cutter, but you can use any one that you have in your box, or even use a cutting tool to cut a curved line as well, which I have done as well. I then place onto a cel pad and thin the edges and create more movement. Then add them piece for piece to the doll, as seen in pic. Patience is required for this as found it took me some time to do this. I am not an expert in ruffles and still experimenting with it
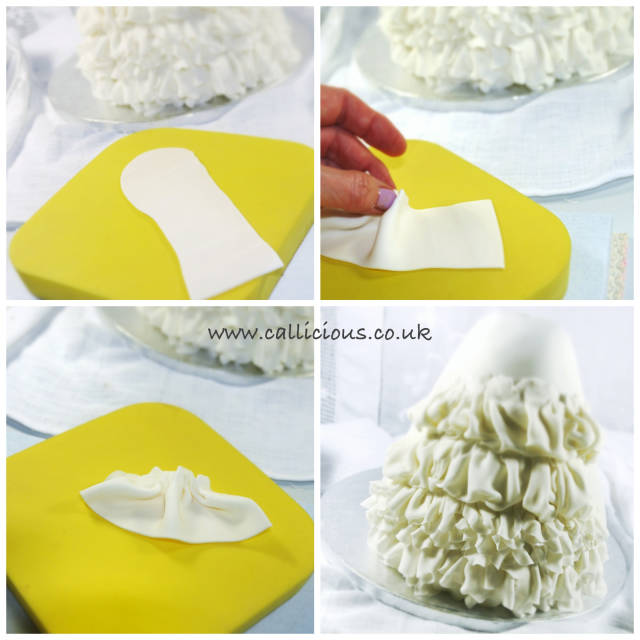
This is similar to previous pic, but here I used bigger ruffles and used a cutting tool to cut a wavy line that I then thinned and gathered to add to the doll.
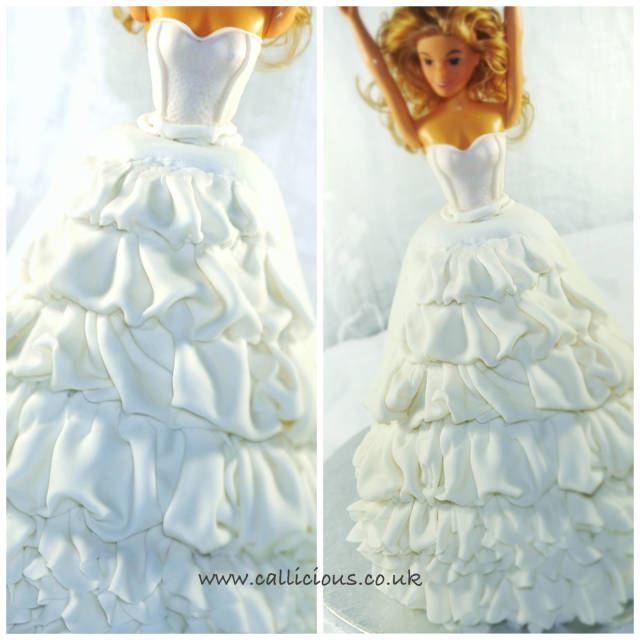
Here is the final result. I then dusted with pearlescent colour dust
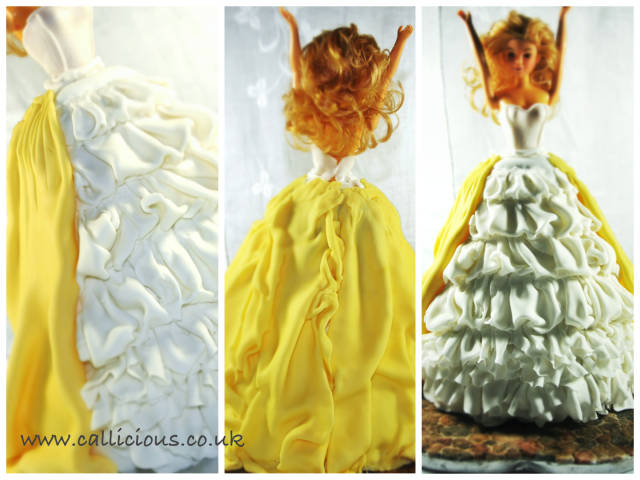
Now I add the yellow and used the back of a paintbrush to help create folds by tucking underneath the fondant and gently pinching here and there with my fingers. No template, just random shapes I cut and folded around the doll.
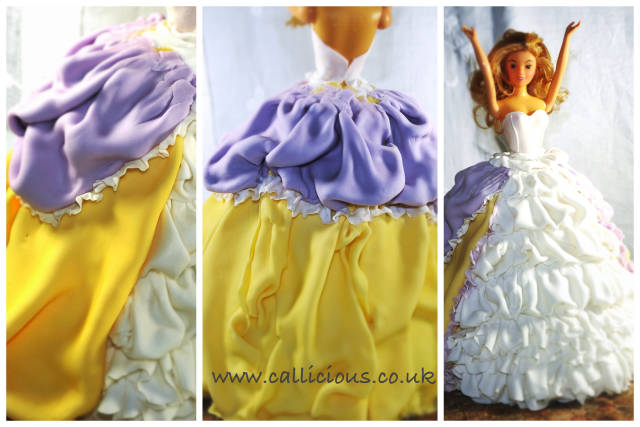
The same process for the lilac as I used for the yellow. I did not use a template and cut out random shapes that I then moved into the shape I wanted to be.
The small ruffles I used to line around the lilac was done my cutting strips and pulling the edges to ruffle with a balling tool

I then piped on the detail with royal icing. That brush embroidery effect, is a rush job (apologies) , but really just to create the illusion of embroidery. Pipe an outline, then use a damp brush to “pull” the icing inwards. I use Eddie Spence’s book as a guideline for this. The dots I piped with a 2 nozzle. I then painted the dots with gold lustre
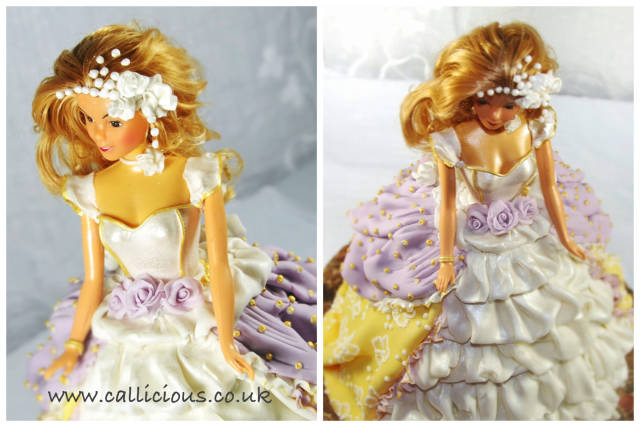
This was done making free hand roses in fondant. I then piped on some dots to create a fun hair feature. The purple roses on the dress I made my hand as well, no cutters
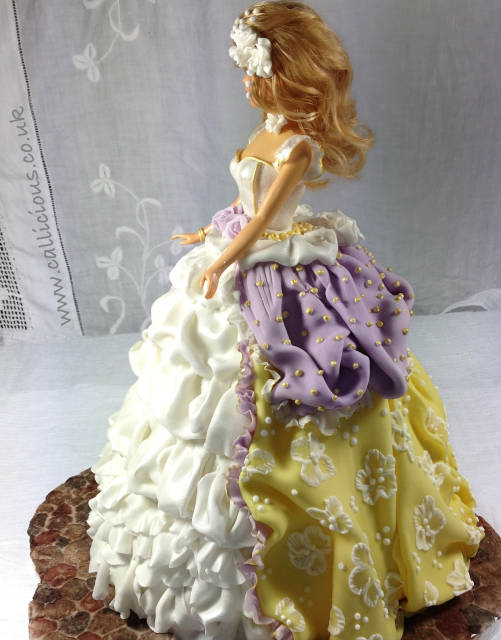
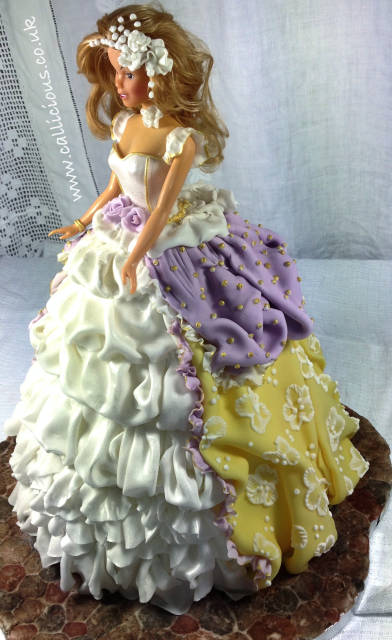
Finished pics: Here she is all completed. I hope you will all have a go. Use any colours and dress designs and themes you wish and have fun!!! Great fun for young girls. This cake itself took 1.5 days, but that stretched into 2.5 days as it took time to put the tutorial together.
You must never limit your challenges, instead you must challenge your limits
26 Comments

So beautiful…thanks so much for sharing Calli
your welcome Jo hon!!! xx
You must never limit your challenges, instead you must challenge your limits
WOW! Calli, do you mind if I put this on my website?
Find me on facebook: http://www.facebook.com/cakesbymimi.net
Sending you a private message Mimi… thanks so much for your lovely message :) xx
You must never limit your challenges, instead you must challenge your limits

Thank you so much for putting together this tutorial Calli!
Benni - http://www.facebook.com/pages/Adventures-in-Caking/128896783863694

Thank you so much Calli!
And Happy Birthday (minus one day) !!!
Dina @ miettes, http://www.facebook.com/pages/miettes/257790597632317

What a fantastic tutorial, so clear at every step. I think that a lot of little girls will be very grateful to you for this! xx
Pamela - http://madewithlovebyme.wordpress.com/ www.facebook.com/PamelaMcCaffreyCakes
Perfect timing on your tutorial, I need to make a “fancy” barbie doll cake for a 5 yr old. I have been pondering how to make it :) Now I know. Thanks so much.
Very nice.
Giuseppe Sorace l'arte di decorare le torte

She is gorgeous, thanks for sharing Calli xxx