
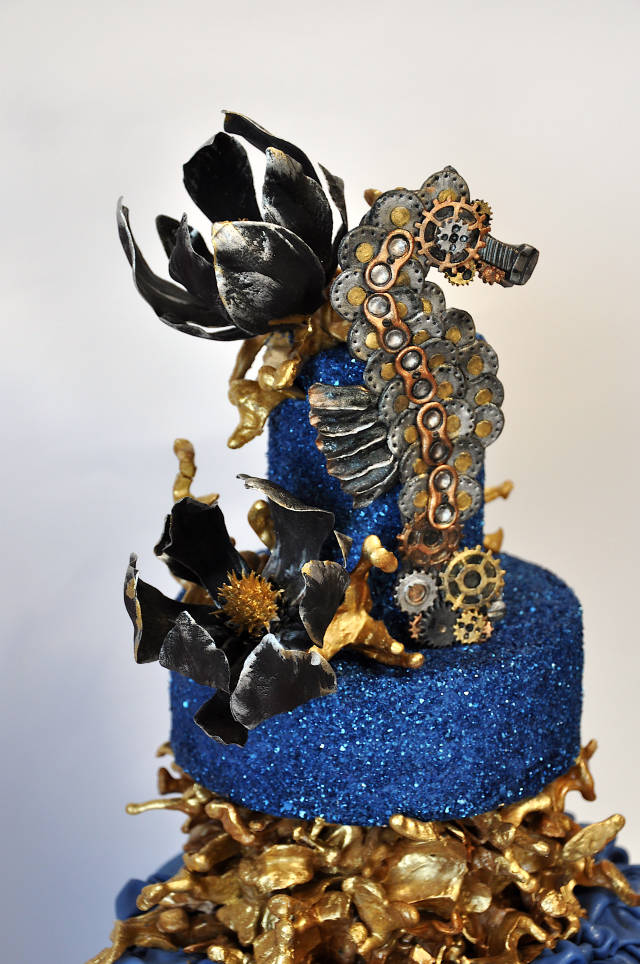
2D Steampunk seahorse tutorial
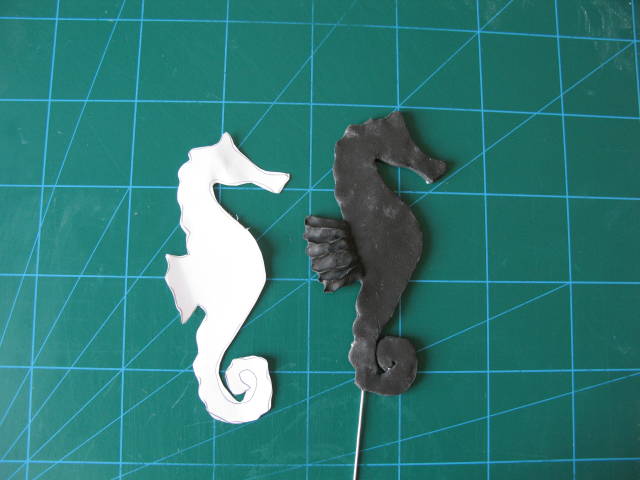
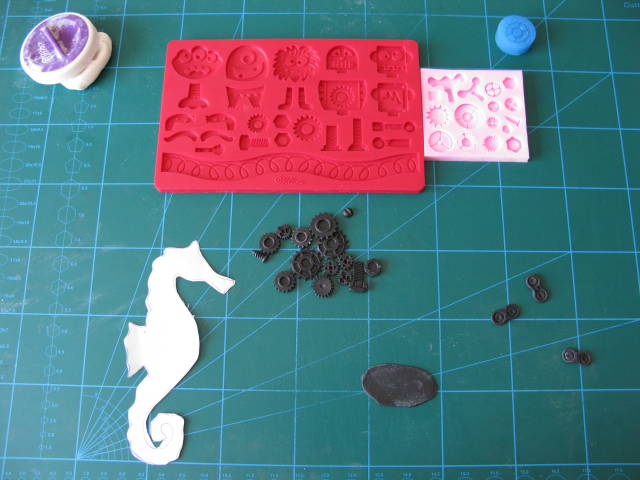
Make a template of a seahorse and cut it. Roll a piece of black fondant (mixed with tylose), place your template over it and cut it with x-acto knife. Insert wire N.18 and leave it to dry.
Use cog gear mold and make some cogs. Later we will cover the seahorse with cogs and lamellas.
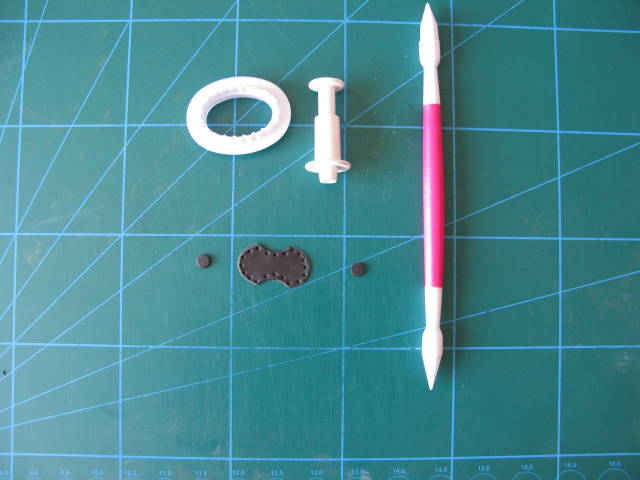
For the body make lamellas using ellipse cutter, small dot cutter and star modeling tool. Cut an ellipse and cut small pieces in the middle to create the shape of number 8. Using the star modelling tool make small dots around the lamella. Cut two small dots and place them on the lamellas.
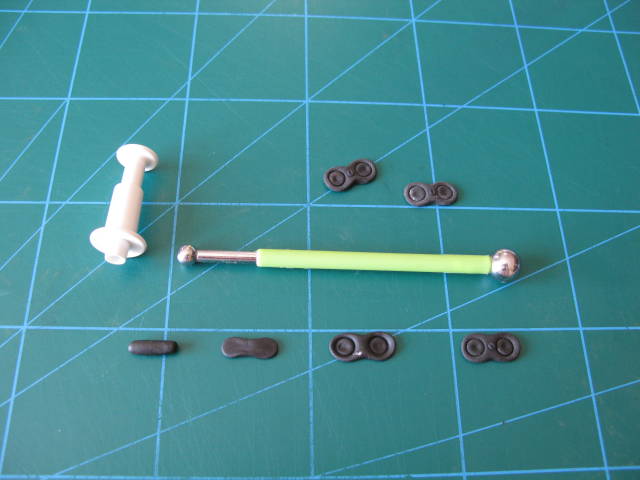
For the middle chain parts create a small sausage, press slightly in the middle and then press on top to flatten it. Use the ball tool to create the shape and the impress circles with the small dot cutter. Make a tiny little ball, flatten it, indent a line with the back of the xacto knife and place it in the middle.
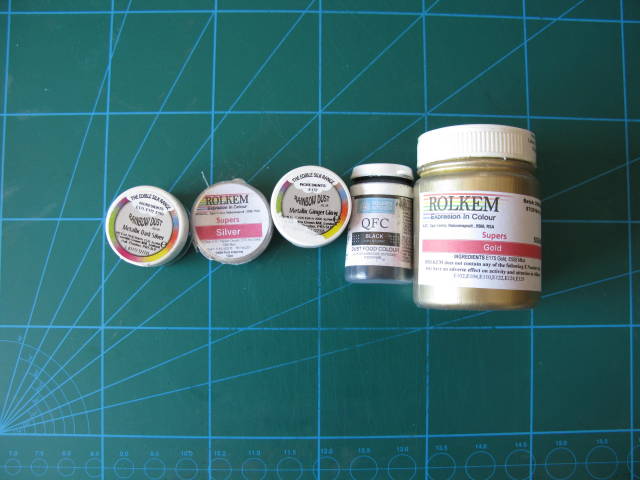
Use metallics to make your cog lifelike. Use Rolkem super gold, Rolkem super silver, Metalik dark silver (Rainbow dust), Metallic ginger glow (Rainbow dust) and Black dust (Squires Kitchen). Attach your cogs on your dried seahorse using edible glue or piping gel. Use lamellas for the body, slightly overlapping them and cogs for the rest of the body. Then place the chain in the middle of the body. For the seahorse fin roll small piece black fondant and pinch the paste with your fingers and pull the lines for the fin. Dust it with metallics as you wish.
I have the simplest tastes. I am always satisfied with the best."
17 Comments

Lovely! Thank.You for this!

Woooooow,simply stunning!! Thank you for sharing!!😍😍😍✨✨✨✨✨
Ivana

Thank you!

Awesome!!!!
CakesbyEvička
Awesome 😀
Olina's taarten

Thanks a lot for sharing! It looks amazing
Marlene - CakeHeaven

Awesome! Thank you for sharing!
Elena

Thank you!
Mis dulces tentaciones

Thank you! <3
Benny's cakes

Awesome!!! Thank you for sharing!!! :*
SweetUs