AIRBRUSH #3: LET'S KICK IT WITH JOHNNY -BAMBOO CAKE BOARD { AIRBRUSH HOW TO }
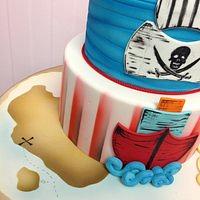
I don’t know about you, but the first thing I look at when I see a cake… is the cake board.
Its like a cake body langue thing… I can read and get so much information about the cake and it’s creator by the cake board the cake is wearing. Seems strange or may sound crazy to you but I will be the first to put my hand up tall and straight…
I JUDGE A CAKE BY IT’S CAKE BOARD
{I am also guilty of not hiring people if their cake portfolio contained photos of their creations without a covered board} #SORRYNOTSORRY
A covered cake board is easy and doesn’t take long… A cake board is like setting the stage for a grand performance… the stage can make or break a design… it helps and assist the main act by setting the scene and mood… and HEY its a great opportunity to get creative… not going to lie, sometimes I enjoy creating the cake board more then the cake itself… Its an addiction of mine… enough blah blah let me show you a simple, fast and very effective cake board effect…
[ #respectyourcakeboards ]
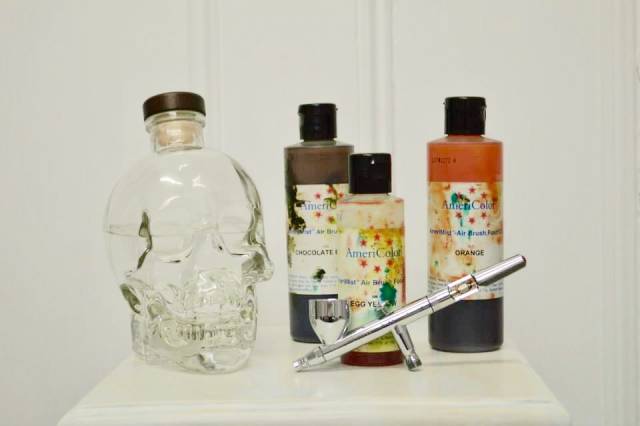
[ MATERIALS REQUIRED ]
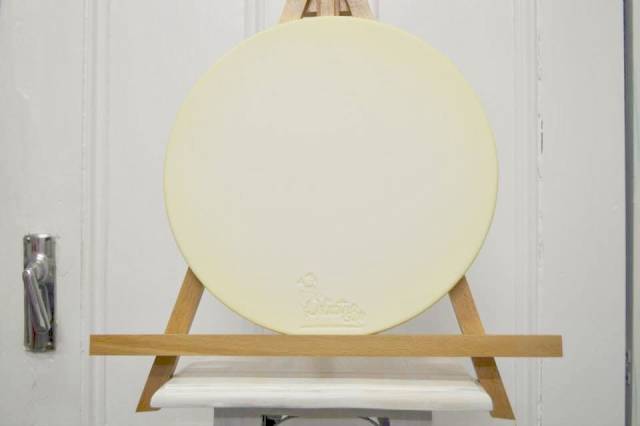
-Fondant Cover Cake Board (at least 24 hours old)
-White Spirit I find vodka the best to use as a reducer… It seems to play nice with the colours I use, doesn’t evaporate as quick as a rose spirit and it gives a nice shine finish
-Airbrush Colours, Chocolate Brown, Orange and Egg Yellow I am using Americolor Airmist, you do you and work with what you feel works best, for me at this stage is the Americolor
-Piece of Card
-Ruler
-Flat Paintbrush
-Airbrush Johnny is an Iwata Eclipse HP-CS
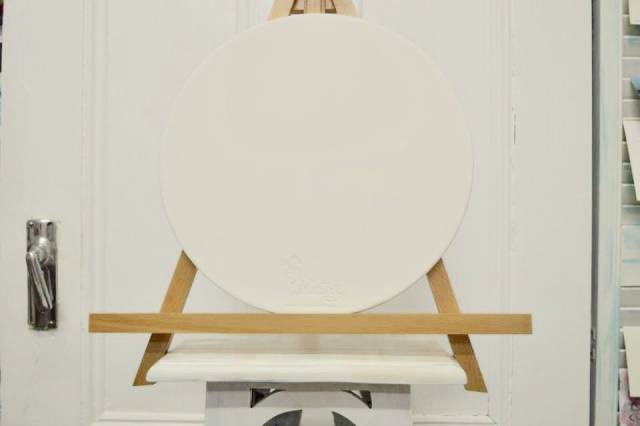
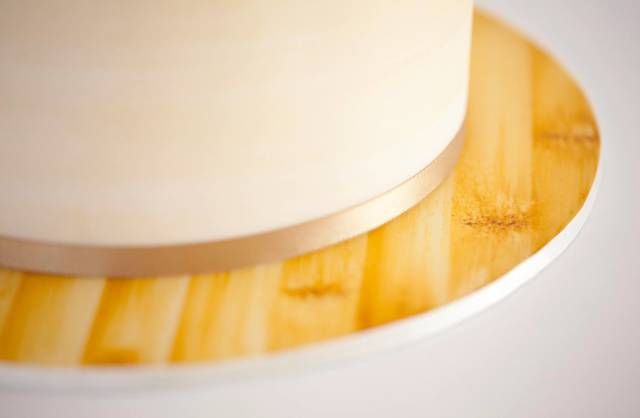
[ COVERED CAKE BOARD ]
This needs to be at least 24 hours old in white. I find white is easier to work with when building up your colour layers PLUS its easier to colour match… BUT if you wish you could always use any leftover pale lemon yellow icing you have laying around.
[ COLOUR FOUNDATION ]
For this cake board I require four different colour tones.
ONE, FOUNDATION COLOUR: Egg yellow reduced to a very pale medium. About one drop of colour to three dashes of reducer you choice of white spirit, for me… VODKA.
TWO: Same as colour one, but with an extra drop of egg yellow and a drop of orange, reduced.
THREE: Same as colour two, but a drop of chocolate brown and an extra drop of orange, reduced.
FOUR: Same as colour three but with an extra drop of chocolate brown, reduced.
You can mix your colours to suit as long as you have a very light, light, medium and dark shade.
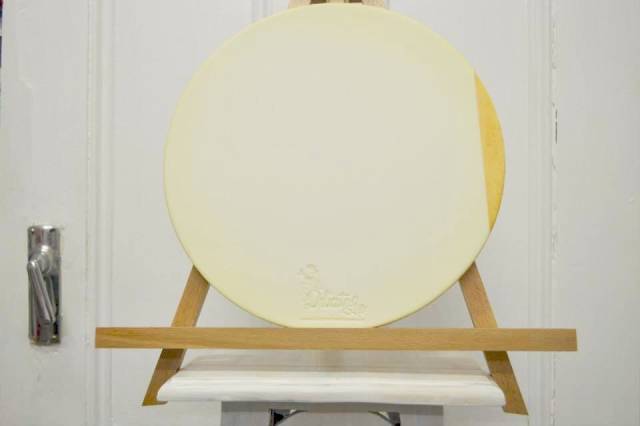
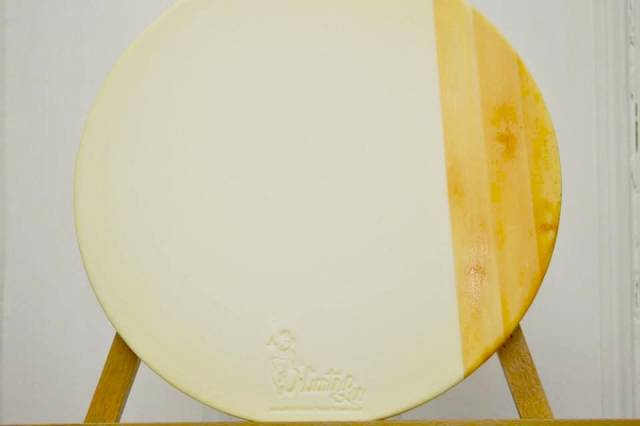
Using your foundation colour (the pale egg yellow), airbrush an even coverage over the cake board. Using a turntable can make this step faster and easier.
I like to make the edges of my cake board darker so that when the cake is set in the middle it pops with more of a highlighted look.

I use a ruler width to gage my spacing, start off with only half the width, so that the finish cake board looks more natural.
Using your piece of card as a “MASK” hold in place and airbrush using colour number two (egg yellow with a dash of orange).
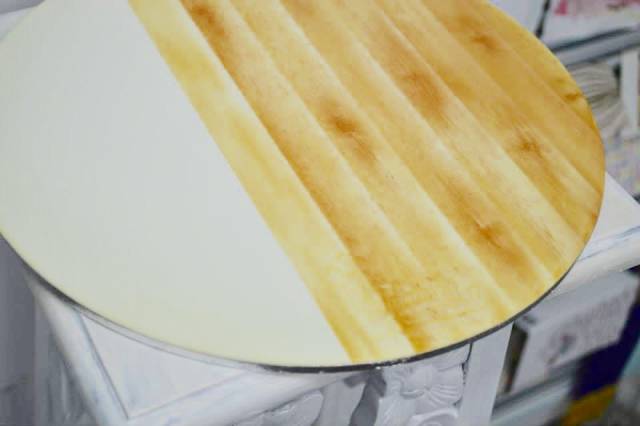
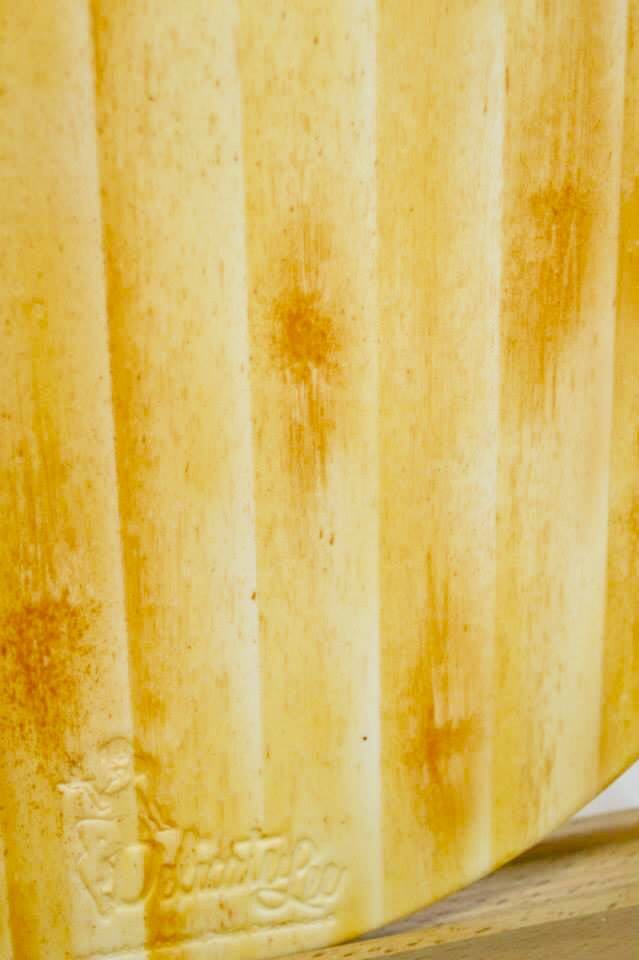
Add texture and movement with feather strokes. No wood grain is a flat colour, so to give your cake board more of a realistic look you will need to add texture and movement {NATURE isn’t perfect so go against our “perfect” nature and make sure each application is different from the last}.
Don’t be too scared as this is the first layer, you really can’t go wrong.
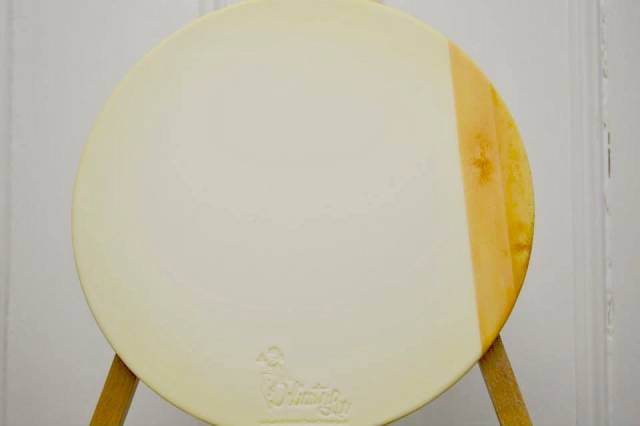
Using colour number three (few drops of chocolate brown added), I add thinner and dark strokes. Then I get my plastic card, fold it in half, point my airbrush on a 75 degree angle and spray, this should give you a nice heavy spray (like if you were to load the paint brush and flick, but with an airbrush you will get a better result and more even). Using my paint brush, in a down wards motion drag over the dots so I get a nice grain like texture. * REMEMBER to keep the grain running up and down*
With my fourth colour (add a few more drops of chocolate brown), I hit the edge of the mask so that I will have more of a defined line, add some more grain using the plastic card method and then to get the bamboo grain look, I focus on one spot, then brush away and then towards leaving the middle alone. This should create the bamboo knot.
I use my ruler again to gage the width of my next panel, mask and repeat the layers.
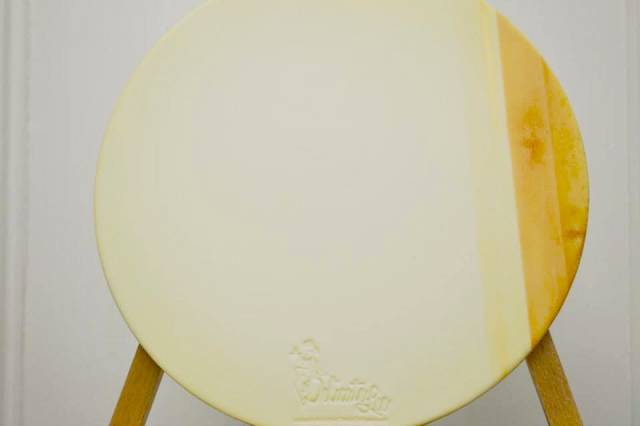
USING COLOUR TWO Remember your strokes, you need to build up your layers with texture and movement… make sure each is different from the last one… If you don’t …the finish product won’t look as realistic.
USING COLOUR FOUR Remember not to be perfect, light and shade, heavy and light.
Creating the bamboo knot, remember to make some light and some dark. Adding movement and texture using dagger and feather strokes.
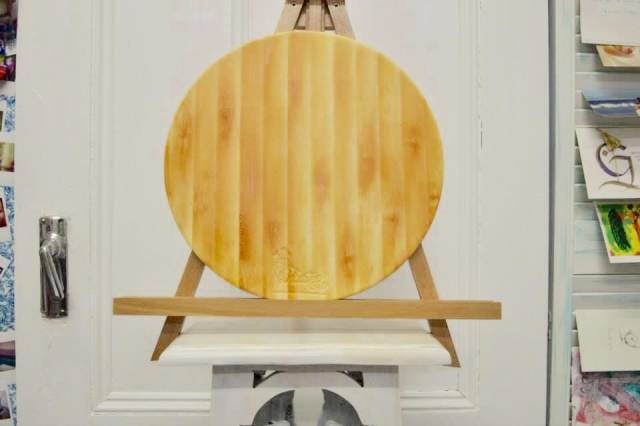
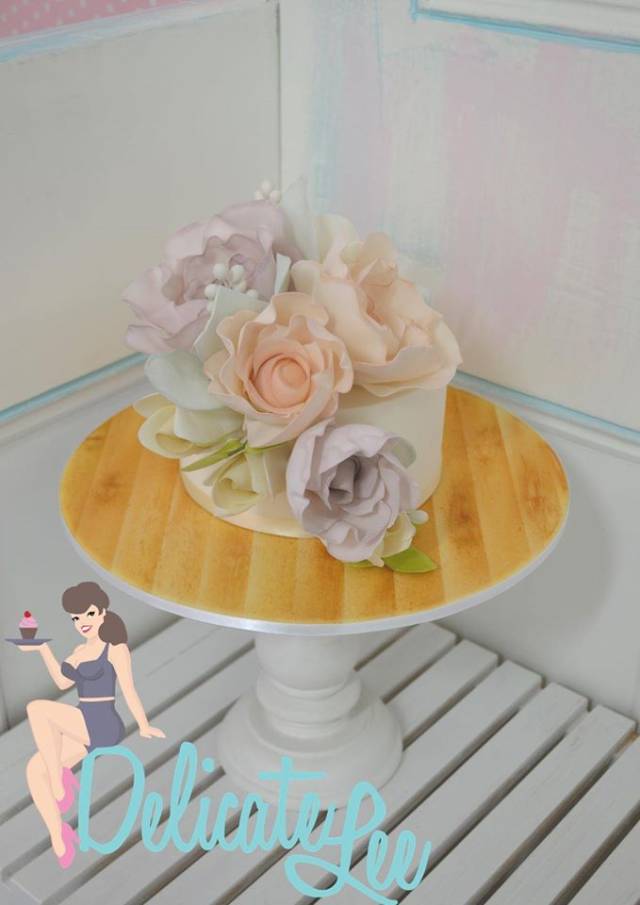
FINISHED
Have fun with this, relax {BREATHE} and don’t get so up tight that you choke your airbrush
Keep your work light and make sure every time you apply paint, make sure it was different to the last time
9 Comments

Thanks for sharing!
Marlene - CakeHeaven

Love this!!! Ahhh !!! You are my favorite !
Lori's Custom Cakes
Thank you and you are all very welcome <3
Great wood effect, thanks for sharing
You must never limit your challenges, instead you must challenge your limits
Awesome tutorial, thanks for sharing! I have just got an airbrush and only used it twice so looking forward to getting more adventurous with it. What area do you use for your airbrushing, I am afraid to get the paint everywhere in my kitchen?
Cupcakes2Delite.com
Cool effect. I have airbrush-phobia but will definitely try this. Thanks for sharing.
TrudyCakes

Wauw… Love iT!
Karla's atelier
Wauw… Love iT!
Karla's atelier