
How to make a gum paste or fondant calla lily
Here is a ‘how to’ that explains how you make your own calla lilies from fondant or gum paste. You can decorate your cake or cup cakes with these gorgeous flowers. If you are a beginner the calla lily is a good place to start!
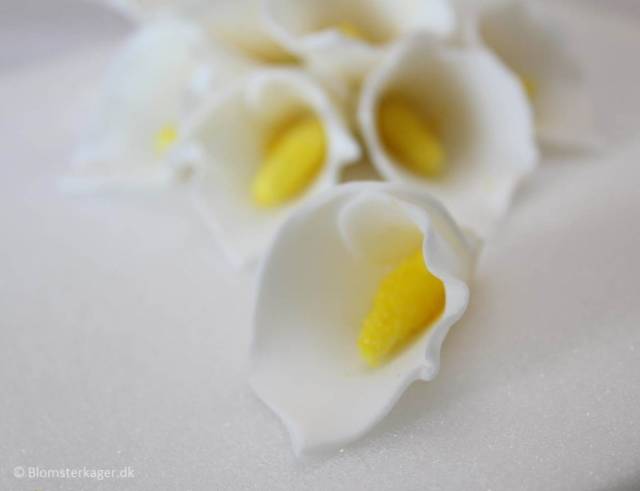
Calla lilies are beautiful flowers and they are often used at weddings, actually, one of my best friends had a wedding bouquet consisting of calla lilies in a variety of different colors and it was very elegant.
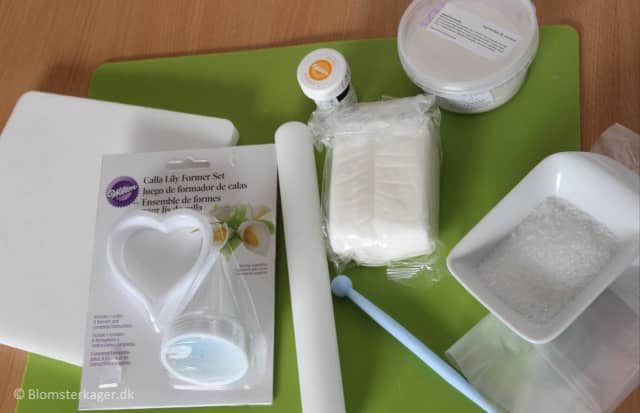
For making calla lilies from gum paste or fondant, you will need:
Fondant or gum paste
Tylo powder (only if you use fondant)
Calla lily cutter and cone shaped forms (I use a set from Wilton that contains both the heart shaped cutter and the forms)
Duster with corn flour
Non-stick board or cutting board
Rolling pin
Foam Mat
Ball tool
Icing colors (in your color of choice. You don’t need icing color if your calla lily is white. But you do need some yellow color for the centre)
Dust colors (yellow and green)
Brushes for glue and dust colors
Edible glue
Kitchen towel
2 tablespoons of white sugar
Small plastic bag
Small bowl
INSTRUCTIONS:
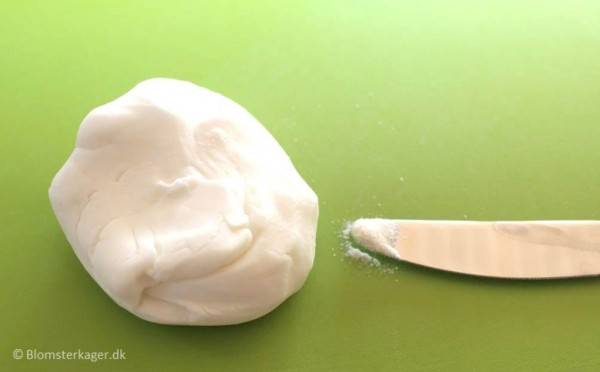
1) Start by coloring the fondant or gum paste in a color of your choice using icing color. Please notice: If the fondant or gum paste is left on the table for a while it will dry out and become unusable. I always protect the fondant by wrapping it in a plastic bag when not in use.
2) Knead the fondant or gum paste and add a pinch of tylo powder so that the fondant becomes easier to work with (if you use gum paste you don’t need the tylo powder)
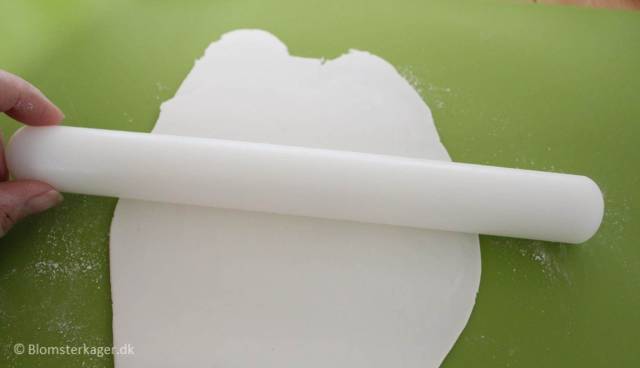
3) Dust the board with your corn flour duster. You should also dust the rolling pin before you begin.
4) Roll out some gum paste / fondant but you should not roll out the gum paste / fondant too thinly.
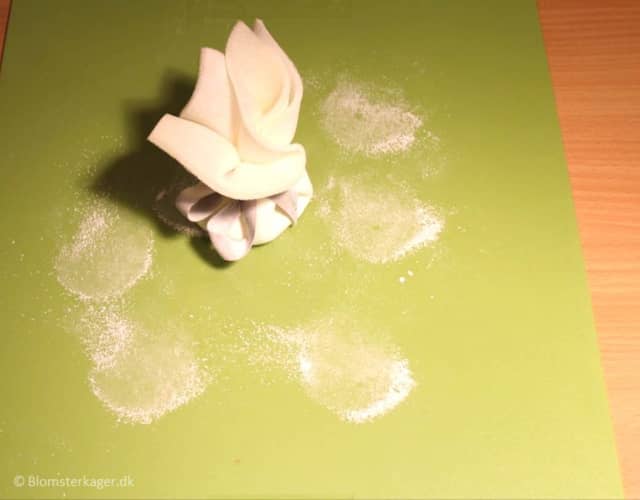
5) Cut out a flower with the heart shaped calla lily cutter. Press down the cutter firmly and twist it a bit. This way you get a cleaner cut.
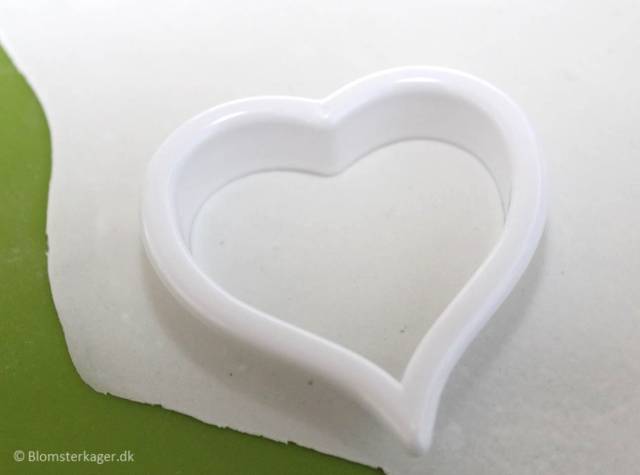
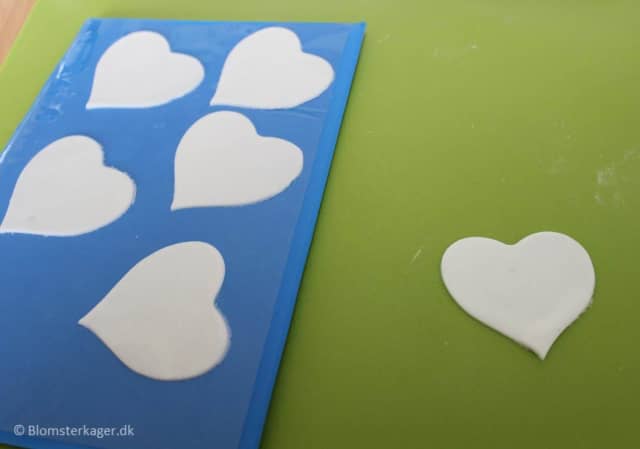
6) If you want to make more calla lilies at a time, it is a good idea to roll out a big piece of fondant or gum paste and cut out all the flower petals at once.
Place the flowers you don’t need right away under a plastic bag and keep it airtight (I use a gum paste storage board from Wilton) so that the petals don’t become dry in the meantime.
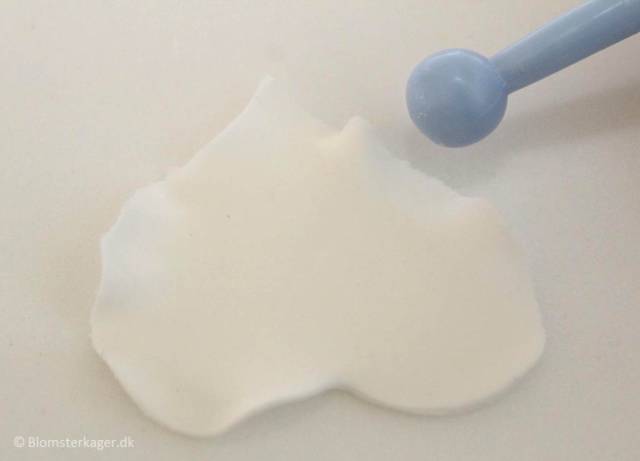
7) Place the petals on the white foam mat and thin the edges of the petals with the ball tool by gently sliding the tool on the petals. This makes the flower look more realistic. Only thin the top half of the petal (the pointy part is the top half).
Tip for using the ball tool: Place one half of the ball tool on the petal and the other half on the mat while you glide the tool on the petal for a better result.
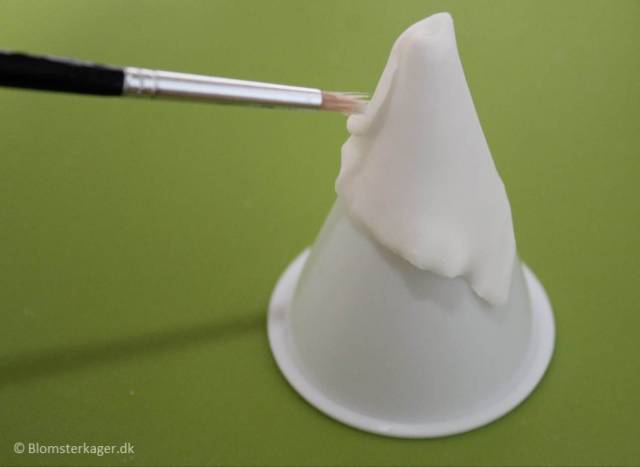
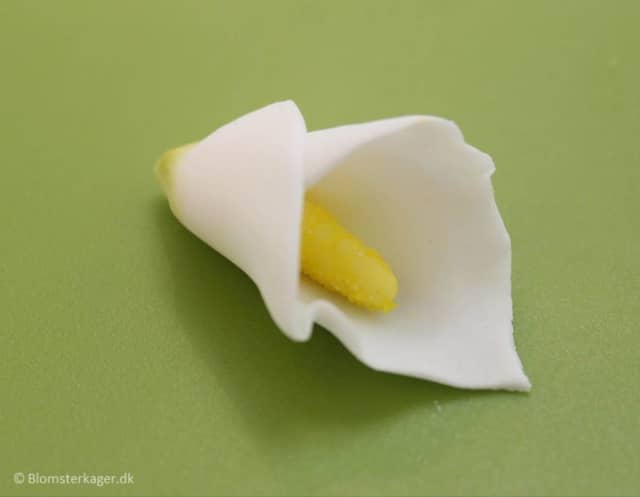
8) Wrap the flower around the flower former cup. The flower former cup ensures that the calla lily gets the correct shape. Place the heart-shaped form upwards. Hold the flower with one hand and dot a bit of edible glue on the edge of the flower with the other hand. Afterwards, glue the flower together so that it is wrapped around the flower former cup while it dries. Make sure that one side of the petal is wrapped over the other. Leave it to dry for a couple of hours.
HOW TO MAKE THE STAMEN:
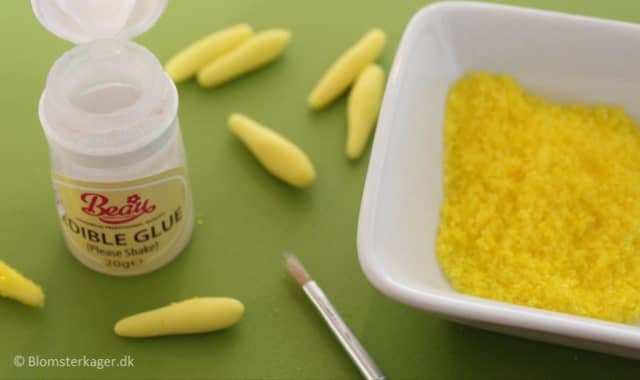
9) Put the sugar in a plasticbag. Add a pinch of yellow icing color to the bag with sugar.
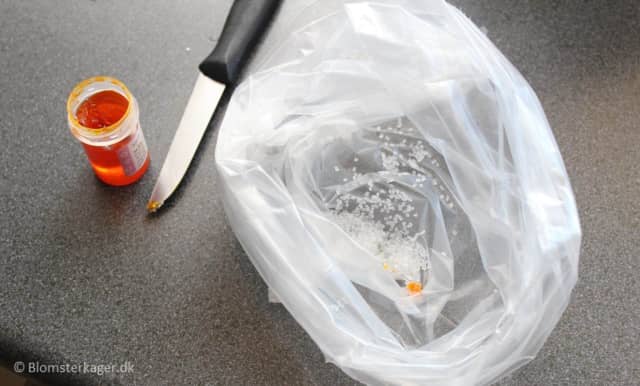
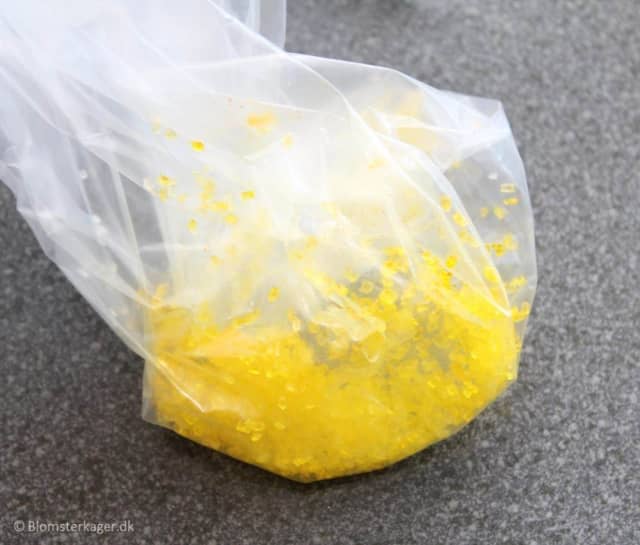
10) Rub the plastic bag until all the sugar is yellow. Pour the sugar into a small bowl.
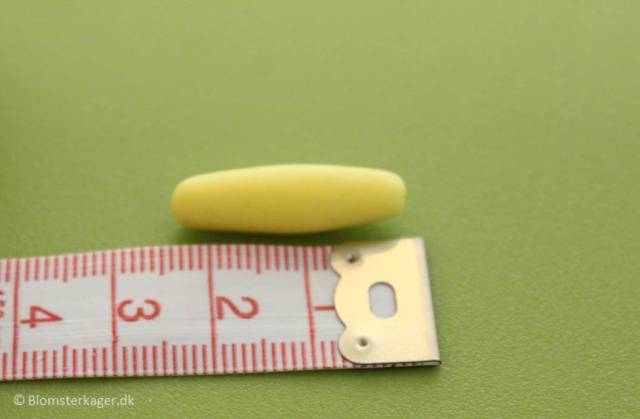
11) Color some fondant with yellow icing color. Form a small piece of the fondant into a sausage like shape twice the size of a pea.
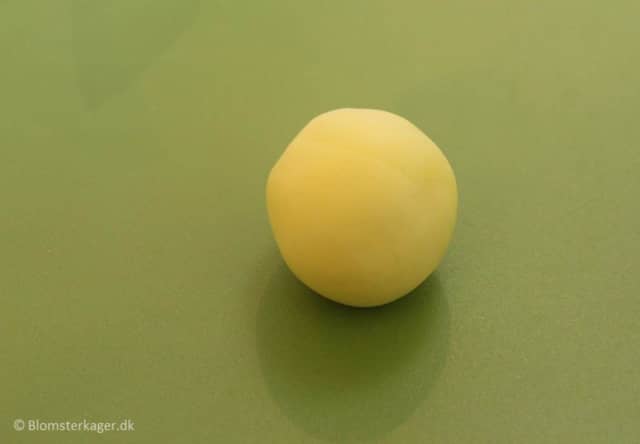
12) Make sure that the small piece of fondant looks like the one in the picture (should be approx. 2,5 cm / 1 inch long) Make a stamen for each flower if you are making more calla lilies.
13) Dot the stamens with edible glue; you can use a paint brush.
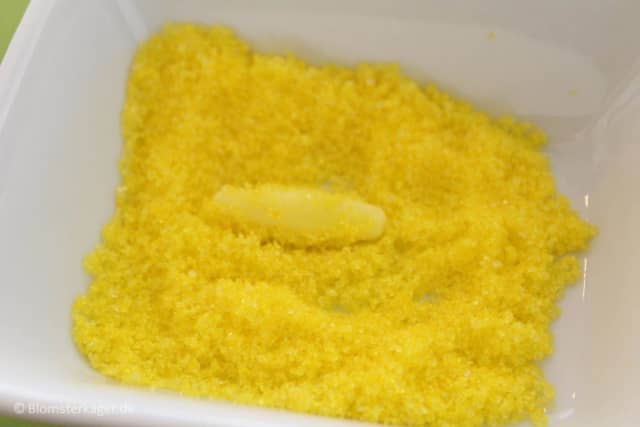
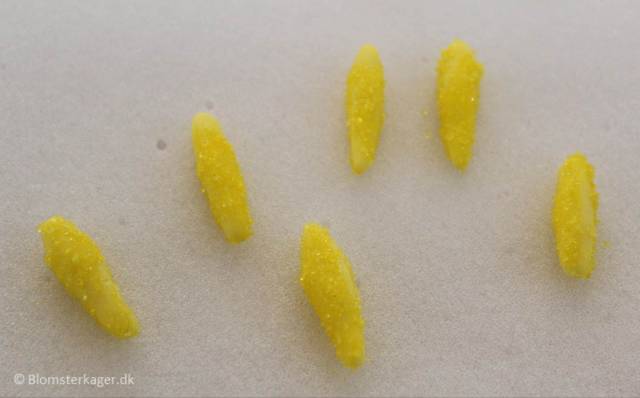
14) Roll the stamens in the yellow sugar. Let them dry for approx. 20 minutes.
HOW TO PAINT THE CALLA LILY:
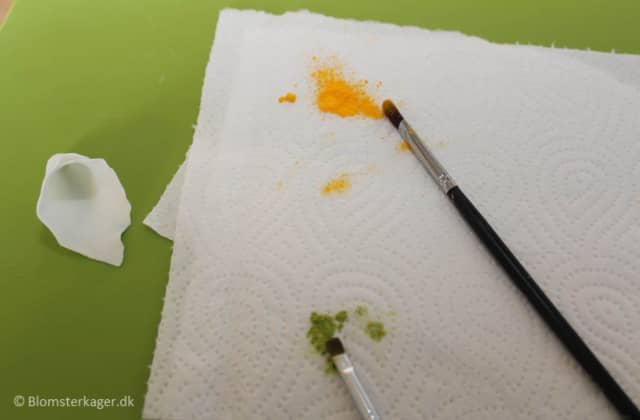
15) When the flower is dry, you can color the calla lily with some color dust. Apply some light green color dust to the bottom of the flower with a dry paintbrush.
You add the color to the flower by pouring a bit of color dust out on a piece of kitchen towel. Dip a dry paintbrush into the color. Tap off any excess color before applying to the flower. Remember! It is easier to apply a little bit at a time than try to remove the color again if you have added too much!
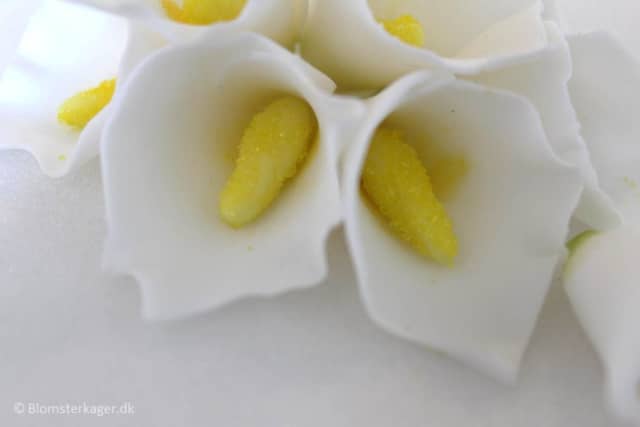
16) Add some edible glue to the bottom inside and affix the stamen. Leave it to dry for an hour or so. Finally, you can color your calla lily with some yellow color dust surrounding the stamen.
Your flower is ready and can be used on wedding cakes or other cakes for a special occasion. You can also use it on cupcakes.
Check out my other tutorials at my blog – http://sugarflowerblog.com
Karen from sugarflowerblog.com