
3D Cakes #2: 3D Robocop Cake Tutorial #2

This is a continuation of how I made my Robocop cake…check out 3D Robocop Cake Tutorial #1 to see the beginging stages.
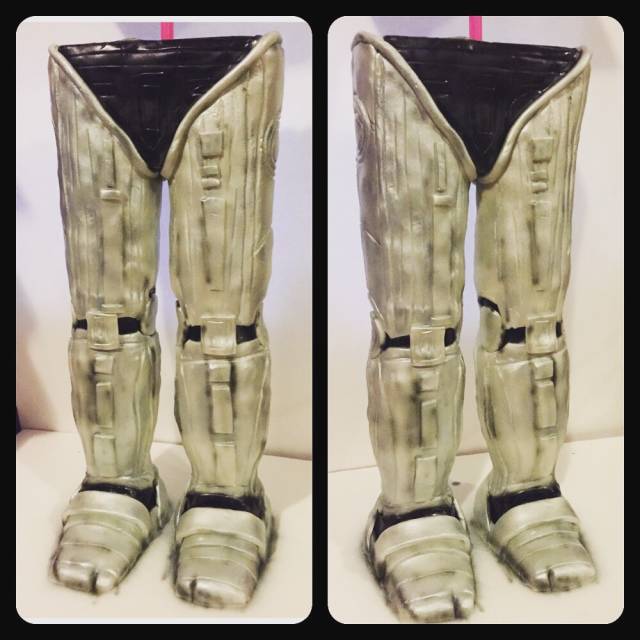
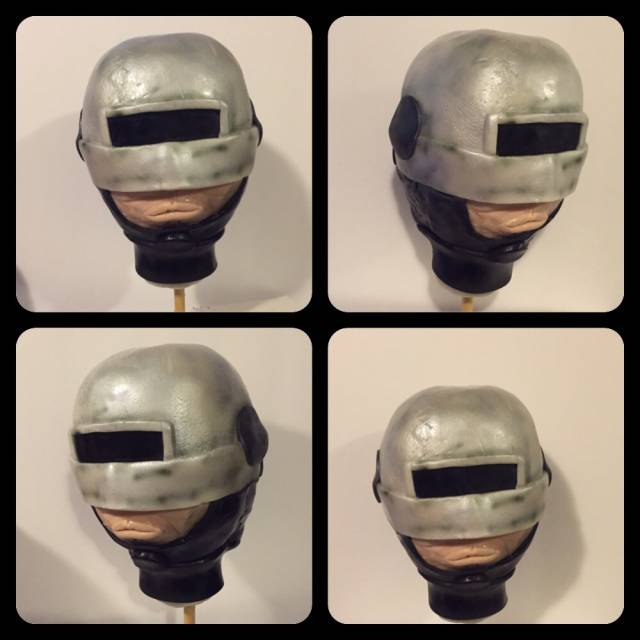
Using my picture as a guided I started adding fondant to my legs and head. The little details I just used my vainer fondant tool and created the lines. The face part of Robo is just the lips and a bump for the nose which was covered.once I was happy with it is used my airgun to paint it. This really made it come to life.
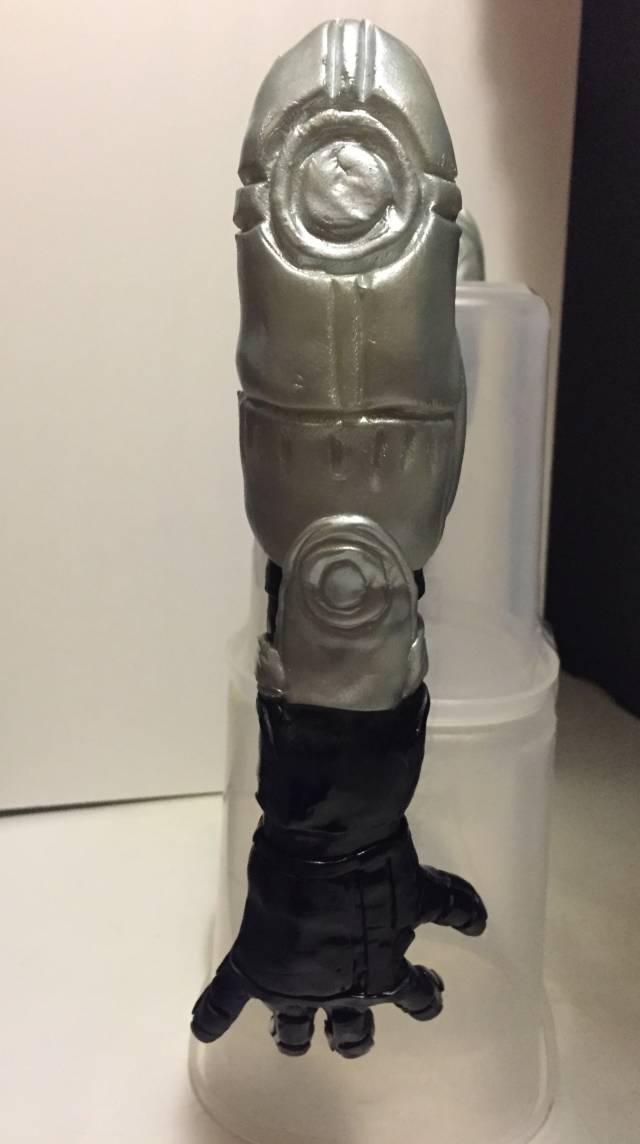
The arms and hands are done the same way as the legs and head. I used fondant to shape the fingers. Then used airgun to add more color. Kept using my picture as a giude in the little details.
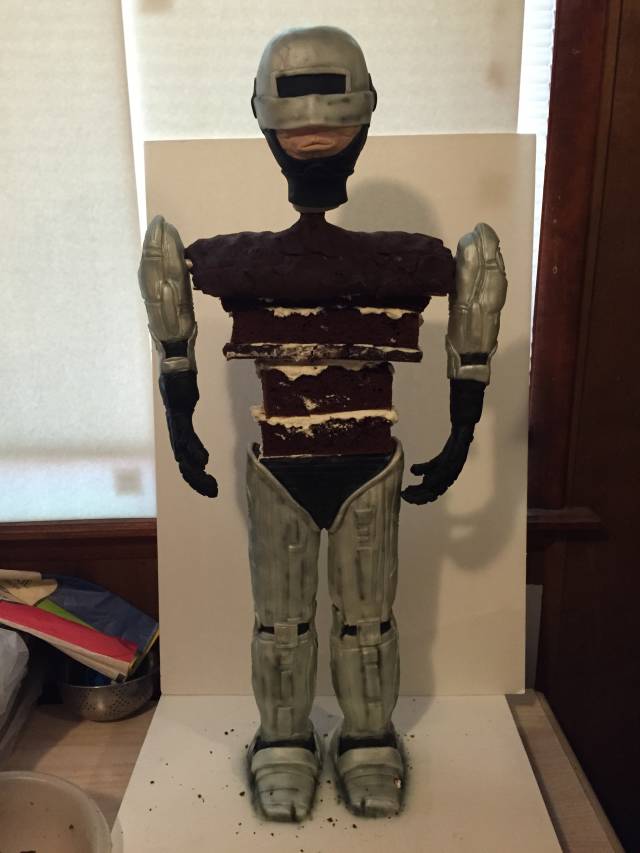
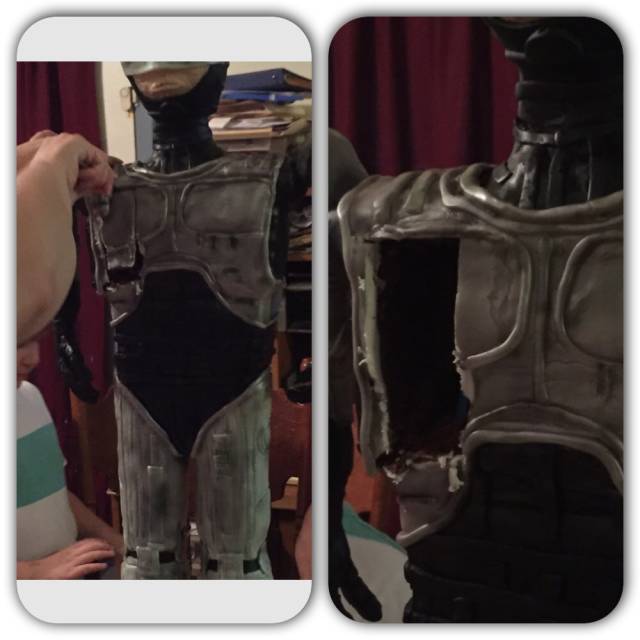
So this picture shows how I stacked my cakes within the support structure . This was a DISATER. The cake fell twice. My cake was just too moist. So I decided to make each section like a huge cake pop. I shaped it then covered in chocolate, then stacked in place. Sorry I don’t have pictures of this part. I only had 4 hours before my sons birthday party and I was rushing to finish. But this actually worked really well and filled out the body better.
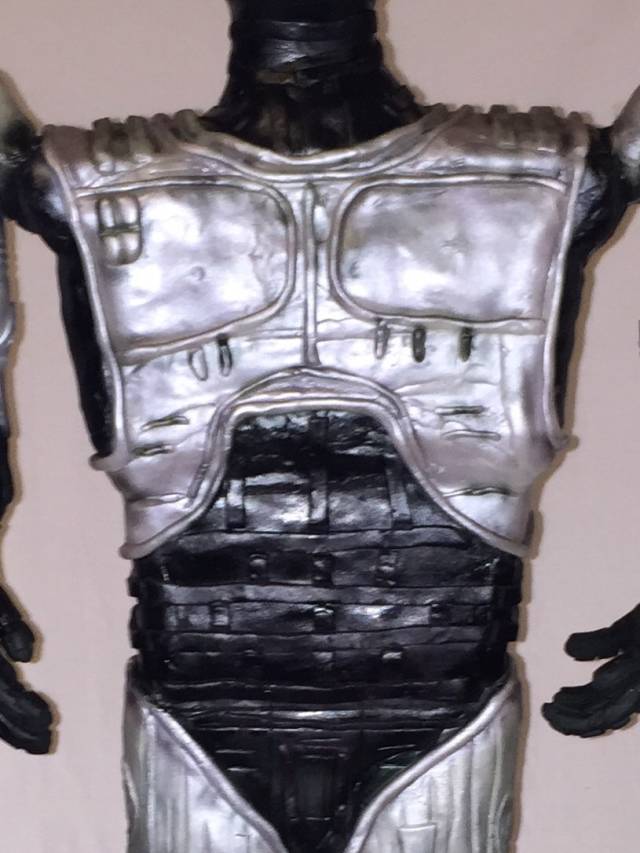
Covered the body in fondant and added deatails and again used my airgun for added color. Silver and black americolors is what I used.
Finally, time to cut the cake. No one wanted to eat the cake because they knew I had spent about 28 hours working on it. 😀
I would have made the head, legs, arms out of RKT, if I could have had the time to make it all at once but I had to make them weeks in advance.
I hope you enjoyed my first tutorial. I am just trying to pay it forward and share like so many of you have done..
Danielle
3 Comments
Hi der,Nice work.is dis all fondant or gum paste? Or der is cake also in it?!
Ok ok I missed one pic..der is cake too!! Nice one
Thank you
Danielle