Sharp edges on a round cake - the easy way
Want to learn sharp edges the easy way? Well look no further cake fans, I will soon sort you out!
Now as a prewarn, easy doesn’t always mean perfect. So what I’m saying is – this method does not provide perfection. Perfect sharp edges yes, but it can taint elsewhere. Sad face I’m so sorry! The lighter the colour of the cake, the better it will look, hence why I have done this tutorial with a darkish colour. So you all can see what I’m talking about…
So have a read through. See the pics. Judge and form your own opinions, but sharp edges have to be better than no sharp edges…right?!
SO what you will need
- a ganached cake. (cake card at the bottom)
- smoothers.
- non serrated knife.
- greaseproof/baking paper. (I like the white one from Sainsburys!)
- two cake boards, larger than the cake.
- rolling pin (non-stick)
- sugarpaste
So you ready to go? Let’s get started!
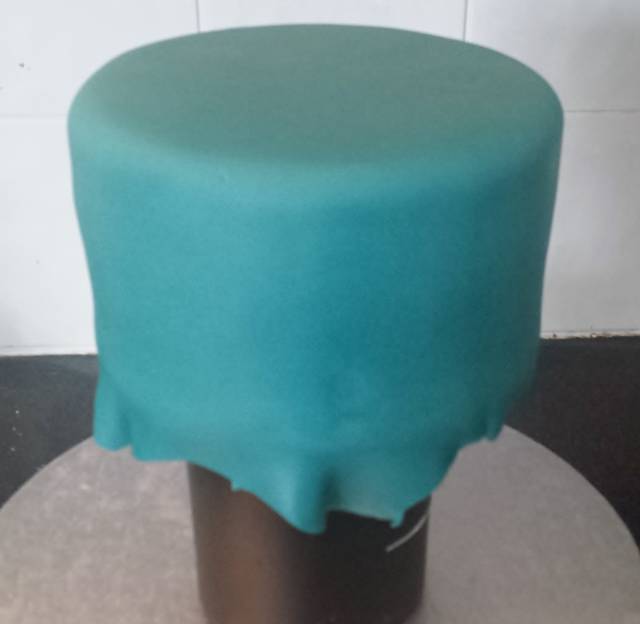
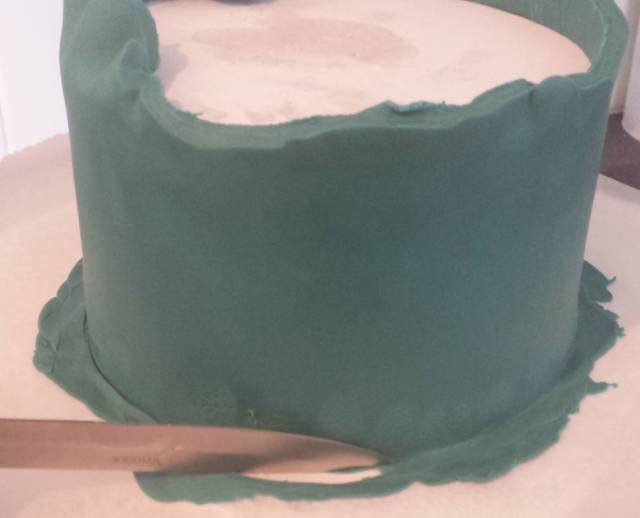
1. Roll out your sugarpaste and drape it over the cake. It needs to be quite thick. At least 5mm, if not slightly more. You want the cake to be on top of a piece of baking paper. Then the baking paper on top of a cake board.
Use your knife to trim any excess that goes over the edge of the board. Use your hands to smooth the top, move in quick circles with your palm. Then using a downward motion, smooth part of the side, turn the cake, smooth down again, turn the cake. You want to be going down about two inches at a time. DO NOT smooth all the way to the bottom, stop about an inch up.
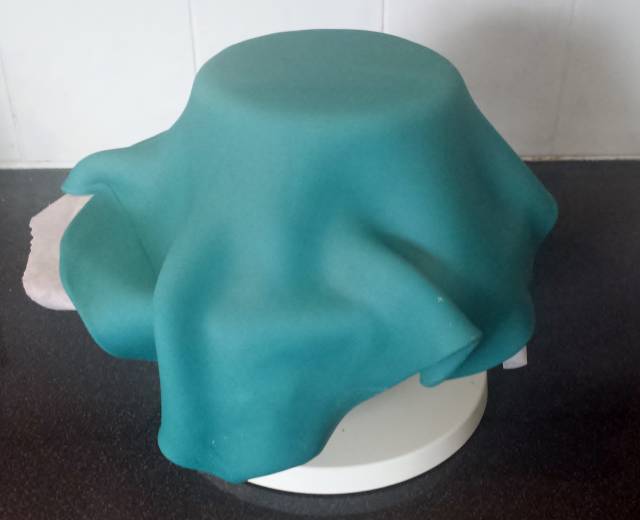
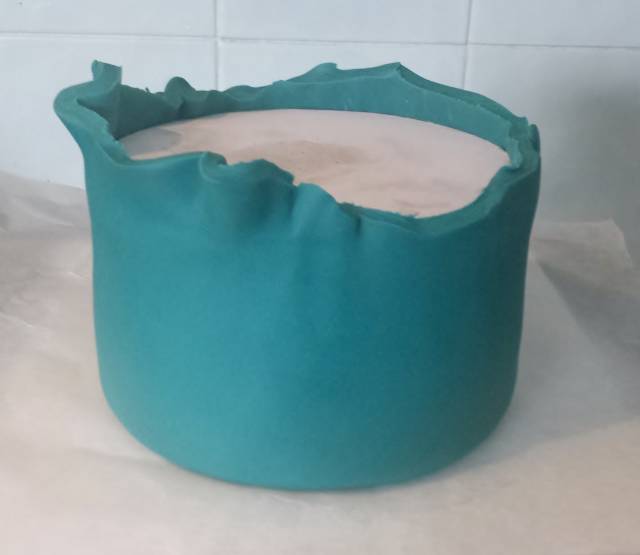
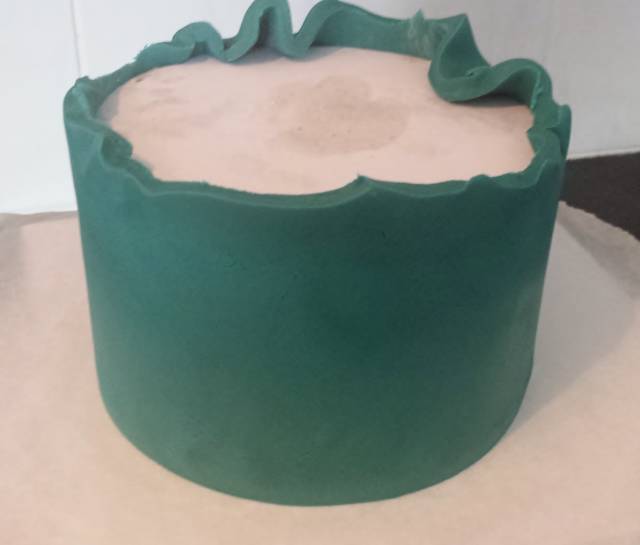
2. Your cake will now look like this. (See below!) Trim around it again so you have around 2 inches going all the way around.
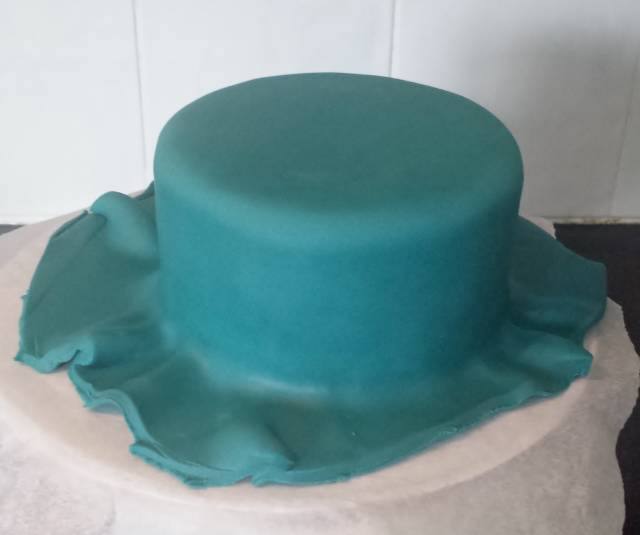
3. You then need to grab hold of the baking paper and slide it towards you. Put your other hand underneath the paper, ready to catch the cake.
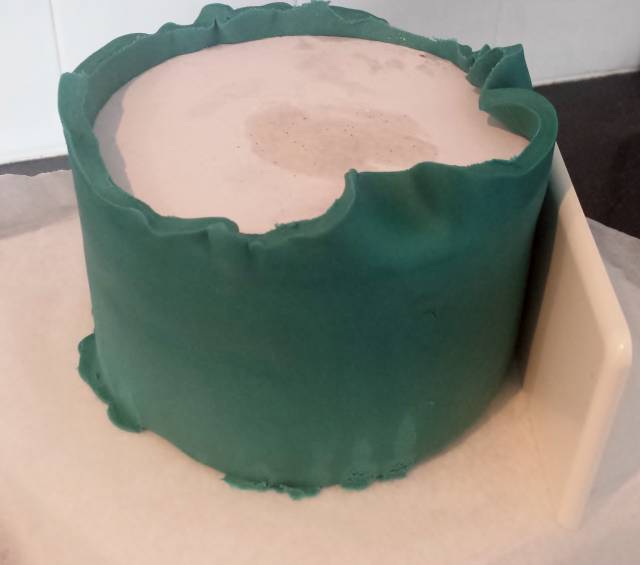
Now the fiddly bit, Holding the cake on the tips of your fingers, slowly remove the baking paper. Sounds impossible, believe me it can be done! Put the cake on top of something weighted, must have a smaller diameter than the cake.
4. Now be careful here, it might be wobbly! Use your hands to smooth the sugarpaste down to the bottom of the cake. Make sure it is fully adhered.
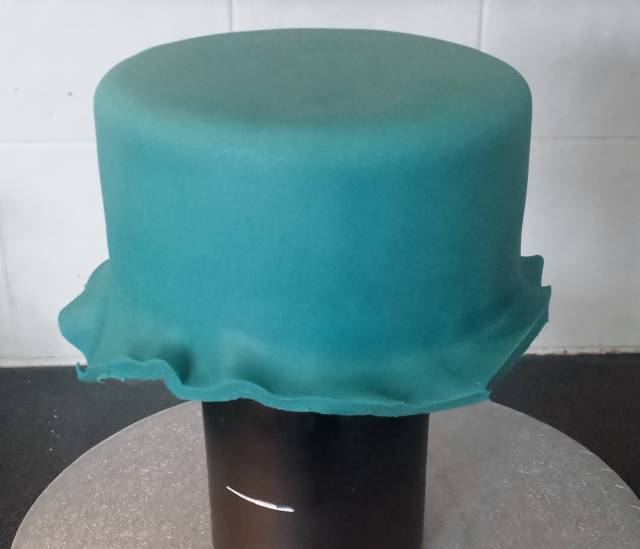
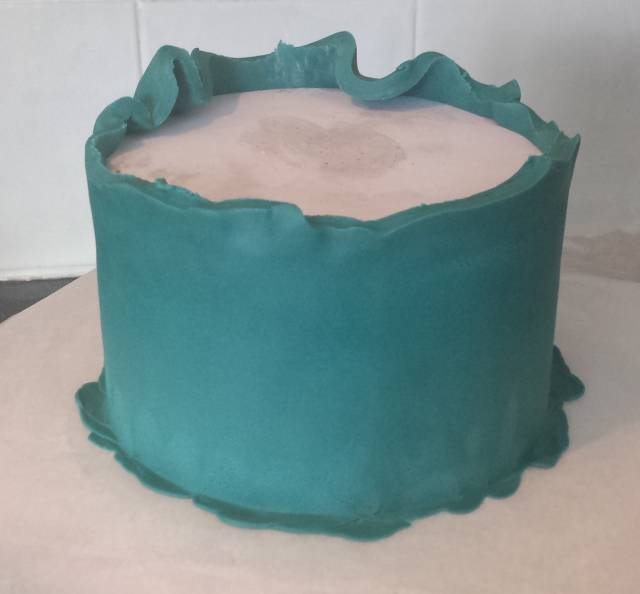
5. Now, another flip! We need baking paper on top of the cake. It MUST NOT have wrinkles in it. Board on top of that. Then one hand under the cake, another on top, FLIP IT!! Just please whatever you do don’t hold it too loosely, I dropped a 12″ square fruit cake doing this (eek! believe me, not fun) – but please don’t squash it either!

6. You now have this!
7. Now, the smoothing part. Do your usual. Use 1 or 2 smoothers, ideally 2, and go around your cake. We want it as smooth as possible. Then making sure the smoother stays flat against the cake (the side must be straight!!!) make gentle up and down motions, pushing the sugarpaste down around the base of the cake. You don’t want to push from the top of the cake, maybe about 1/2 an inch from the bottom, then just push gently downwards. You want the sugarpaste to form a lip at the bottom of the cake, see below?
Now the problem – I told you this method wasn’t perfect! See the scuff marks on the cake? At the bottom above the lip? You can make these less visible, but they will still be there slightly.
8. Keep going until there is a lip all of the way around. Go over with the smoother again. Push down with the smoother around the base.
9. Use your non-serrated knife to trim the lip. It must be completely flat against the cake, we don’t any remaining lip, you must get it all. But we dont’t want to cut into the cake either! Go around with the smoother.
10. It now looks like this, exciting huh?!!
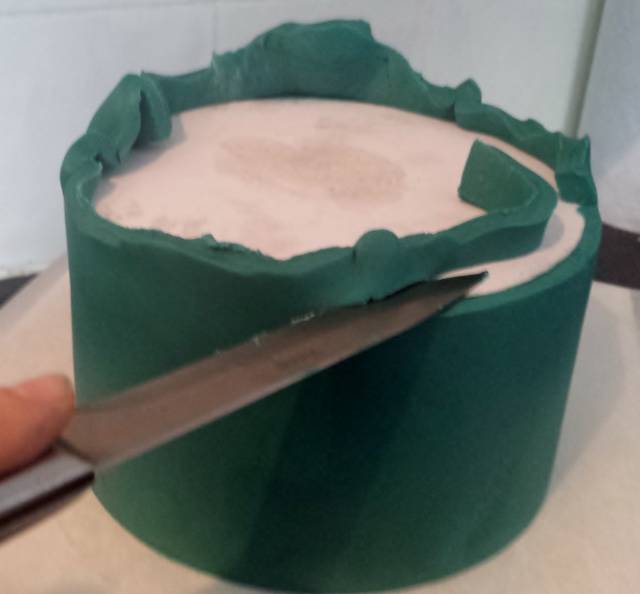
11. Take your knife and use it to trim the excess paste around the top (base where the cake card is!). You want the knife vertical to the board. Cut slowly. Rub over with a smoother or palm after to smooth this.
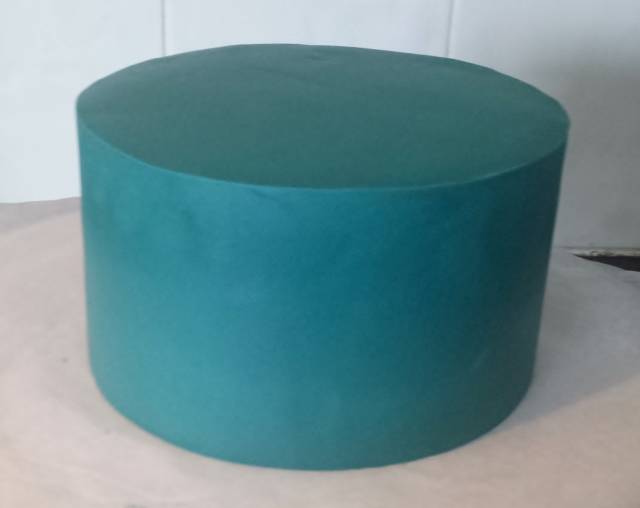
12. Another flip now. Yes I know, I know, scary times – but this is the good bit! place the baking paper and board back on top the cake, then pick it up and flip. Remove the board, then slowly peel off the paper. TA-DA! You should have a smooth perfect sharp edged cake! If there is still a slight lip, you will need to turn it over and trim it and smooth again.
If perfect, go over with your smoother. Use your hands to polish the scuff marks, fast circular motions. You may ever be lucky and not get any! As with all things its practise make perfect!
All your comments would be appreciated! Many thanks! Jerri x
Jerri, Somerset UK, www.facebook.com/that.little.cake.boutique
36 Comments

I always love it when alternative ways of doing things are raised. This is ACE and so well explained with good clear pics too. Thanks ever so much Jerri…. And loving those superb straight edges xx
You must never limit your challenges, instead you must challenge your limits
Wow this is awesome thank you so much for sharing!!!!!! <333333333333333333
Dubey Cakes
No problem at all, im so glad you enjoyed it. And Calli as a big fan, that means a lot coming from you!
Jerri, Somerset UK, www.facebook.com/that.little.cake.boutique
<3 xxxx we all learn from each other…. in fact we never stop learning !!! isnt it great? xxxx
You must never limit your challenges, instead you must challenge your limits
Yes I completely agree… I love discovering new ways of doing things, easier ways! Thanks hun :) xxx
Jerri, Somerset UK, www.facebook.com/that.little.cake.boutique

Love your method! Those certainly are sharp edges! Thank you for sharing!!
Toni, Pennsylvania, https://www.facebook.com/WhiteCraftyCakes

I love this way. I have always thought about trying it as I hate covering cakes at all. But I am always scared to tip the cake upside down lol.
I have too many cake fears!
Naomi AKA Cairns Cake Lady, Australia www.cakedecorcairns.com or www.google.com/+CakeDecorCairns or www.facebook.com/cakedecorcairns
Thank you so much!
I think we all have, it was scary the first time, but as long as you have the boards to hold above and below and you do it quick, its fine!
Jerri, Somerset UK, www.facebook.com/that.little.cake.boutique

Thank you so, so much for this very helpful tutorial!!! I really appreciate it :)
Clara
No problem at all Clara!
Jerri, Somerset UK, www.facebook.com/that.little.cake.boutique