
Seated Dragon Tutorial (step by step photos)
IF YOU ARE GOING TO COPY MY PICTORIAL TO CREATE A SEATED DRAGON LIKE THIS, PLEASE GIVE CREDIT TO MY PAGE, BECAUSE I HAVE COME UP WITH THIS DESIGN AND THESE STEPS TO HELP OTHERS. EACH PHOTO IS COPYRIGHTED WITH MY NAME ON IT. THANK YOU.
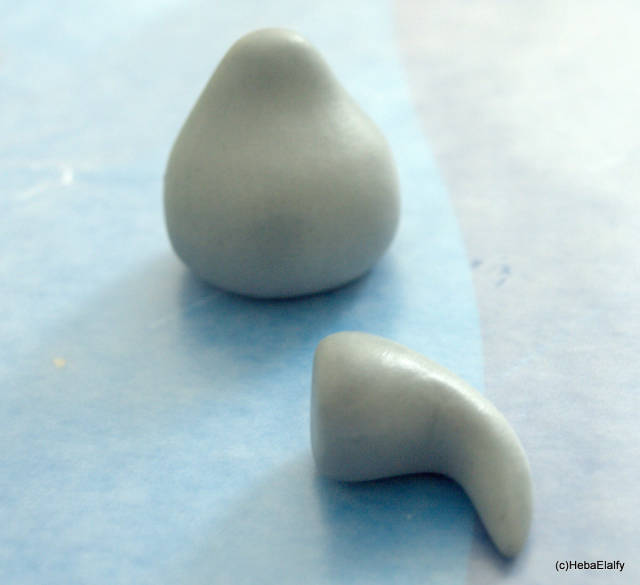
roll out a large ball and taper it at the top as shown for the body; roll out a medium sized ball and form it into a tail but remember to flatten one side as shown that’ll stick to the body at the back.
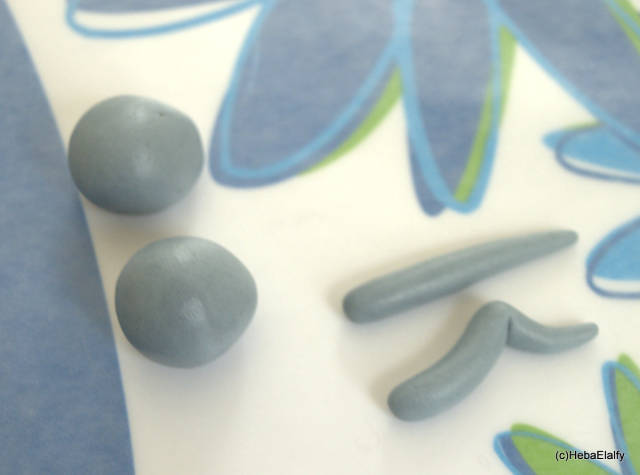
roll two medium sized balls for the thighs of the dragon and taper it slightly at the top as shown.

roll two small sized balls for the feet and taper them ever so slightly (shown in another photo) before cutting into the claws; for the wings, roll two noodles, taper one end of each and form them into the wing shape.
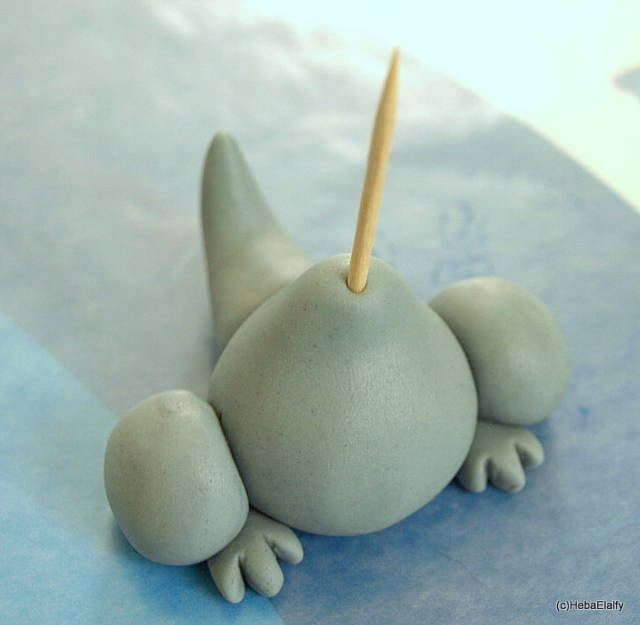
using water, stick all the pieces you made to the main body and gently insert a tooth pick (to support the head).
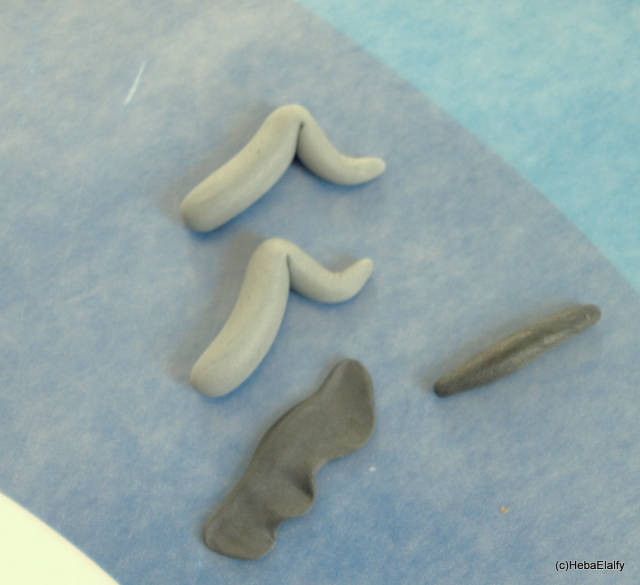
roll out two short noodles as shown and carefully push down to form the wings structure, as shown.
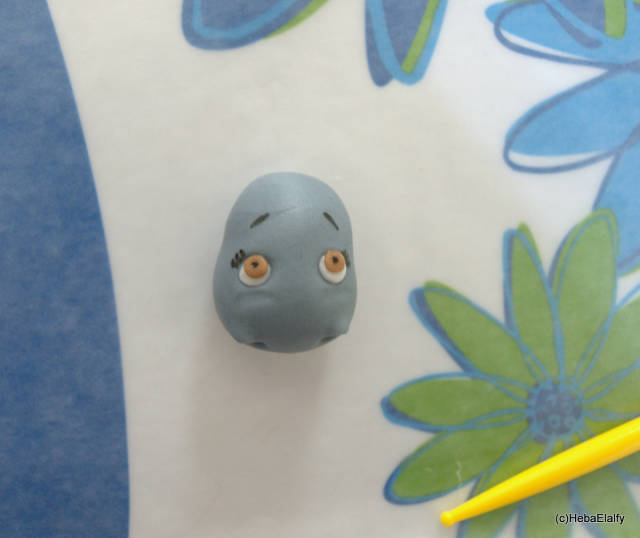
roll out two tiny balls for the ears, use the smallest ball tool you have to shape the inside of each ear then gently pinch one end to make the tip of the ears.

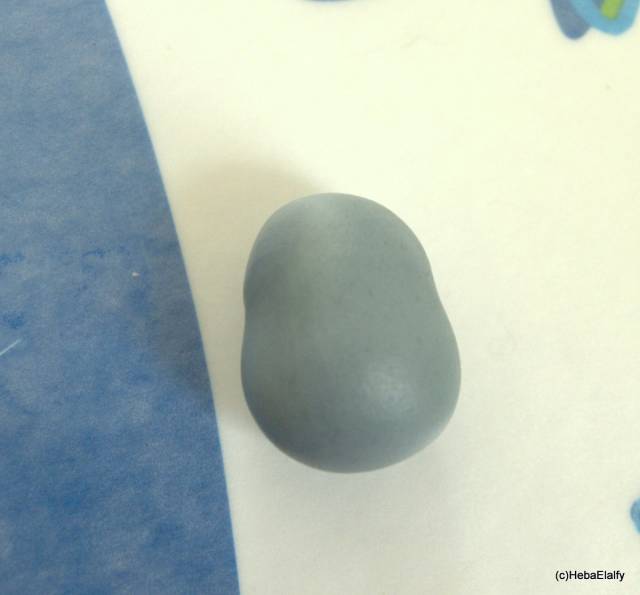
for the head, roll out a ball in your palm making one end slightly smaller and then run your pinky finger gently through the middle to shape the face.
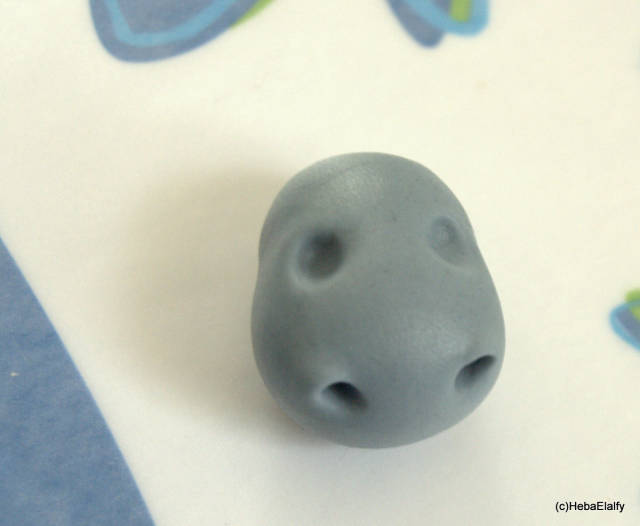
again, using your smallest ball tool, push into the fondant to form the eye sockets and the nose while gently pushing upwards to form the nostrils.
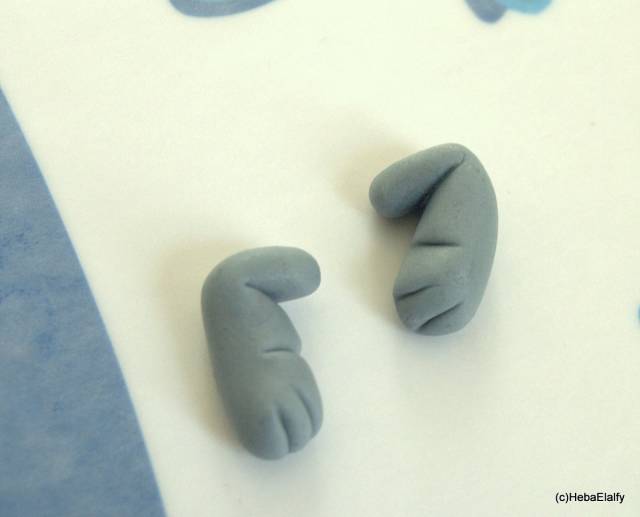
for the arms, roll out short noodles and gently form the elbow and paws.
roll out two tiny white fondant balls and flatten them gently, use a tiny drop of water and place these white balls into the eye sockets, after which you roll out two smaller fondant balls (brown in this case but can be blue or whatever color you want the dragon’s eyes) and stick those on top of the white balls; using a black edible marker, draw the eye brows, eye lashes and pupils of the eyes.
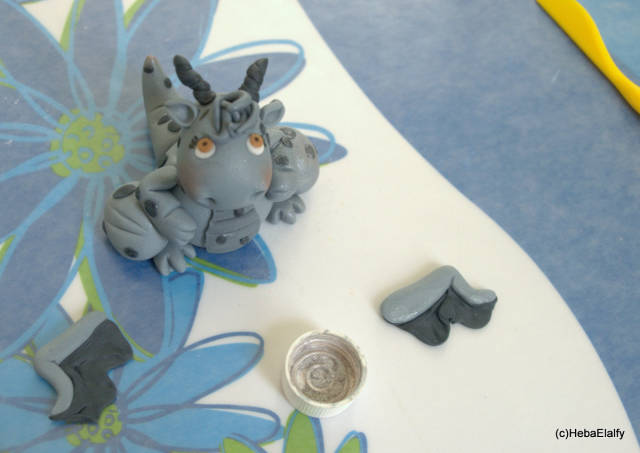
roll our different sized balls and gently press them onto the dragon’s body to add the spots.
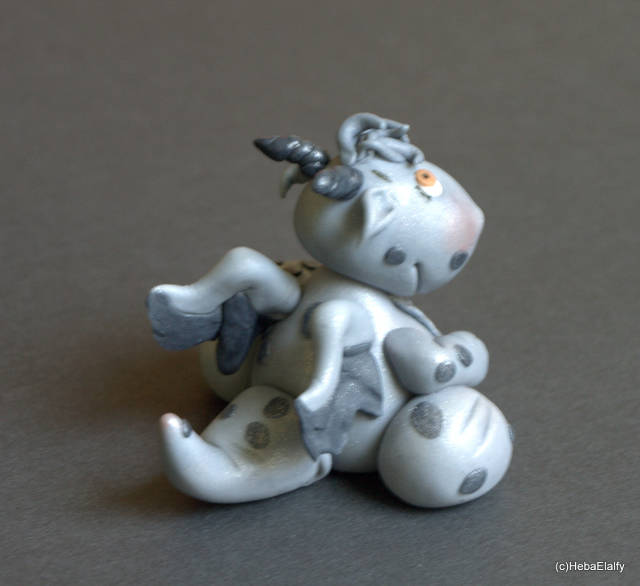
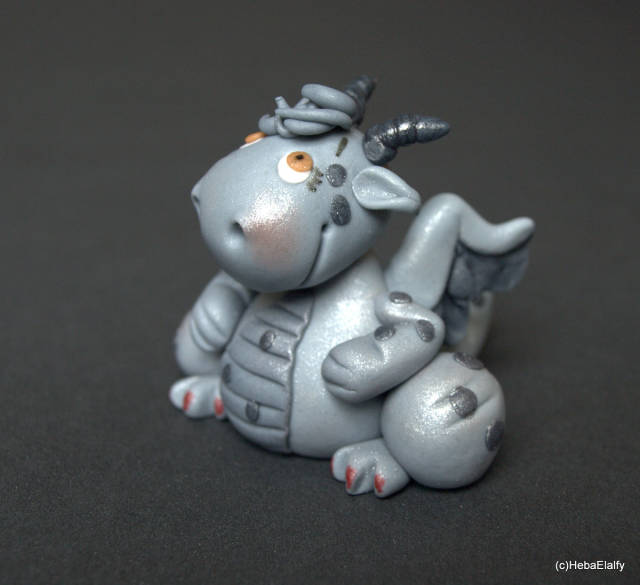
stick the wing flaps onto the main frame and let it set before using a drop of water to attach them to the back of the dragon; roll out two small noodles and gently twist them to form the horns and stick them on top of the head with a small drop of water and hold; if you want to you can add some strands of hair and a tummy; finally, I used some light red glitter to add blush on the face, and some light silver glitter to add shimmer to the entire body.
finally, I used a red edible marker to add the nail polish
Heba Elalfy ***more photos at https://www.facebook.com/sweetdreamstoyou
11 Comments

Fab and faved.
Thank you so much for this fabulous tutorial Heba.xxx

Very cute. Thank u Heba xx
Thanks so much ladies <3 kisses to you both xx
Heba Elalfy ***more photos at https://www.facebook.com/sweetdreamstoyou

Very cute! ☺
Floralilie Sugar Art

Adorable

Fantastic…..thanks for sharing xx
sugar and art - perfect combination! sugarmagic22@gmail.com
Thank you :)
Heba Elalfy ***more photos at https://www.facebook.com/sweetdreamstoyou

Thanks for sharing, he’s adorable and a fab tutorial :) x
Liz
Thanks Liz :D
Heba Elalfy ***more photos at https://www.facebook.com/sweetdreamstoyou

Fab, great tutorial x
Alana Lily Chocolates & Cakes