Magnolia Flower Tutorial
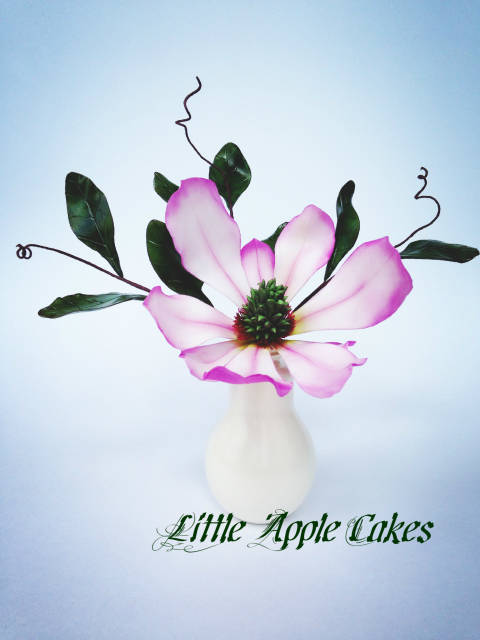
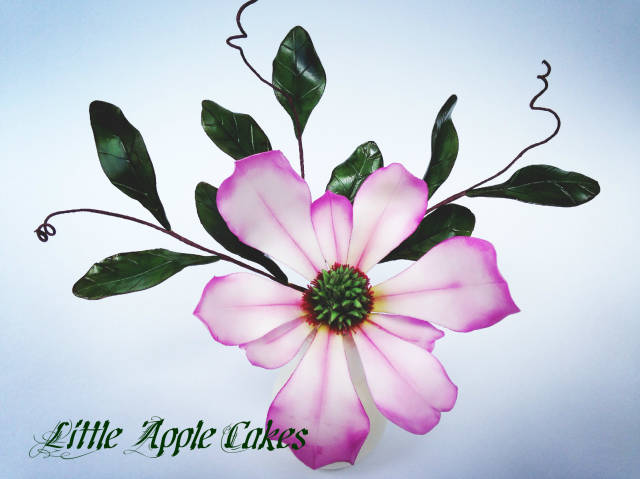
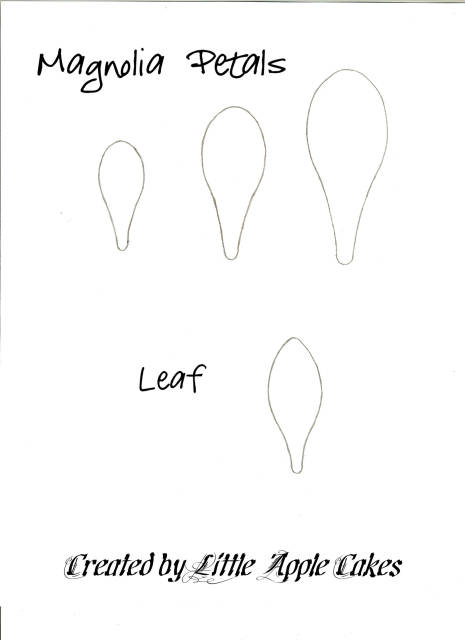
For this tutorial I used lily cutters in three different sizes. If you don’t have the cutters you can always print out the petal template. You can even find it in my Notes on my Facebook page https://www.facebook.com/LittleAppleCakes
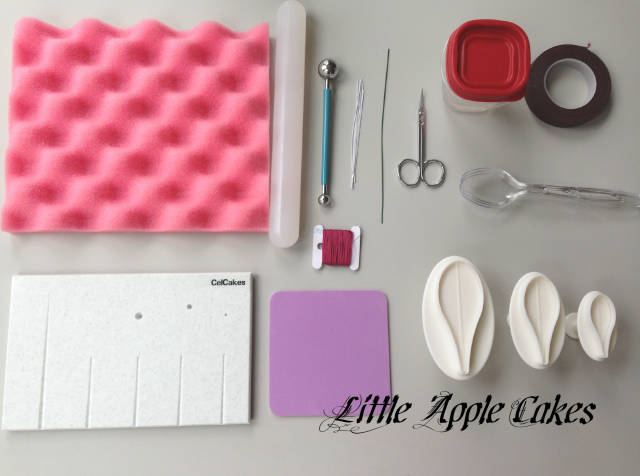
To make one Magnolia you will need:
Bumpy foam,
Groove board,
Rolling pin,
Large Ball tool
9 pieces of 26 gauge paper covered white wire (around 3,5 inches in length)
1 green 6 inch long wire (20 or 22 gauge)
Small pointy scissors
Soft pad
Burgundy cross stitch floss/thread
Three plastic spoons
Gumglue
Brown floral tape
Cutters or card stock cutouts
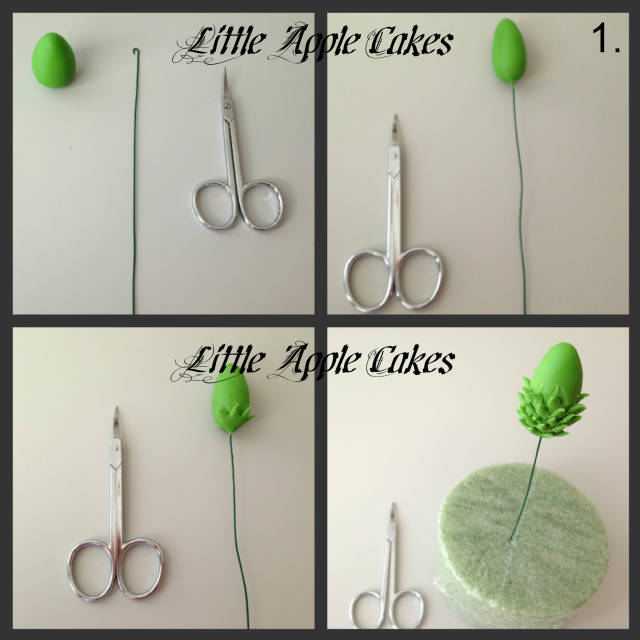
PICTURE 1.
Start by making a hook on the top of the green wire, I didn’t have any paper/cloth covered one so I just used the metal one. They are fine for centers but not for the petals. Shape a large grape size piece of green gumpaste to a cone, dip the wire into gumglue (wipe of the access). Pinch the bottom part of the gumpaste to the wire to secure it.
Using a pair of small sharp scissors, start cutting small snips in the gumpaste all the way around in a circle and pull them down just a little bit. In every new row you will cut in between the previous snips (to cover the gaps). Do so all the way to the top of the Magnolia and leave it to dry overnight.
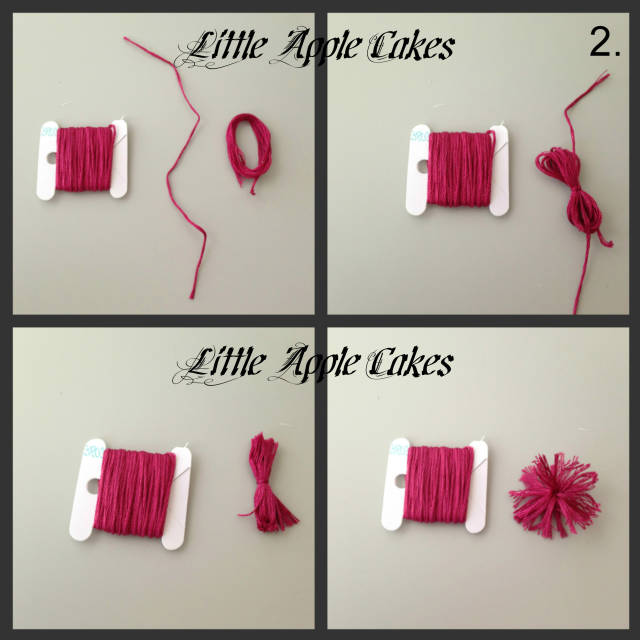
PICTURE 2.
Take a piece of cross stitch thread and wrap it around your pointer and middle finger 10 times. Take another piece of thread and tie it in the middle. Using a pair of scissors cut all the loops and cut the tread to the same length on each side (you can cut off more after you attach it to the center). Ruffle it up (the wire will go through the center of the thread).
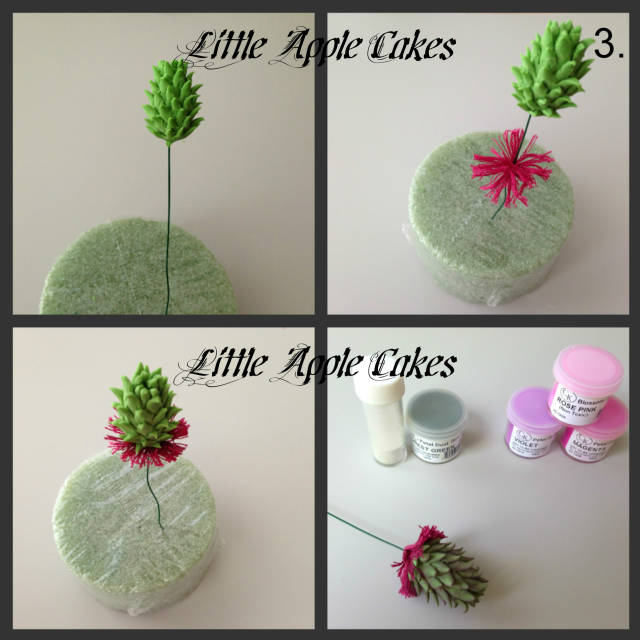
PICTURE 3.
Put some gumglue on the bottom of the center and glue the ruffled thread to the center.
You will have to put some extra gumglue between the thread ruffles (the place where you tied them together) and also on the bottom. This will make the thread stand up instead of falling down between the petals.
Finally use a combination of dark green dust and pearl dust (I used CK-Forrest Green and Wilton pearl dust) and dust the whole center with it. Use a little mix of the petal colors (I used CK-Magenta, Violet and Lilac) and dust the center from the top down, you want all the spikes to have pink/purple tops.
*NOTE: one of the petal dusts in the photo is wrong color, it says Rose Pink but I used Lilac.
PICTURE 4.
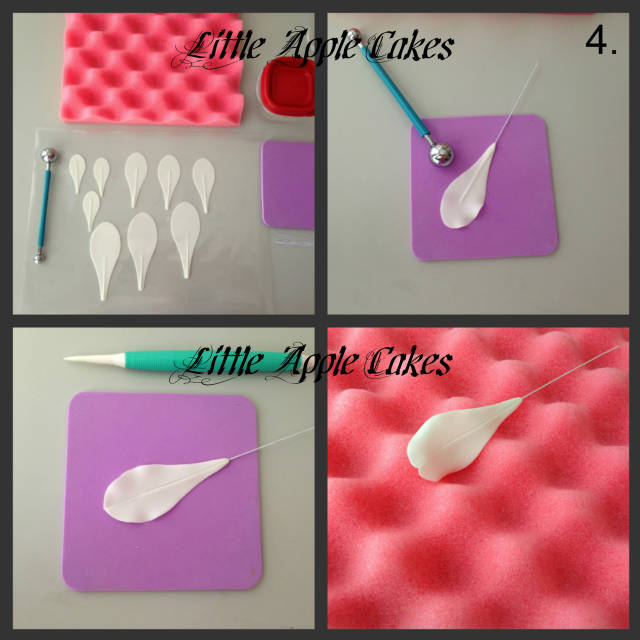
Using the cutters or card stock cutouts make three petals of each size and keep them in a plastic folder while working.
Dip the wire in the gumglue, wipe off the access and insert it in the petal groove (1/3 of the petal deep).
Start by thinning out the edges of the petal, working from the bottom to the top of the petal. Half of the ball should be on the petal and the other half on the mat. Thin out the rest of the groove where you inserted the wire and don’t forget to secure the wire by pinching the petal to the wire on the bottom of the petal.
Turn the petal around and with the veining tool make a line going from the bottom of the petal to the top.
Pinch the top of the petal to make it pointy. Use a toothpick to roll the petal back on both sides (just as you would do with a rose petal).
Put it on the side (to give it a bit of movement) on a piece of bumpy foam and leave to dry overnight. Do so with the small and medium size petals.
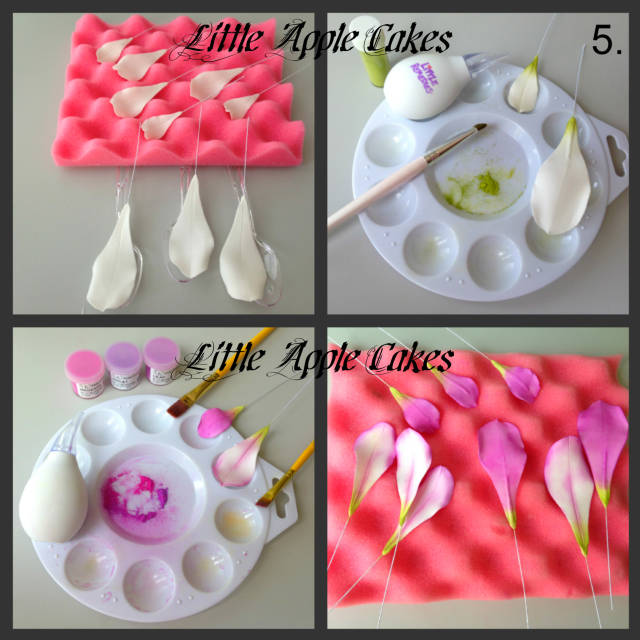
For the large petals you can use plastic spoons. After rolling back the petals you can dry those with one half on the spoon and the other half outside of the spoon (see photo nr. 5.).
PICTURE 5.
Using a soft brush dust the bottoms (both front and back) of all nine petals with green petal dust (I used Wilton’s – Lime Green).
NOTE: I usually use a baby aspirator bulb to take off the access dust from the petals. They can be purchase at the pharmacy. I got this tip from someone on Cakes Decor, I think it was Bobbie Bakes).
With a soft brush and a combination of petal dusts (CK- Violet, Magenta and Lilac), dust the whole back of the petal. Switch to a harder brush and start by shading the center vein on the front side of the petal first. Then dust the top of each petal working from the edge to the center.
PICTURE 6.
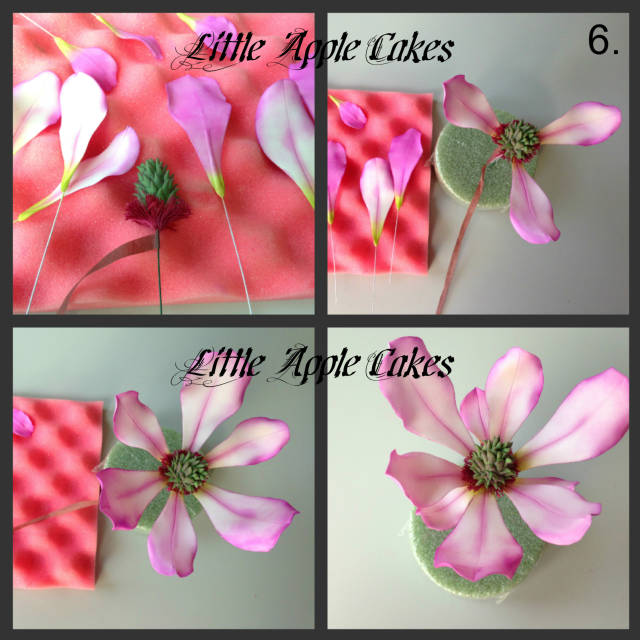
Cut the tape half wide and start by attaching it to the center wire.
Start adding the medium petals first leaving an even space between the petals. Then add the large ones.
The smallest petals will be attached last and just a little bit lower than all the other ones. Space them out evenly and finish wrapping the whole center wire in brown tape.
You can finish decorating your flower three different ways:
~ brush some pearl dust to give them a natural shine,
~steam the whole flower,
~or use both, brush petal dust and steam afterwards to seal in the color.
Hope you enjoyed the tutorial and found it useful. If you recreate any of my tutorials I would love to see them. Thank you so much for all your support and watching.
Hugs, Selma ~ Little Apple Cakes
Selma S. ~ Little Apple Cakes
51 Comments
Lovely magnolia!!! Thank you for this amazing tutorial!!!
beautiful! thank you so much for the tutorial xxx
This is fabulous Selma! Thanks so much for sharing! xx
Mira http://www.facebook.com/mirabelladesserts www.instagram.com/mirabelladesserts
Lovely tutorial Selma.
Thank you so much for sharing it with us all.
Noreen.xx.
That is great. I have been wanting to try flowers. This seems doable. Thank you.
So beautiful magnolia!! Thanks for great tutorial :) xoxo
Thanks everyone, Wicked Cake Girls, if you need help with the tutorial or find yourself not understanding something just send me a pm :
Selma S. ~ Little Apple Cakes
beautiful—thanks for sharing
Thank you Selma <3
Dina @ miettes, http://www.facebook.com/pages/miettes/257790597632317
fantastic Selma, thanks:)))
https://www.facebook.com/pages/Handmade-with-Love-by-Aga/306351252851898


